Installation – Skyjacker 9254 User Manual
Page 2
I-7254
Pg 2
installation:
1. Park the vehicle on a level concrete or asphalt surface with the front
tires / wheels pointing straight forward.
2. Set the emergency brake & block the rear tires / wheels.
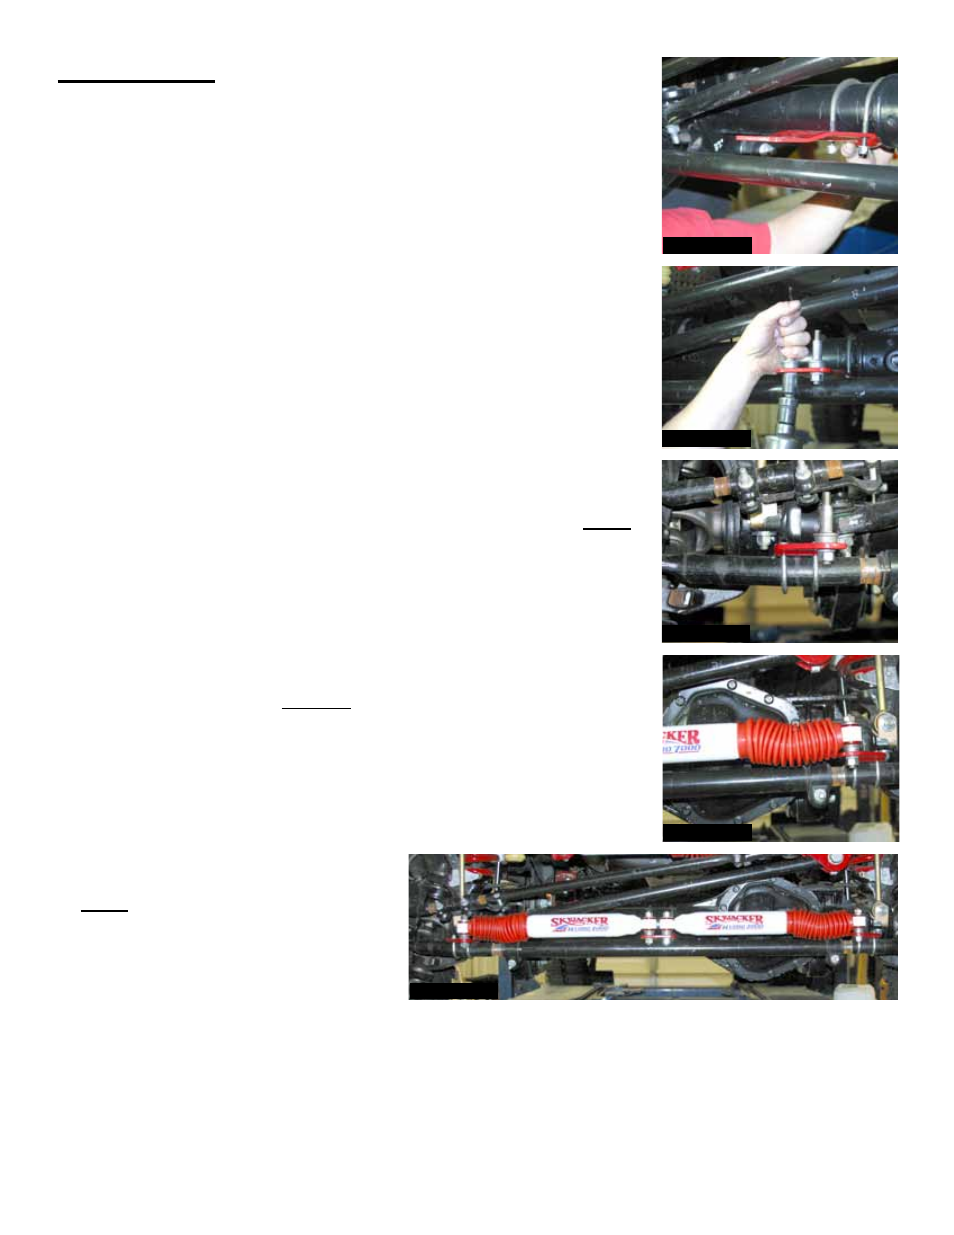
3. Place the new Skyjacker main bracket under the front axle against
the differential. Attach the new main bracket to the differential at this
point using the supplied 3/8” u-bolts, washers, & nuts. (See Photo
# 1) With the new main bracket tightened, be sure to leave 1/8" to
3/16” of clearance between the new bracket & OEM tie rod assembly.
Any more clearance will cause stress to the polyurethane bushings
of the new Skyjacker steering stabilizers once installed. Any less
may cause the OEM tie rod to rub the new main bracket.
4. Attach two of the new Skyjacker studs (Part #140629) on top of the
new main bracket. (See Photo #2)
5. Install the new Skyjacker passenger side bracket to the OEM tie rod
assembly using the supplied 5/16” u-bolts, washers, & nuts.
Note:
Do not tighten at this time. Attach one of the supplied studs (Part
# 140629) to the top of the new passenger side bracket. (See Photo
# 3) Repeat this process on the driver side using the new driver side
bracket.
6. Assemble the new Skyjacker steering stabilizer cylinders by installing
the new Skyjacker shock boots then the hourglass bushings. Pull the
shaft of the cylinder out half way & install onto the new studs of each
new bracket. It will be necessary to adjust the new tie rod brackets to
line up with the new steering stabilizer cylinders. Once lined up,
tighten the new tie rod brackets. (See Photo # 4)
7. With both new steering stabilizer cylinders installed, cycle the
steering left to right & check for clearance between all parts. (See
Photo # 5)
Note: Part # 7254 / 9254 Steering
Stabilizer is designed to work on
vehicles with a minimum 4” lift.
Photo # 1
Photo # 2
Photo # 3
Photo # 4
Photo # 5