Installation – Skyjacker 7299 User Manual
Page 2
I-7299
Pg 2
installation:
1. Park the vehicle on a level concrete or asphalt surface with the
front tires / wheels pointing straight forward.
2. Set the emergency brake & block the rear tires / wheels.
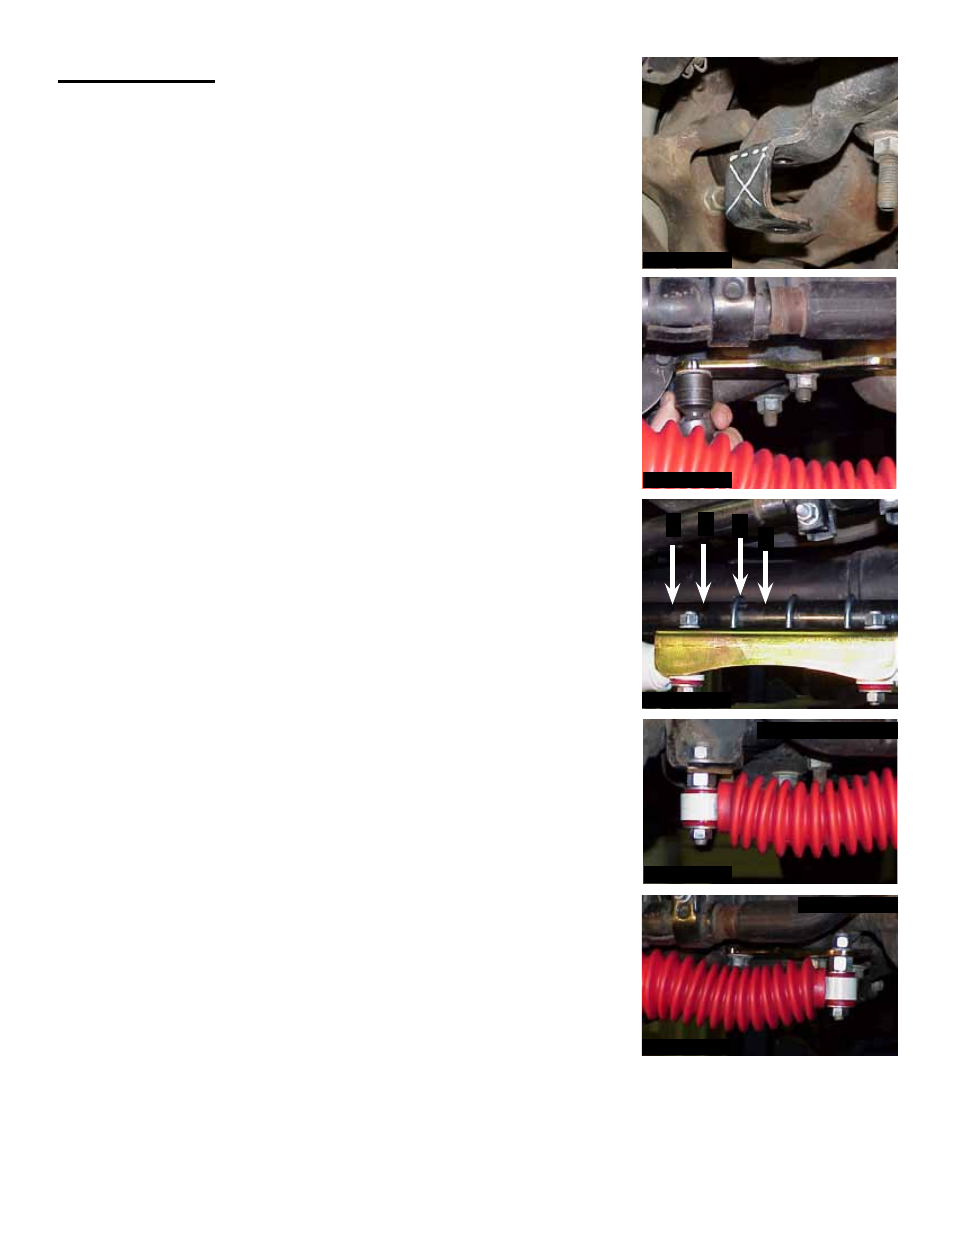
3. Remove OEM steering stabilizer & stabilizer mounting bracket.
4. Cut the OEM passenger side stabilizer bracket at the dotted line
with a hacksaw or grinder & discard. (See Photo # 1)
5. On the driver’s side, remove the nuts from the front u-bolt & install
the new Skyjacker bracket onto the u-bolt using the OEM
hardware. (Photo # 2)
6. Place the new Skyjacker main bracket under the OEM tie rod.
Notice the four indentions on top of the OEM tie rod (See arrows
in Photo # 3). For the correct alignment of the new main bracket,
you must count over to the third indention & place the first u-bolt
onto the third indention. Mount the other two u-bolts through the
bracket.
7. Place the new Skyjacker shock boots onto the new steering
stabilizers & secure the boots in place with the supplied plastic
ties. Insert the 5/8” ID polyurethane bushings & P-932 studs into
each steering stabilizer eye. Pull the steering stabilizers out &
fasten the other end of the studs to the brackets. (See Photos # 4
& # 5)
8. Cycle steering left to right & check all components for adequate
clearance.
1 2 3
4
Photo # 1
Photo # 2
Photo # 3
Photo # 4
Photo # 5
Passenger side
Driver side