Installation – Skyjacker 7011 User Manual
Page 2
Installation:
1. Park the vehicle on a level concrete or asphalt surface with
the tires / wheels pointing straight forward.
2. Set the emergency brake & block the rear tires / wheels.
3. If equipped, remove the OEM steering stabilizer from the
frame & from the center steering link.
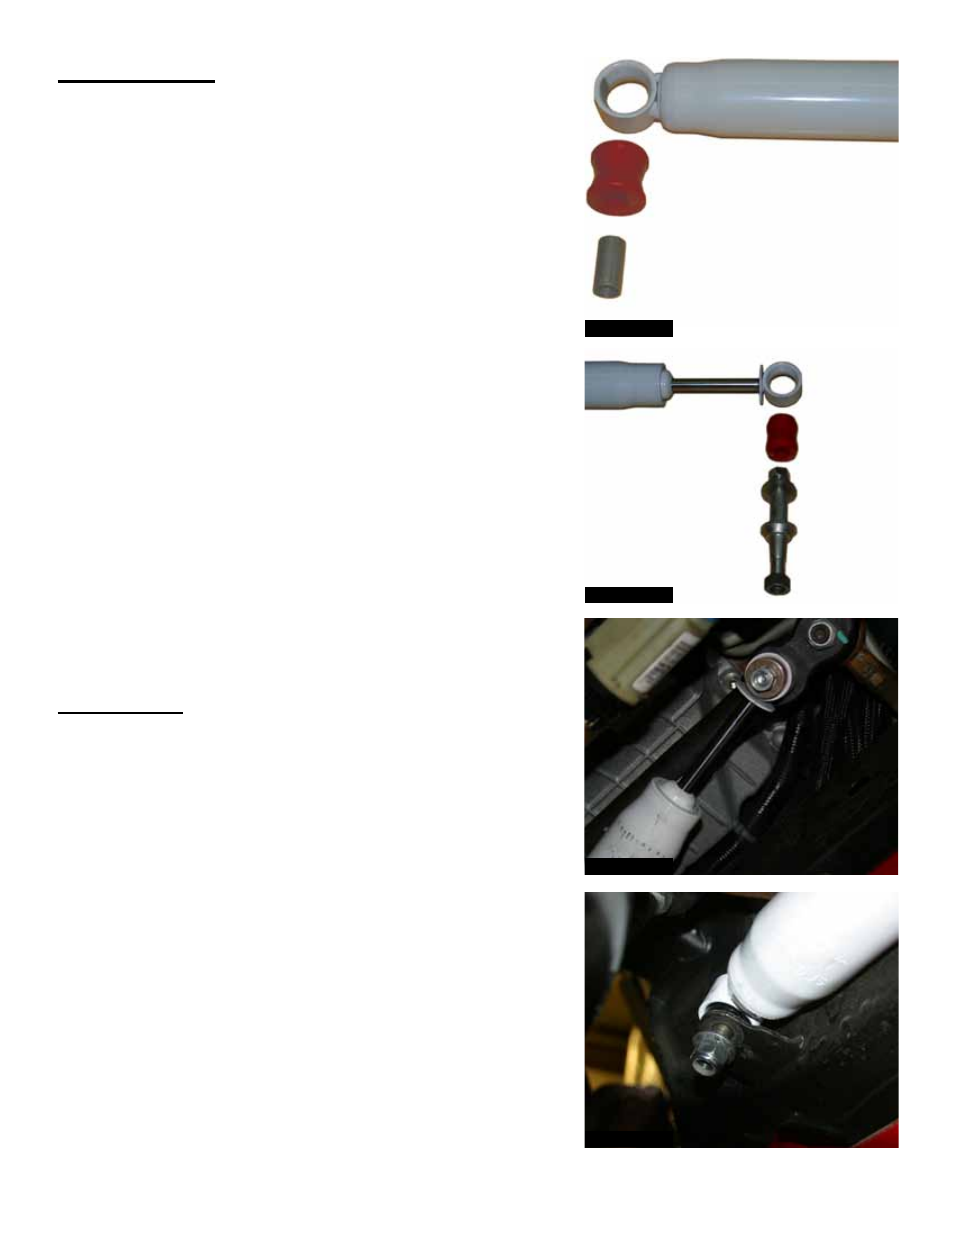
4. Install the supplied 1 1/4” long bushing into the “body” end
of the new Skyjacker steering stabilizer & install the
supplied 1 1/4” long sleeve into the new bushing. (See
Photo # 1)
5. Install the supplied 1 1/2" long bushing into the "shaft" end
of the new Skyjacker steering stabilizer. (See Photo # 2)
6. Install the supplied tapered stud into the OEM center
steering link & tighten using the supplied washer & nut.
Slide the shaft end of the new Skyjacker steering stabilizer
over the new stud & tighten using the supplied washer &
nut. (See Photo # 3)
7. Attach the "body" end of the new Skyjacker steering
stabilizer to the OEM mount on the frame using the
supplied 1/2" x 2 1/2" bolt, washers, & nut. (See Photo # 4)
Final Notes:
• After the installation is complete, double check that all nuts
& bolts are tight. Refer to the following chart for the proper
torque specifications. (Do not retighten the nuts & bolts
where thread lock compound was used.)
• Cycle the steering of the vehicle left to right & check all parts
for adequate clearance.
• After the first 100 miles, check all of the hardware for the
proper torque & periodically thereafter.
I-7011
Pg 2
Photo # 1
Photo # 2
Photo # 4
Photo # 3