Installation – Skyjacker 9122 User Manual
Page 2
Installation:
1. Park the vehicle on a level concrete or asphalt surface with the
front tires / wheels pointing straight forward.
2. Set the emergency brake & block the rear tires / wheels.
3.
Models With oeM Lower Skid Plate: Remove the OEM lower
skid plate mounted between the OEM cross member & front
differential.
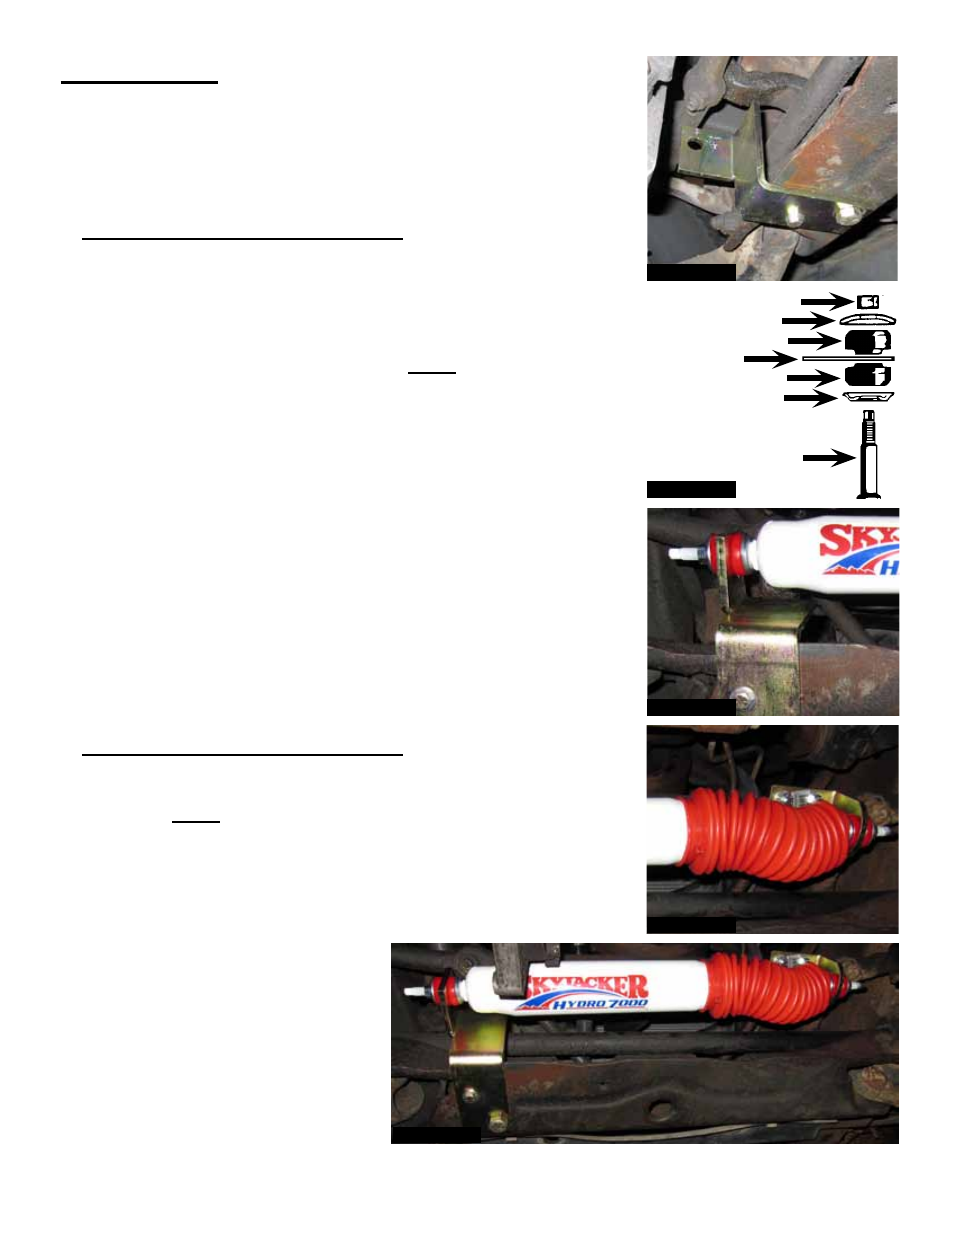
4. Install the new Skyjacker driver side stabilizer bracket to the OEM
cross member using the supplied 5/16" x 1 1/4" bolt, 9/16” x 1 1/2"
bolt, washers, & nuts. (See Photo # 1)
Note: On some models, it
will be necessary to mark, center punch, & drill the larger mounting
location using a 9/16" drill bit.
5. Install the new Skyjacker steering stabilizer to the new driver side
stabilizer bracket using the supplied bushings, retaining washers,
& nut. (See Photo # 2 & # 3)
6. Install the new steering stabilizer to the new Skyjacker passenger
side stabilizer bracket using the supplied bushings, retaining
washers, & nut. (See Photo # 2 & # 4)
7. Extend the new steering stabilizer shaft exactly half way toward the
passenger side of the vehicle & install the new passenger side
stabilizer bracket to the OEM center link using the supplied 5/16" x
1 1/4" x 1 3/4" u-bolts, washers, & nuts. (See Photo # 4)
8.
Models With oeM Lower Skid Plate: Remove the previously
installed 5/16" x 1 1/4" bolt from the new driver side stabilizer
bracket & reinstall the OEM lower skid plate using the OEM
hardware.
Note: Flat washers may be used to shim the opposite
side of the OEM lower skid plate.
9. Check all components & hardware for proper torque & adequate
clearance. (See Photo # 5)
Photo # 1
Stabilizer Stud
Stem Bushing
Retaining Washer
New Bracket
Retaining Nut
Photo # 2
Retaining Washer
Stem Bushing
Photo # 3
I-7122
Pg 2
Photo # 4
Photo # 5