Installation – Skyjacker 9140 User Manual
Page 2
Installation:
1. Park the vehicle on a level concrete or asphalt surface with the front tires / wheels pointing
straight forward.
2. Set the emergency brake & block the rear tires / wheels.
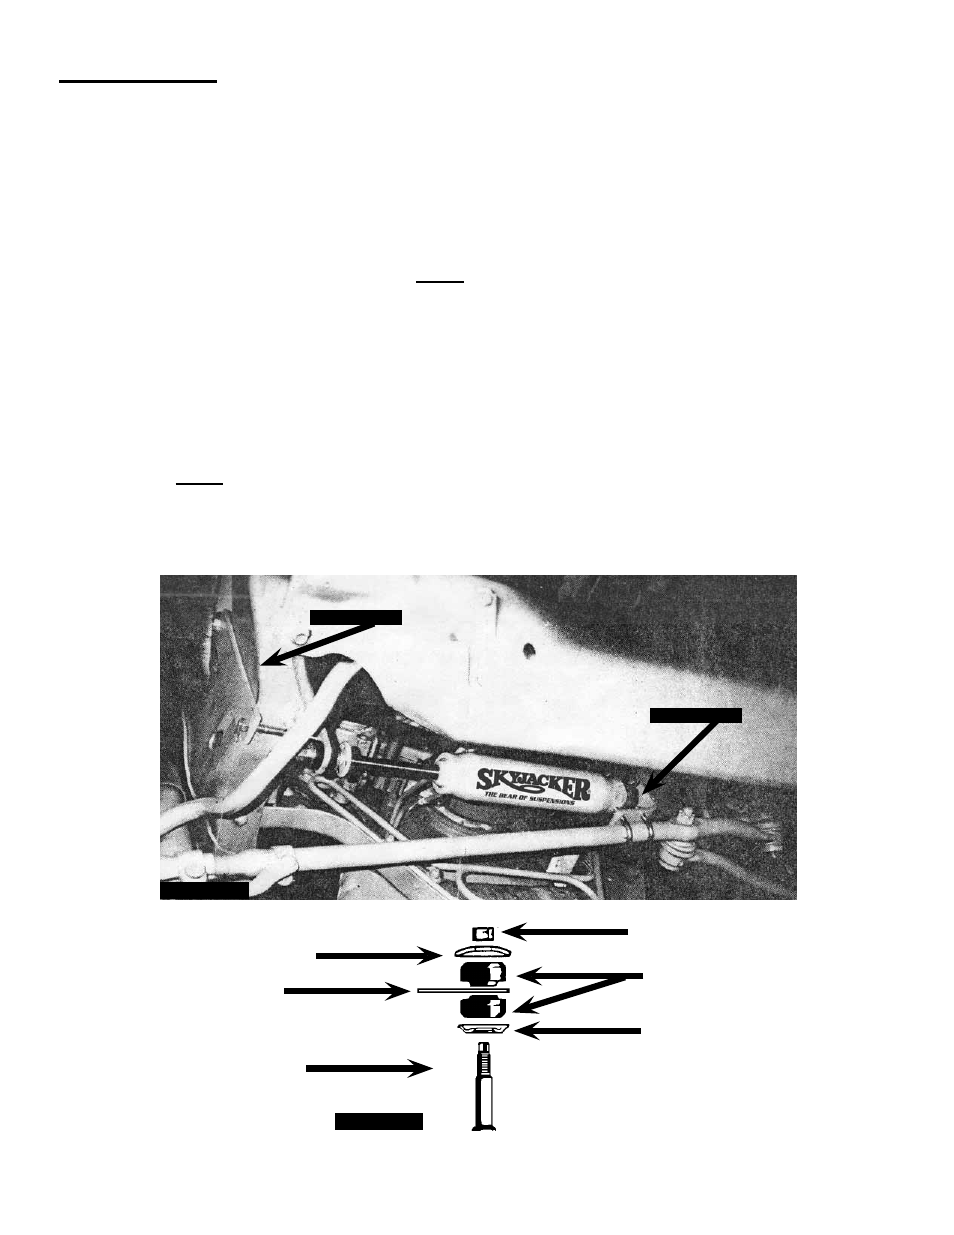
3. Install the new Skyjacker bracket “A” (long bracket) against the inside of the frame & install the
new Skyjacker backing plate bracket on the outside of the frame using the supplied 3/8" x 4 1/2"
bolts, washers, & nuts. (See Photo # 1)
Note: Do not tighten at this time.
4. Attach the shaft end of the new Skyjacker steering stabilizer to the new bracket “A” using the
supplied bushings & washers. (See Photos # 1 & # 2)
5. Attach the body end of the new Skyjacker steering stabilizer to the new bracket “B” using the
supplied bushings & washers. (See Photos # 1 & # 2)
6. Attach the new bracket “B” to the OEM tie rod using the supplied u-bolts, washers, & nuts. (See
Photo # 1)
Note: Do not tighten at this time.
7. Extend the new Skyjacker steering stabilizer piston rod 4.44” (exactly half-way out). Rotate the
new brackets “A” & “B” as needed to obtain the best position & tighten all hardware.
Shock Stud
Stem Bushings
Retaining Washer
Retaining Washer
Bracket
Retaining Nut
Bracket “A”
Bracket “B”
I-7140
Pg 2
Photo # 1
Photo # 2