Installation – Skyjacker 9196 User Manual
Page 2
I-7196
Pg 2
installation:
1. Park the vehicle on a level concrete or asphalt surface with the front
tires / wheels pointing straight forward.
2. Set the emergency brake & block the rear tires / wheels.
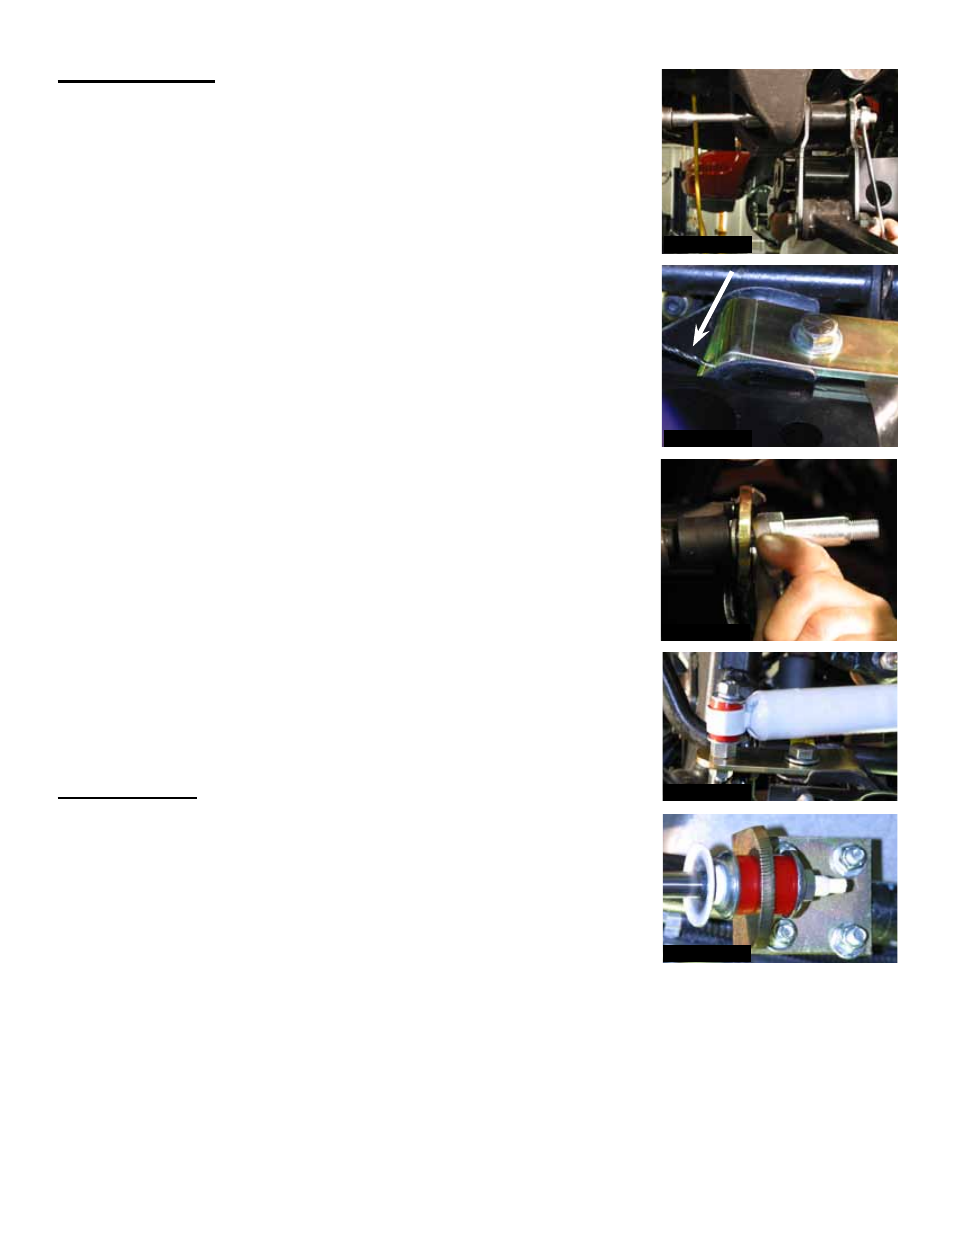
3. While supporting the front cross member with a floor jack, remove the
front lower A-arm bolt at the frame. (If installing on a vehicle with 4”
or more lift, it will be the upper front bolt on the after market cross
member. Remove the bolt using a 15/16" socket. (See Photo # 1)
4. Once the bolt is removed, reinstall with the new Skyjacker outer
stabilizer bracket. Be sure to install the bolt pointing toward the front.
Drill inside the mounting hole using 5/16" drill bit. Then install the
supplied 3/8" thread cutter bolt. (See Photo # 2) The arrow shows the
drill bit.
5. Attach the supplied shock stud to the new bracket being sure to use
washers. (See Photo # 3)
6. Install the new Skyjacker main bracket to the OEM center link using
the supplied u-bolts, washers & nuts. Measure from the center of the
OEM pitman arm 9” & mount the drivers side edge of the new center
link bracket at this point. Slightly adjust the new main bracket, so the
new Skyjacker steering stabilizer is pulled out half way. (See Photo
# 5)
7. Attach the new steering stabilizer to the new outer bracket & new
center link bracket using the supplied steering stabilizer hardware.
(See Photo # 4 & # 5)
important Note:
• This steering stabilizer kit is designed for the 99-06 GM 1/2 ton 4WD.
It will fit lift heights 4"-6” on kits with a lowered front cross member.
This kit will
NoT work on vehicles with a lift kit that relocates the upper
A-Arms.
Photo # 1
Photo # 2
Photo # 3
Photo # 4
Photo # 5