Installation – Skyjacker 9200 User Manual
Page 2
I-7200
Pg 2
installation:
1. Park the vehicle on a level concrete or asphalt surface with the front tires / wheels pointing
straight forward.
2. Set the emergency brake & block the rear tires / wheels.
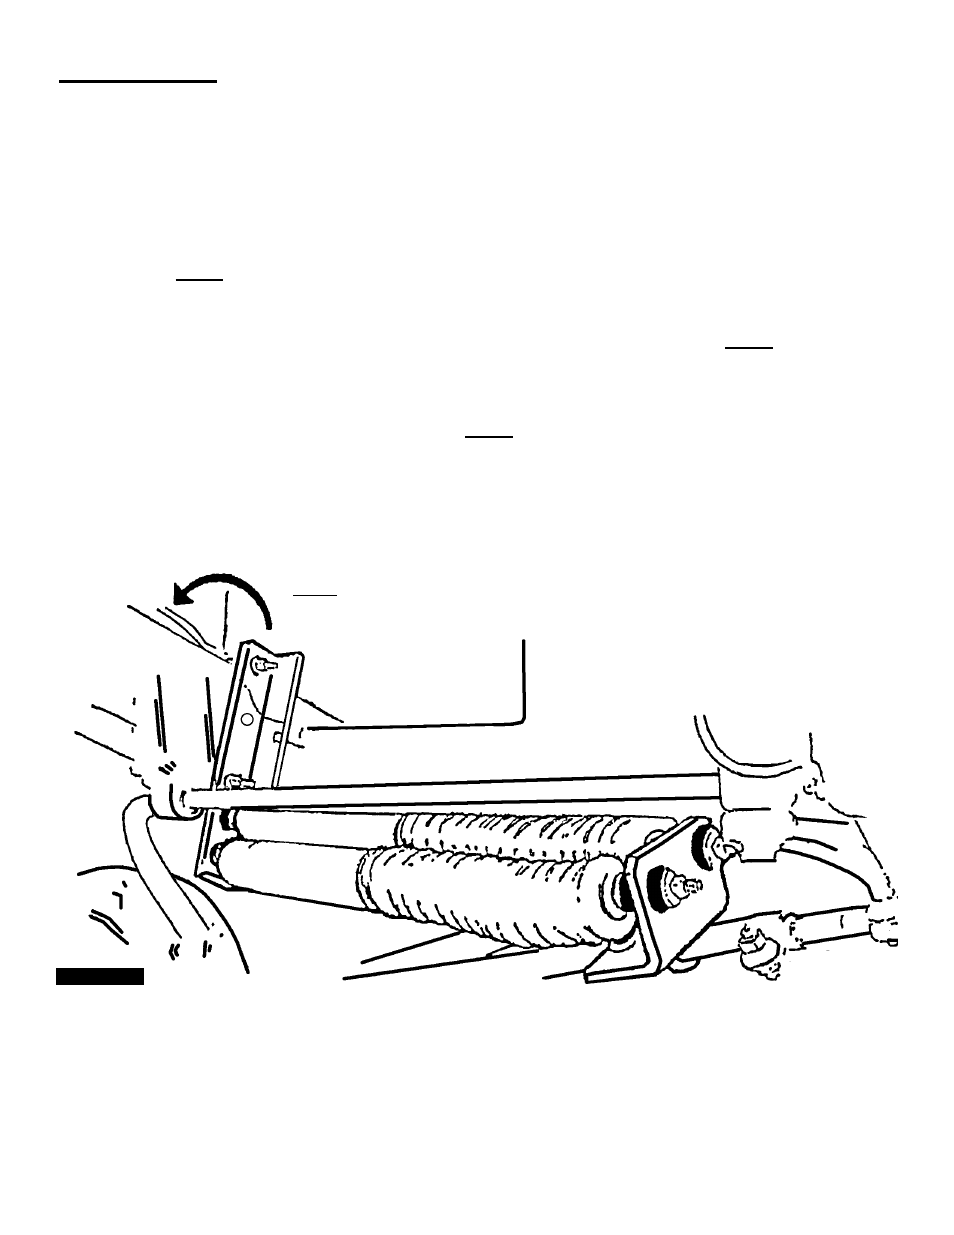
3. Install the new Skyjacker main bracket on the outside of the passenger frame rail on CJ models
or on the inside of the frame rail on YJ models using the supplied u-bolt, washers, & nuts. (See
Photo # 1)
Note: Do not tighten at this time.
4. Install the new Skyjacker tie rod bracket on the OEM drag link using the supplied u-bolts,
washers, & nuts & slide it up towards the turn buckle next to the pitman arm.
Note: Do not tighten
at this time.
5. Install the new Skyjacker steering stabilizers onto the new brackets using the supplied boots,
bushings, & washers. (See Photos # 1 & # 2)
Note: Be sure the new main bracket is slightly for-
ward of the OEM drag link assembly & loosely tightened.
6. Roll the new tie rod bracket toward the front bumper & align with the new main bracket. Extend
both new steering stabilizer shafts out 4” (exactly half way) & loosely mount the new tie rod
bracket at that point. On CJ models the new tie rod bracket will mount on the turn buckle.
NoTe: The main bracket goes on the outside of the frame for CJ
models. For 1987 & up YJ models, the bracket will mount on the
inside as shown.
Photo # 1