Skyjacker MS966 User Manual
Page 2
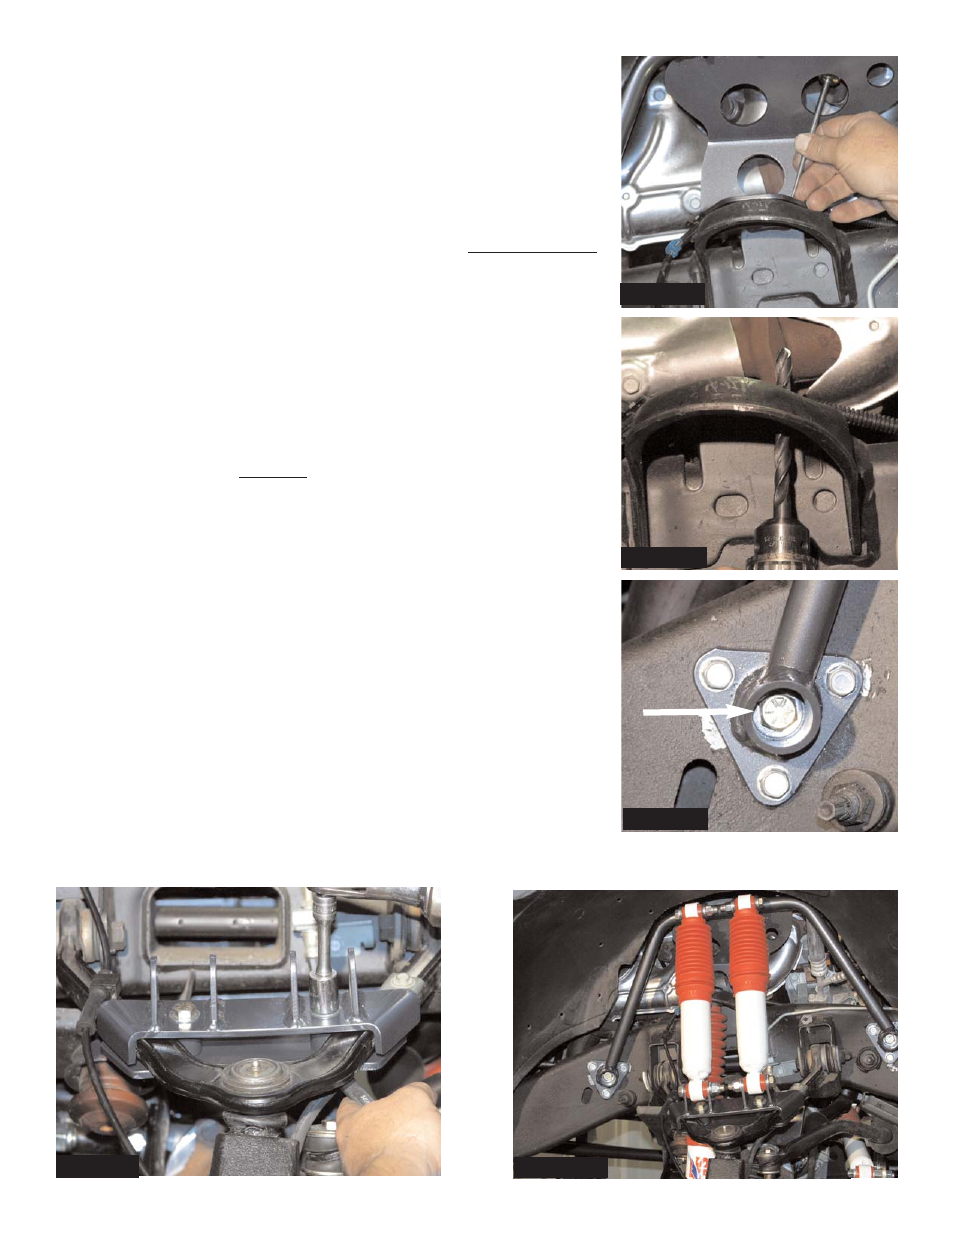
Photo #6
6. With the six outer bottom bolts installed, mark and drill the
upper outside hole to 13/32. It may be easier to drill first with a
1/8 drill bit, then drill with 13/32 from the bottom. (See Photo
#6 and #7).
7. Reinstall the bracket. Install the 3/8 x 1 fine thread bolt in the
upper hole that was just drilled.
8. At this time install the 1/2” bolts into the center of the frame
brackets. Drill the frame hole to accept the 1/2” bolts. Driver
Side: Install the 1/2 x 3” bolts in the front with NO WASHERS,
“due to clearance”. Install the 1/2 x 3 1/2” bolts into the rear
with a washer behind the bolts and one behind the nut. (See
Photo #8). Passenger Side: Install 1/2 x 3 1/2” bolts into both
front and back mounts using washers on both sides.
9. Install the lower bracket onto the upper a-arm. Slide the brack-
et up as far as possible. Secure the bottom backing plate to
the bracket using the 7/16 x 2 1/2 fine thread bolts, washers
and self locking nuts. (See Photo #9).
10. If running a triple shock set up, install the factory position
shock at this time, be sure to install shock using the new
polyurethane stem bushings in the upper mount.
11. Install the new Skyjacker shocks, part # H7080 onto the new
brackets. Attach the shocks to the new brackets using the 1/2
x 3 fine thread bolts, washers, and nuts. (See Photo #10).
• After installation is complete, double check that all nuts
and bolts are tight.
• Check all wiring and hoses for proper clearance.
• Retorque all bolts after the first 100 miles.
Seat Belts Save Lives, Please Wear Your Seat Belt.
Photo #7
Photo #8
Photo #9
Photo #10
Pg 2