Skyjacker DS393 User Manual
Page 2
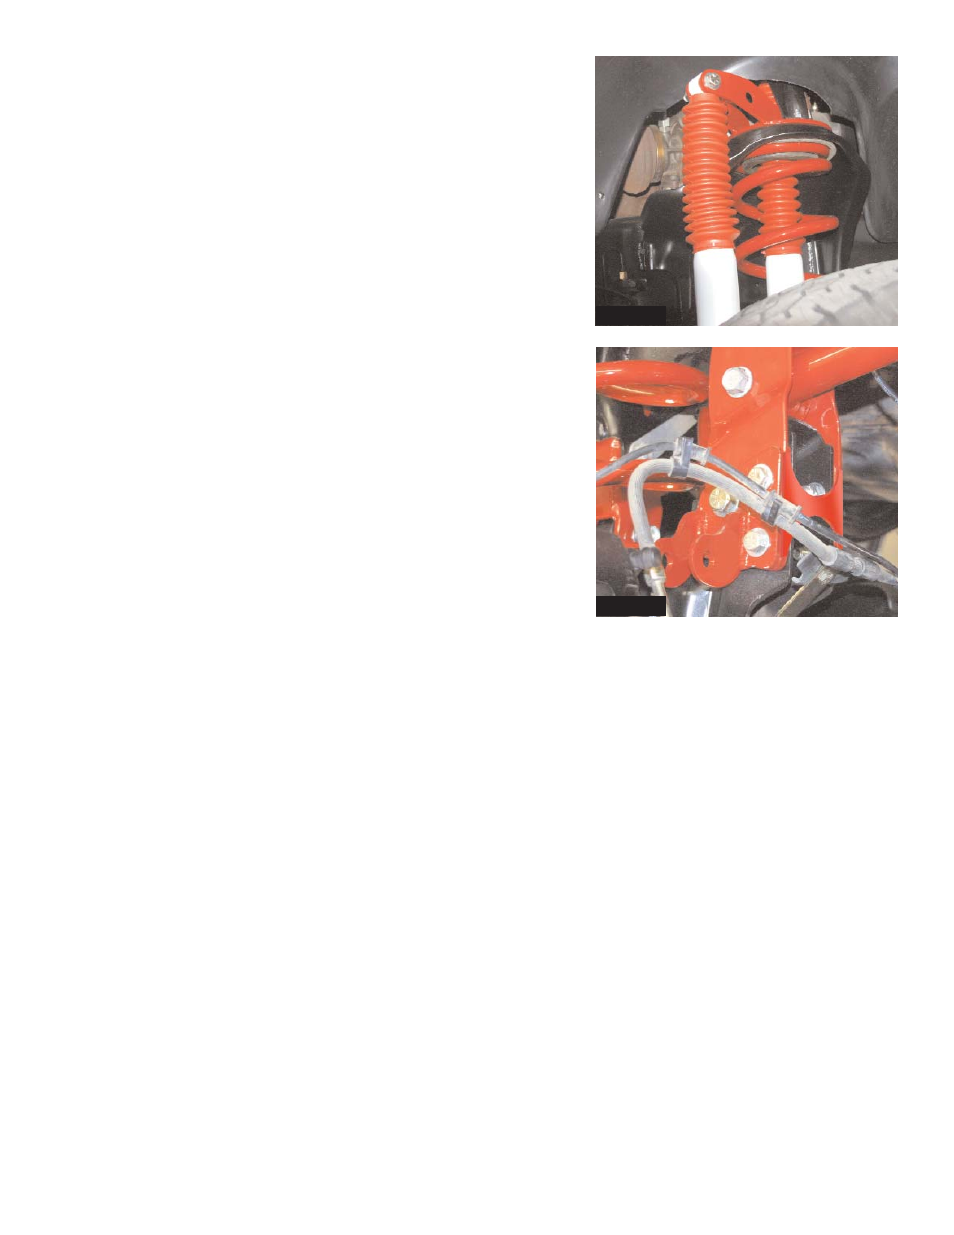
6. Attach new add on shock to upper bracket using 1/2 x 2 1/2”
coarse thread bolts, washers, and nut. (See Photo #3)
Vehicles with Skyjacker 5” Suspension lift continue onto step #7.
All others Skip to step #8.
7. If installing a Skyjacker 5” suspension lift, lower bracket will attach
to original upper control arm position, and the two 7/16 x 1 1/2”
mounting bolts that were installed when installing the lift kit. (See
Photo #4). Be sure to use the anti-crush sleeve with the bolt at the
OEM control arm position. The anti-crush sleeve mounts inside the
factory bracket. (Skip to Step #10)
8. If installing the dual shock kit on a vehicle with less than 5” lift,
remove the upper control arm bolt from the factory mount on the
axle. Only do one side at a time so that the axle does not move.
Attach the new lower bracket to that position using the 9/16 x 5”
fine thread bolts washers and nuts. Once bracket is installed, now
attach shock using the 1/2 x 2 1/2” coarse thread bolts, washers,
and nut. With shock attached, now mark the two rearward holes
that are to be drilled. Once marked, remove the bracket and shock.
Drill the new mounting locations using a 15/32” drill bit. Note:
Bracket will mount as shown in Photo #4 with the exception of the
upper arm relocation bracket.
9. Once drilled, reinstall bracket. Mount the bracket through the upper
control arm mount and through upper control arm using the 9/16 x
5” fine thread bolts washers and nuts. At the two rearward holes
install the 7/16 x 1 1/2” fine thread bolts washers and nuts.
Important Note: On Vehicles without a Skyjacker 5” Suspension Lift, the 7/16” bolts will have to
be installed so that they point toward the outside of the vehicle to allow for clearance of the facto-
ry control arm.
10. Once bracket has been mounted and securely tightened, attach the bottom of the add on shock to the
new lower bracket using 1/2 x 2 1/2” coarse thread bolts, washers, and nut.
FINAL NOTES:
• After installation is complete, double check that all nuts and bolts are tight.
• With the vehicle on the floor, cycle steering lock to lock and inspect suspension, tires and brakeline systems
for proper operation, tightness and adequate clearance.
• Retighten all bolts after the first 100 miles.
Pg 2
Photo #3
Photo #4