Picture #3 picture #4 picture #5 picture #6 – Skyjacker DS390 User Manual
Page 2
NOTE: The bottom bracket must sit flush against the upper
control arm mount. If you are not installing this dual shock kit on a
4-5" Skyjacker lift. You must place “2” 1/2" washers (provided)
under each bolt between lower bracket and control arm mount.
4. Now install the new lower bolts with the bolt heads facing outward
(nuts to the inside) with a small 1/2" washer under each bolt head.
Now tighten all bolts. NOTE: If installing this dual shock kit in con-
junction with a Skyjacker
®
lift kit, return to lift kit instructions at this
time and when referred back to dual shock kit instructions, continue
with step below.
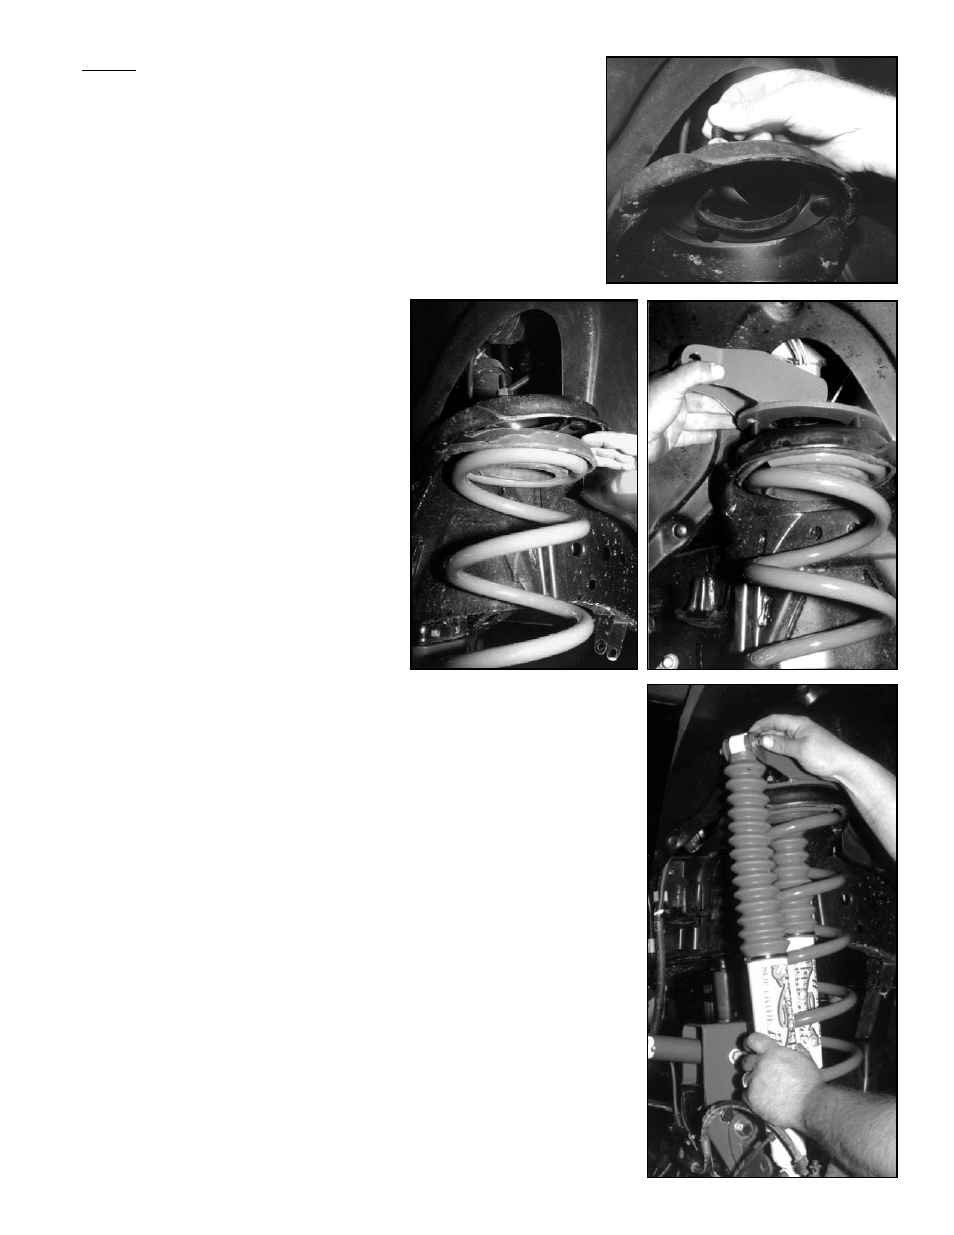
5. Start new 3-bolt tower ring (with square
holes using 7/16" carriage head bolts
supplied) up into position. Start bolts one
at a time (you must be sure the bolt
heads are aligned in the square holes)
using 7/16 "standard" nuts to hold in
place (do not use self locking nuts, they
will be used later). Tighten nuts and
repeat step on other side. (See picture
#3).
6. Start coil springs at bottom first, place
rubber isolator on top of coil and then
start coil into position in the upper tower,
on both sides (see picture #4). Align coil
springs so that the bottom end of the coils
are turned to the inside - center of the
axle. Lift up on jack under differential until
coil springs are securely in place, and keep a load on them to hold in place.
7. If Installing new shocks in original factory location in center of coil spring
(included in lift kit - not the new "dual" shock on outside of coil), install
shock down through center of coil spring tower and tighten lower shock
bolt. NOTE: If installing this dual shock kit in conjunction with a
Skyjacker
®
lift kit, return to lift kit instructions at this time and when
referred back to dual shock kit instructions, continue with step below.
10. Now remove 7/16" standard nuts that were installed on 3-bolt tower ring
in step 7. Install new upper dual shock bracket over 3 bolts of tower ring
(see picture #6), then the original upper shock bracket (there is a left
and a right bracket - the attached shock mounts should curve rearward
on each side). Install the 7/16" self locking nuts and tighten. Install shock
grommets, retainer washers, nuts and tighten.
11. Using new 1/2 x 2 1/2" bolts provided, install new shocks onto new
upper and lower dual shock brackets. NOTE: If installing this dual shock
kit in conjunction with a Skyjacker
®
lift kit, return to lift kit instructions at
this time (you are through with these instructions).
12. Install tires, remove jack stands, and lower vehicle to the ground.
Picture #3
Picture #4
Picture #5
Picture #6
2.