Installation – Skyjacker NBP103 User Manual
Page 2
Pg 2
Installation:
1. With the vehicle on flat level ground, set the emergency brake, &
block the front & rear tires / wheels.
2. Align the new Skyjacker nerf bar with the front & rear fender wells &
support the new nerf bar using jacks / jack stands.
3. Align the mounting brackets of the new Skyjacker nerf bar with the
OEM holes located on the frame rail of the vehicle.
4. Mark a line on the OEM skid plate around the rear mounting bracket
of the new Skyjacker nerf bar. (See Photo # 1)
5. Remove the outer OEM skid plate hardware & lower the OEM skid
plate in order to cut along the previously drawn line using a jig saw or
similar tool. (See Photo # 2)
6. Once the OEM skid plate has been cut, reattach the OEM skid plate
using the OEM hardware.
7. Drill the two upper rear OEM frame rail mounting locations using a
5/16" drill bit & install the supplied 3/8" x 1" thread cutting bolts using
a 9/16" socket. (See Photo # 3)
8. Remove the previously installed 3/8" x 1" thread cutting bolts & attach
the new Skyjacker nerf bar to the front upper frame rail using the
supplied 5/16" x 1" bolts, washers, nuts, & a 1/2" socket.
Note: Do
not completely tighten at this time.
9. Attach the new Skyjacker nerf bar to the rear upper frame rail using
the previously removed 3/8" x 1" thread cutting bolts & a 9/16" socket.
Note: Do not completely tighten at this time. (See Photo # 4)
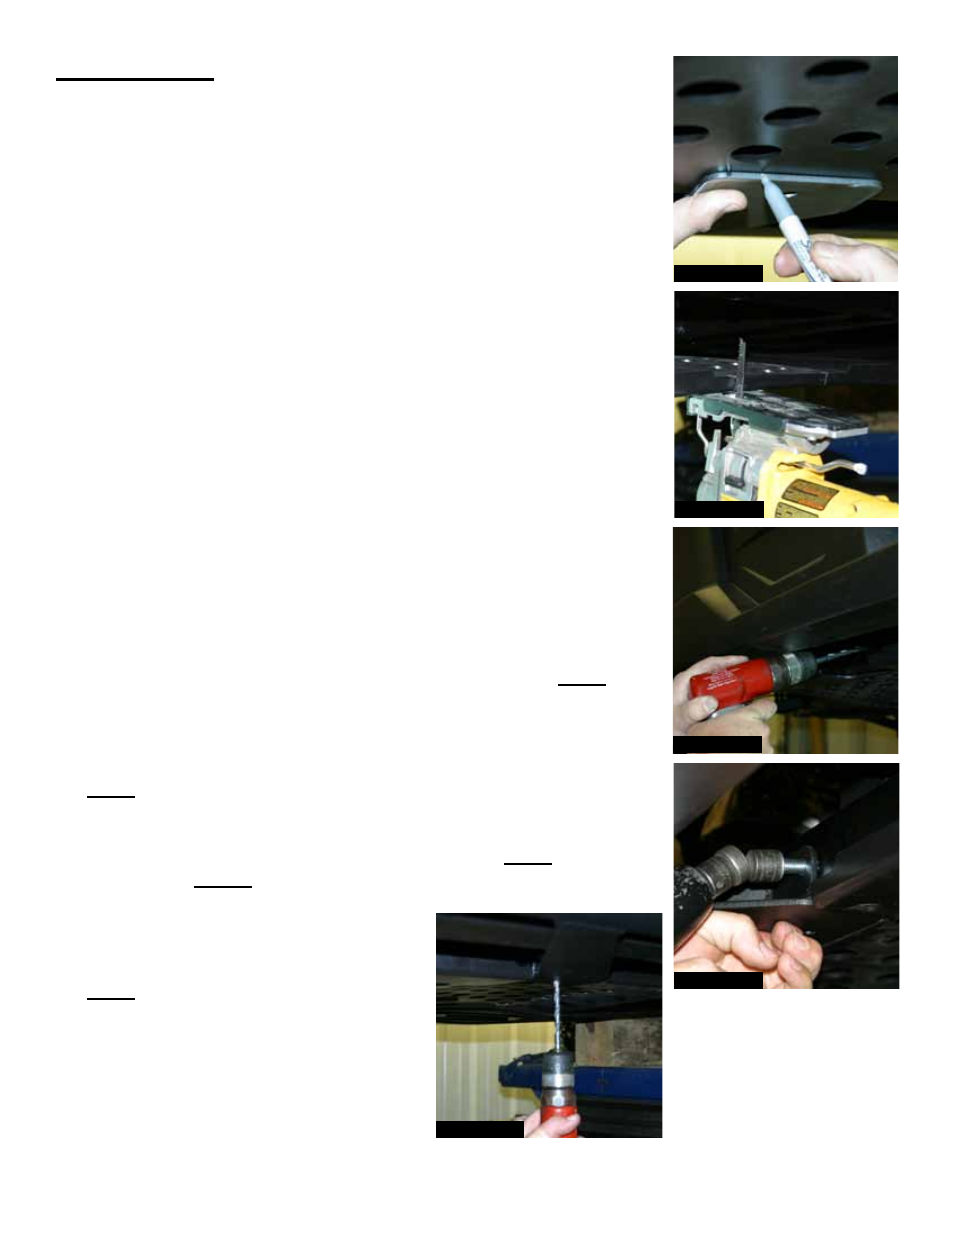
10. Slightly drill the rear lower mounting location of the new Skyjacker
nerf bar to create a pilot mark using a 3/8” drill bit.
Note: Only create
a pilot mark,
do not completely drill this mounting location at this time.
11. Drill the previously pilot marked rear
lower mounting location of the new
Skyjacker nerf bar using a 5/16” drill bit.
Note: Be extremely careful not to drill
through the floor of the vehicle. (See
Photo # 5)
I-NBP103
Photo # 1
Photo # 2
Photo # 3
Photo # 4
Photo # 5