6】bulb replacement procedures 1 – PIAA 2000 Series User Manual
Page 9
-9-
PKI-0004
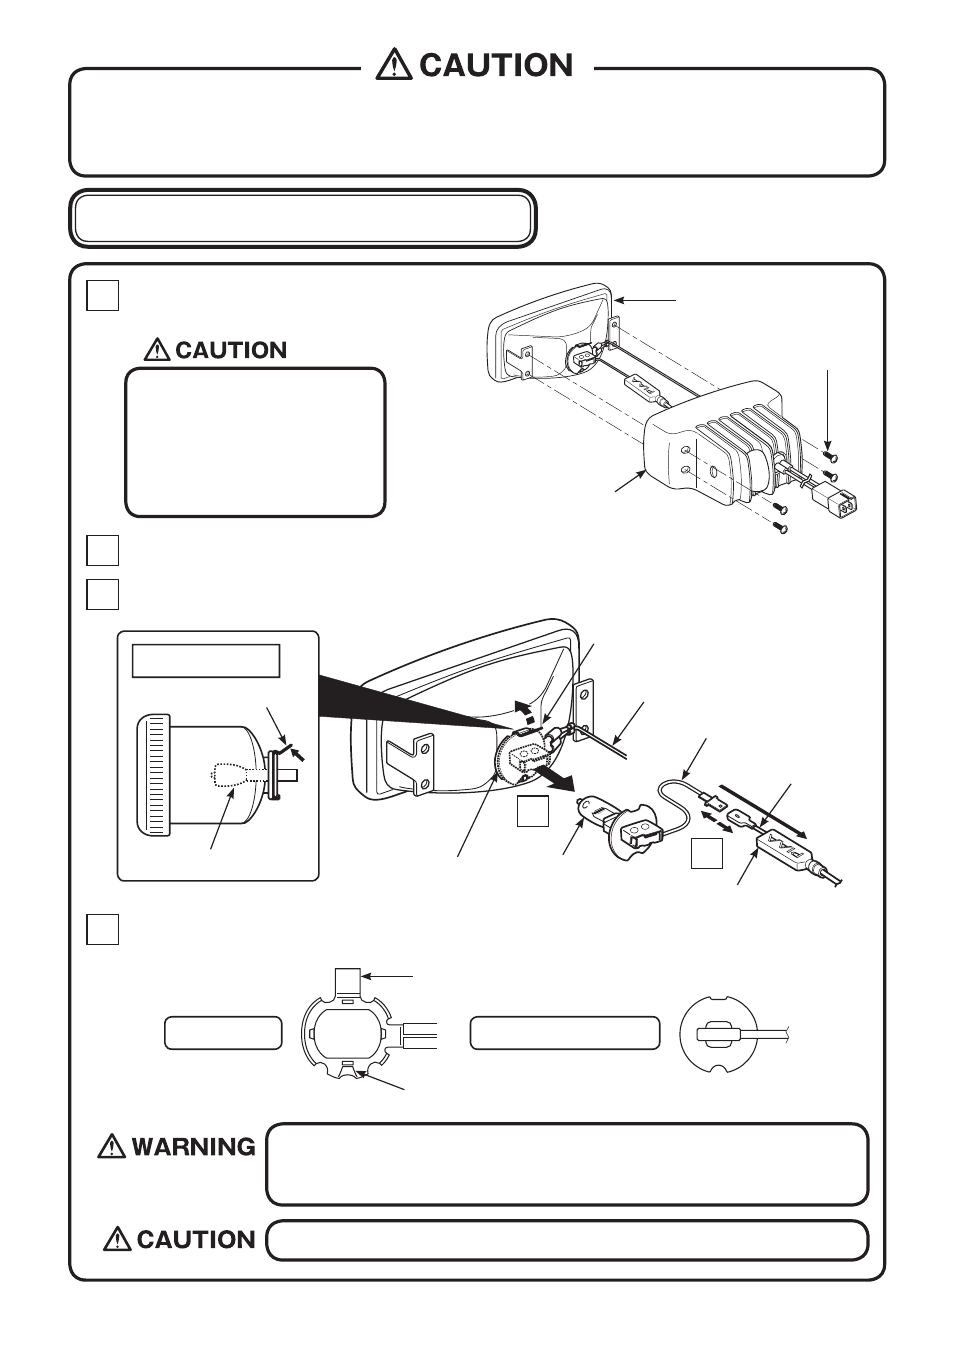
Loosen the 4 screws on the back of the lamp housing. Re-
move the lens unit from the housing unit.
● After replacing the lamp and reassembling the unit, make sure the harness is not inadvertently caught in the assembly.
Such conditions may cause a short.
● Dispose of used bulbs properly (non-combustible) and avoid breaking the unit.
● Do not use the bulb without its protective covering. Inflammable material placed near it may catch fire.
Screw
Lamp body
● When disassembling the lamp,
do not pull with excessive force.
If the harness section is damaged
it may cause it to overheat.
● Make sure not to misplace the
screws that were removed.
Lens unit
【6】Bulb Replacement Procedures
1
Clasp
Prong
Round notch
Square notch
Move the sleeve aside and remove the (+) harness from the bulb s lead line.
Set the end of the bulb holder to the round notch of the bulb s metal fitting. Set so that the clasp catches on the
square notch located on the upper section of the bulb.
Bulb holder
Cross-section of bulb
Sleeve
(-) Harness (black)
Lead line
Bulb
While pushing the clasp holding the bulb holder, remove the bulb from the lens holder.
2
3
2
3
Clasp
Cross-section
Bulb
Clasp
4
Bulb holder
(+) Harness
● Do not touch the glass section of the bulb or allow any grease or oil to get on to the glass.
If it is not wiped clean it may cause the glass to crack or worse it may burst.
If you touch it accidently or if stained in any way, use alcohol to wipe it clean before use.
● Make sure to set according to the shape of the notches provided.