Product details, Tools required – PIAA 2000 Series User Manual
Page 3
-3-
PKI-0004
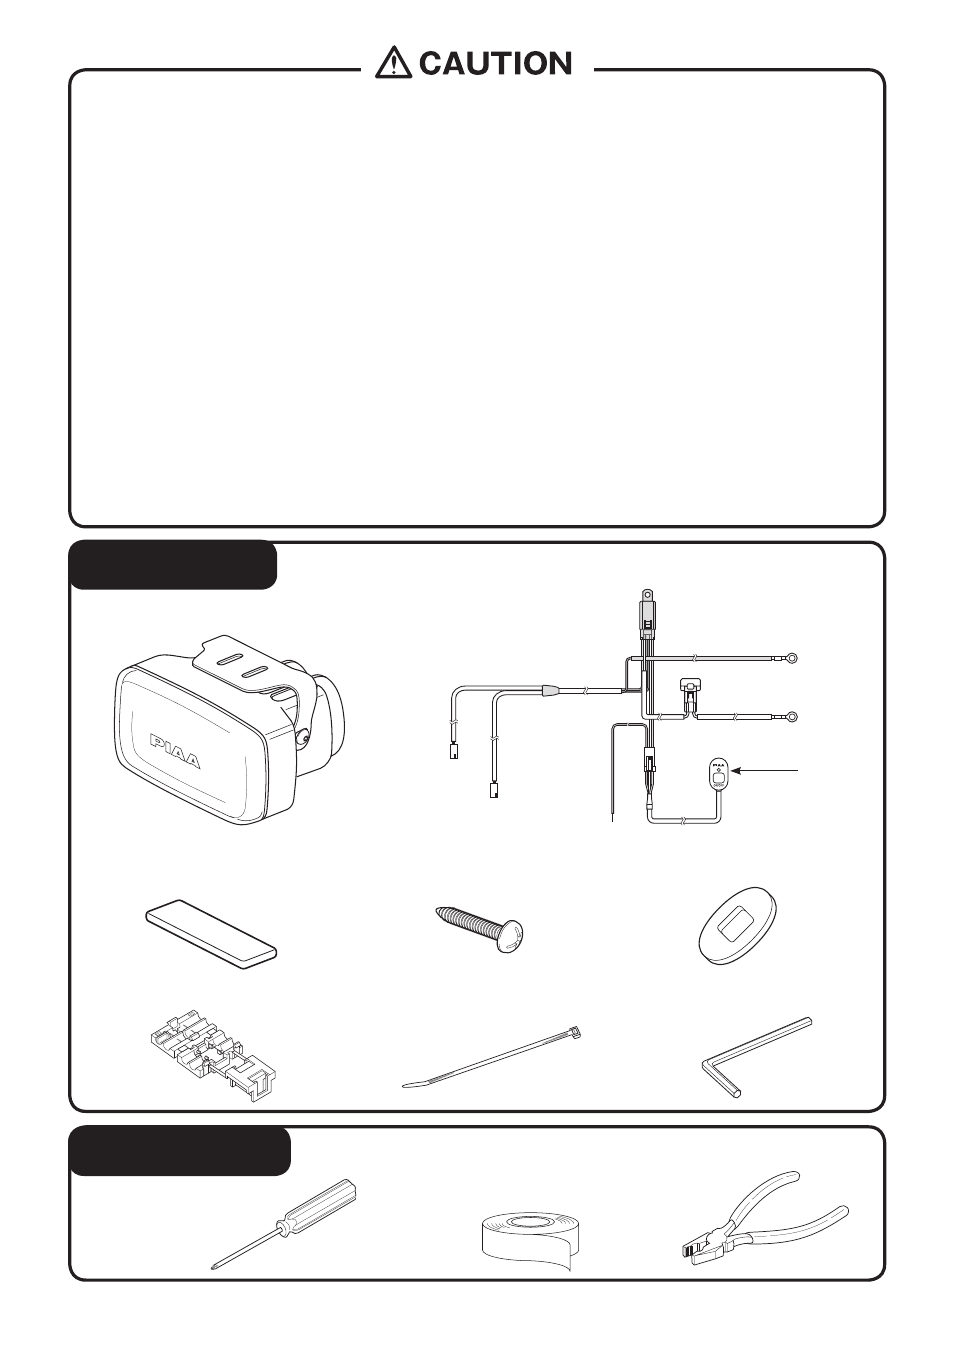
※ Please use the tools indicated below.
● Philip s head driver
※ Verify that all the parts are included. If a part is missing, please contact you local distributor.
Product Details
switch
● Vinyl tape
● Pliers
Tools Required
● Obtain the (+) current necessary for the switch from the (+) current used for the light switch.
(Do not use the same current used for a computer, radio or audio system)
● Do not place the relay box where water can directly enter the unit.
● Install the relay harness in a position where it will not make contact with high temperature surfaces such as the engine,
radiator or engine compartment.
● Arrange the relay harness so that it does not make contact with moving parts.
● Do not place the relay harness on high-voltage wires such as brake or air-conditioning wires.
● If the relay harness makes contact with a part of the engine, apply a length of ordinary cushioned tape around the harness.
● When connecting the connector, insert until you hear an audible click
● When removing the connector, hold the main body of the connector and pull it out. If excess force is used to pull the cord, it
may damage the connection, which could cause it to overheat.
● Make sure the harness does not sag. Use a harness band of vinyl tape to secure it in place to wiring inside the engine
compartment.
● Before connecting it to the battery, verify the wiring arrangement.
● When connecting the battery terminal and or other electrical units, do not mistake the (-) and (+) terminals. Always start with
the (+) terminal.
● After all wiring is complete, confirm that it works properly. If it fails to activate, refer to 【7】Troubleshooting section
of this manual.
① Lamp main unit (2 units)
② Relay harness set
(PL5FB) [1 set]
⑧ Hexagon wrench (1)
⑥ One-touch connector (1)
⑦ Wire tie (5 psc.)
③ Double-stick tape
(5 pcs. - 1 spare)
④ Screw (4)
⑤ Double-stick tape for switches
(1 psc.)