Check – PIAA 2000 Series User Manual
Page 5
-5-
PKI-0004
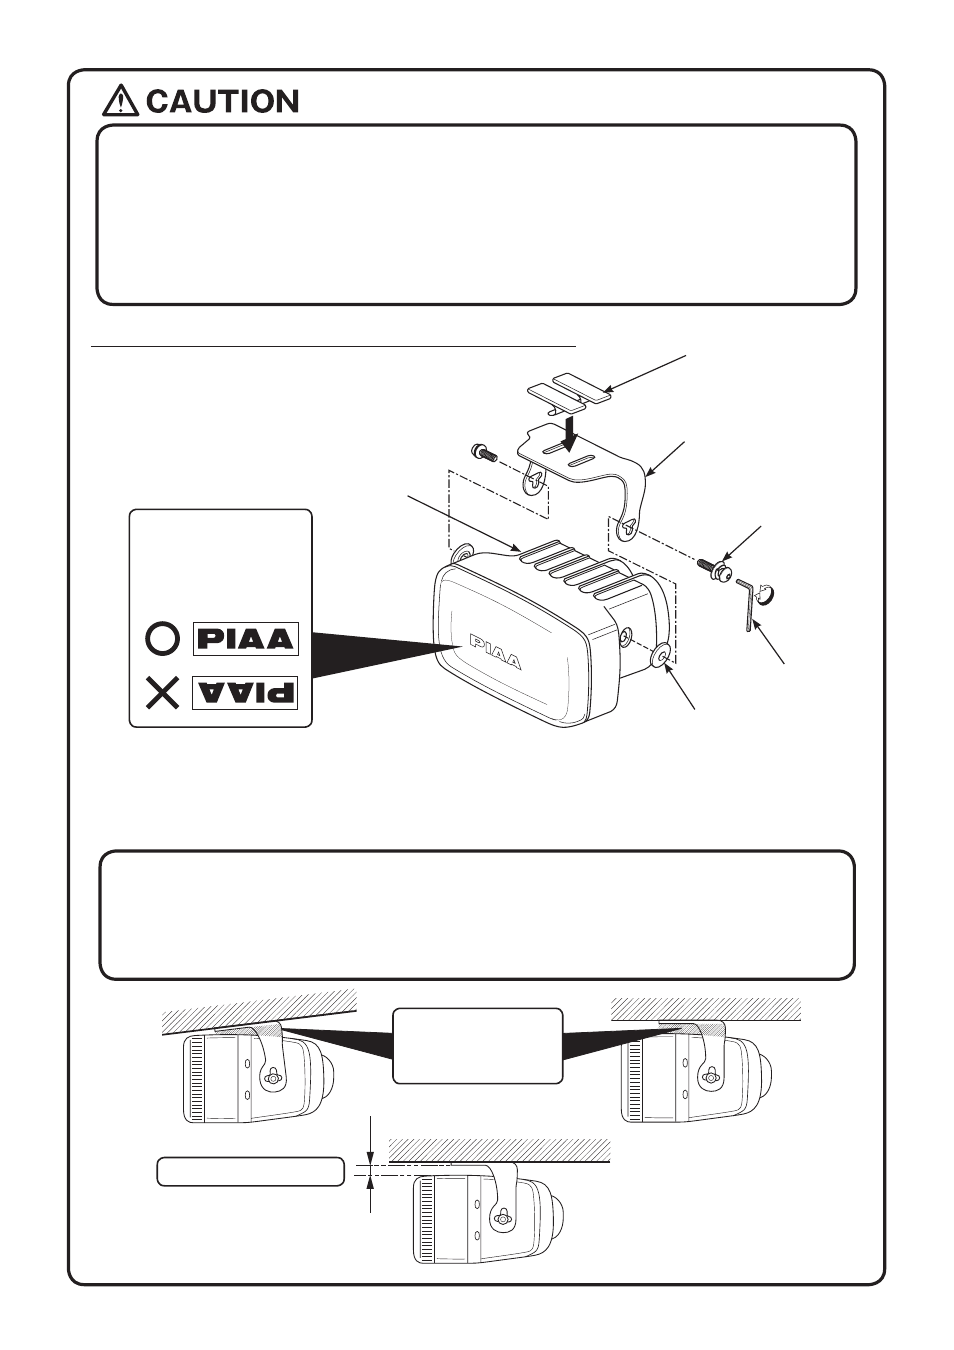
Bracket
Double-side tape
(Item 3)
Hexagon Bolt
● Make sure the lamp can be adjusted up and down (beam must be adjusted so that it shines at least 40m ahead of
the vehicle.) If it cannot be adjusted, it must be re-installed.
● There must be between 30mm to 35mm on either side of the lamp to allow for proper adjustment.
● If using a screw, make sure there is adequate space between the bracket and the lamp
(where screw will be inserted).
● Install the lamp body so it does not rub against the surface of the bumper. Heat may cause the plastic to deform.
Allow between 5mm to 10mm between lamp body and vehicle part.
● When using a bracket available on the market, make sure the bolts you remove from the vehicle does not hinder its
performance.
● Do not install on an unstable location, it may come lose while driving. This may affect the overall life of the bulb.
In addition it may damage the vehicle or the main body of the lamp. Make sure you install the lamp on a stable and
secure location.
◆ When you have decided the installation method……
(1) Rearrange the bracket according to your needs,
and apply double-side tape (Item 3) and one-side
tape as shown in the diagram below.
(2) Hold the lamp up to where it will be installed on the vehicle. Verify the gap between the lamp and
surrounding obstacles.
More than 3mm is required
Lamp body
Spacer
Section with at least
3mm gap (slant line)
Screw stop.
Make sure the installation
position is correct and the
logo will not be upside
down.
Check !
Hexagon wrench
(Item 8)