2 standard assembly with fixing brackets, Standard assembly with fixing brackets, Installation – Lenze 8240 frequency inverters User Manual
Page 18
Installation
4-2
UOOu_^MTMO
L
4.1.2
Standard assembly with fixing brackets
822X assembly preparations EëÉÉ cfd QJN F
To assemble and install the controller it is necessary to remove the unit
cover. The accessory kit inside the controller contains the parts required
for the assembly and installation.
1.Loosen screws (x).
2.Swing cover to the top and detach.
3.Bolt the fixing brackets onto the housing.
(x)
3)
cfd QJN
aáãÉåëáçåë J лн~еЗ~кЗ ~ллЙгДду
3)
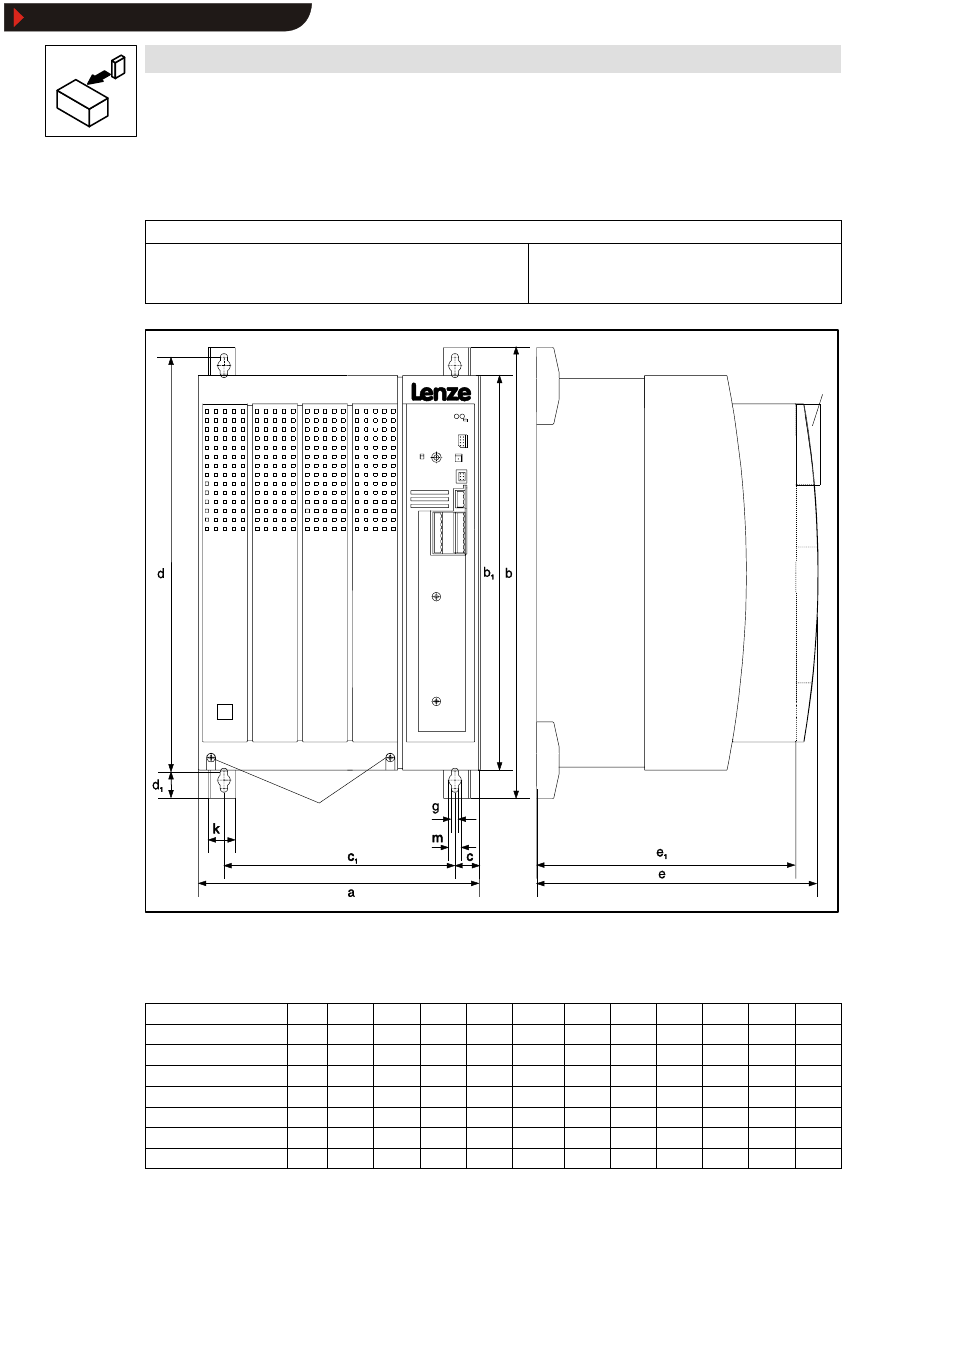
With attachable fieldbus or I/O module:
Observe assembly depth and assembly space required for connection cables
[mm]
a
b
b1
c
c1
d
d1
e
3)
e1
g
k
m
8221 / 8222 / 8223
250
402
350
22
206
370
24
250
230
6.5
24
11
8224
340
580
510
28.5
283
532
38
285
265
11
24
18
8225
340
672
591
28.5
283
624
38
285
265
11
28
18
8226 / 8227
450
748.5 680
30.5
389
702
38
285
265
11
28
18
8241 / 8242
78
384
350
39
-
365
-
250
230
6.5
30
-
8243 / 8244
97
384
350
48.5
-
365
-
250
230
6.5
30
-
8245 / 8246
135
384
350
21.5
92
365
-
250
230
6.5
30
-
Show/Hide Bookmarks