Operation – Leica Biosystems RM2125 RTS User Manual
Page 39
39
Leica RM2125 RTS
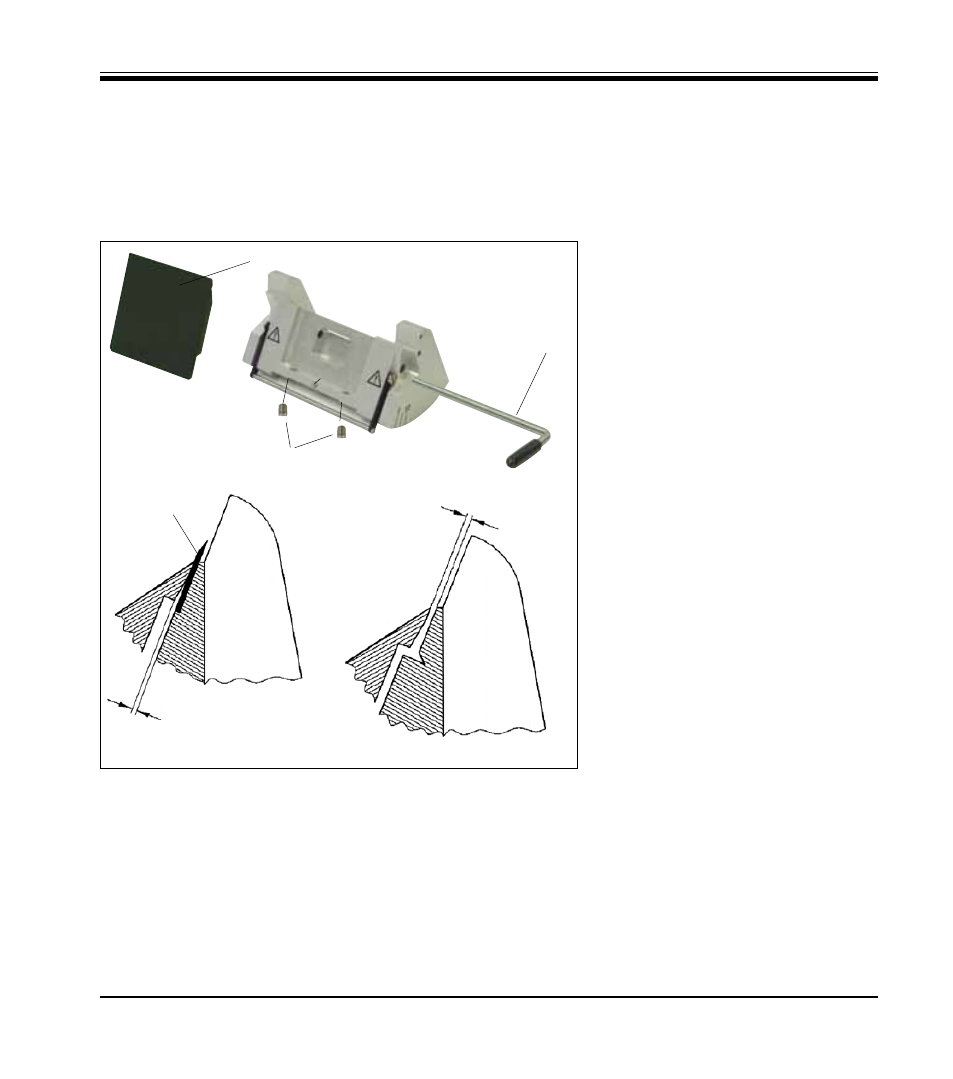
Adjusting the front pressure plate
• Bring the pressure plate (86)
into position, insert the clamp-
ing lever (89), and use the
clamping lever to clamp the
pressure plate only lightly.
• Adjust the height of the pres-
sure plate using the screws
(87).
The upper edges of the two
pressure plates (86) and (80)
must be at the same height and
parallel to one another.
The clearance angle of the front
pressure plate (86) is adjusted with
a stud screw (88) that is accessible
at an angle from inside through a
bore on the bottom of the knife
holder (
Fig. 33/
).
• Insert a blade (77) and clamp it
lightly using the clamping lever
(89).
The height of the front pressure plate can be adjusted using the stud
screws (87) on the bottom of the knife holder. They can be accessed
through bores on the bottom of the knife holder. An Allen key No. 2 is
required to make the adjustment.
• Use the screw (88) to adjust the pressure plate (86) so that only the up-
per edge of the pressure plate puts pressure on the blade. A gap must
be visible (
Fig. 33/
). A small screwdriver (approx. 3.0 x 70) is required
to make the adjustment.
• When making the adjustment, make sure that the distance between
both pressure plates is approx. 0.4-0.8 mm when open (
Fig. 33/
).
Fig. 33
87
88
86
approx. 0.05 mm
0.4 - 0.8 mm
89
5. Operation
77