Klein Tools VDV500-051 User Manual
Page 3
4
5
ENGLISH
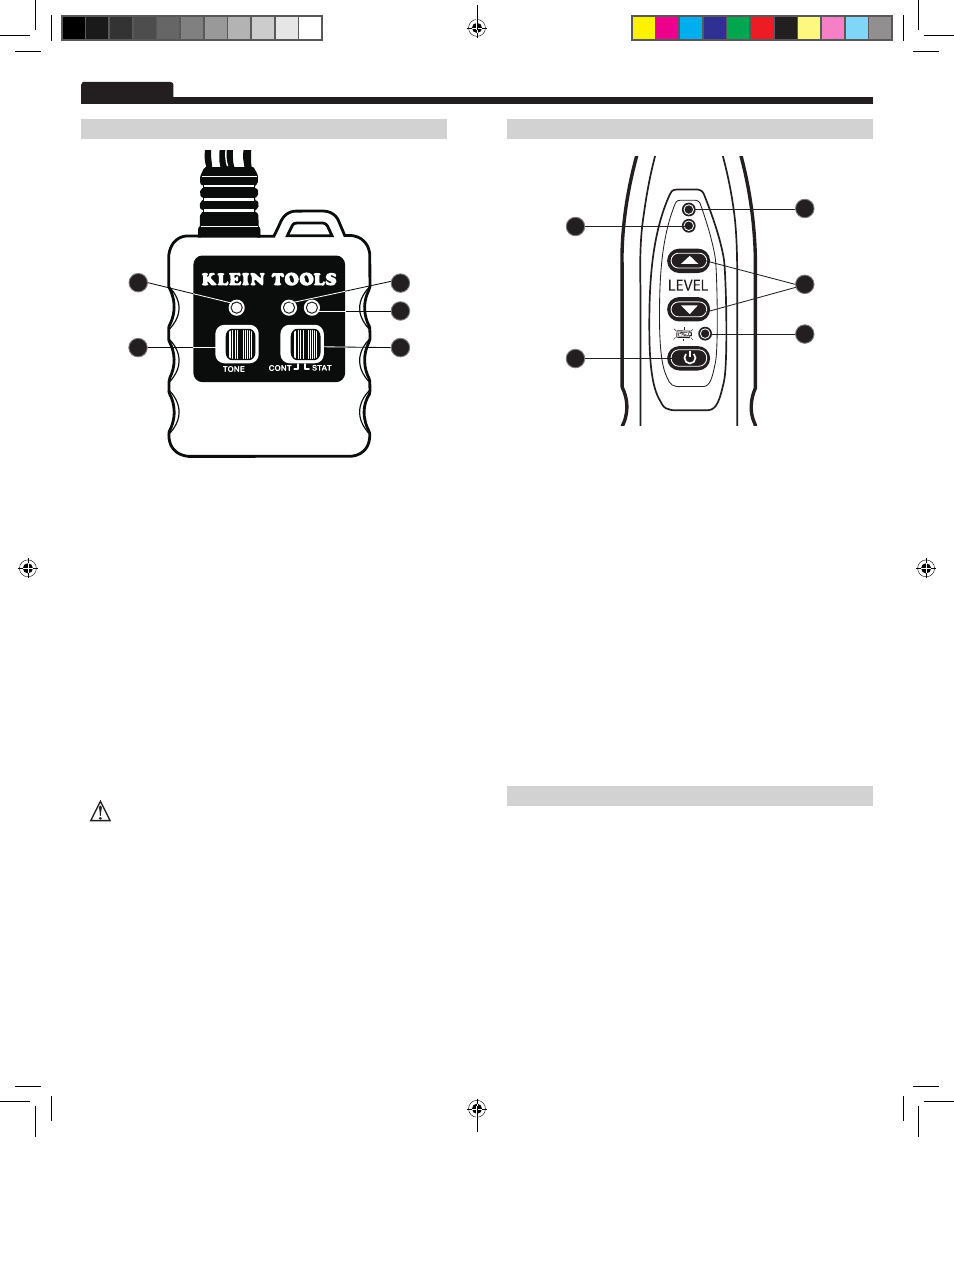
TONEcube FRONT pANEL
pROBEplus FRONT pANEL
• LEDs
1. Tone LED:
Flashes once per second when tone is on. Flashes
rapidly when battery is low. Toggles one second on and one second
off when tone cadence is changing.
2. NRM (Normal):
Green LED is on when a DC voltage is present
with normal polarity of a phone line in status mode. Both LEDs are
on if AC voltage.
3. REV (Reverse):
Red LED is on when DC voltage is present with
reverse polarity of a phone line in status mode. REV lights with low
resistance across clips in continuity mode. Both LEDs are on if AC
Voltage.
• Switches
4. TONE:
This switch is a momentary slide switch. When slid to the
left for a short duration, it toggles between tone on and off. If held
on, it begins to send different tone sounds in sequence until the
switch is released, setting the tone style.
5. cONT-STAT:
This slide switch configures the status LEDs (NRM
and REV) to indicate voltage and polarity, the STATUS position, or
continuity on the REV LED, the CONT position. When the TONEcube
is not in use the switch should be left in the STAT position to prevent
draining the battery.
CAUTION:
Continuity (CONT) mode should NOT be used when
toning live wires. This may cause damage to the TONEcube.
• LEDs
1. Tone Detected LED:
The green LED above the level buttons will
illuminate when the detected signal exceeds the set threshold. The
threshold is set with the level buttons.
2. Overload LED:
The red LED above the detect LED will illuminate
when the amplifier is overloaded. The volume should be reduced so
changes in signal strength can be heard.
3.power-On/Battery Low LED:
This LED will illuminate when the
probe is active. It will flash rapidly when the battery needs to be
replaced.
• Buttons
4. On/Off Button:
The On/Off button operates in two modes:
• Toggle Mode:
When the tracer is turned on with a short
tap (less than 0.5 seconds) of the button, the tester will
turn on and stay on until the button is tapped again or after
approximately 5 minutes.
• Normal On/Off:
If the button is pressed and held down, the
unit will be on for only as long as the button is depressed.
5. Level Buttons:
The up and down buttons are used to adjust the
sensitivity/volume and the detection threshold of the LED. They can
be tapped or pressed and held.
TONE TRAcING
Note:
If using a different tone generator than the TONEcube, refer to its
manual for steps 1-4.
If using a different amplifier probe than the PROBEplus, refer to its
manual for steps 5-8.
1.
Move CONT-STAT switch on the TONEcube to the STAT (status)
position, particularly when toning powered phone lines. CONT
(continuity) position may be used on unpowered pairs.
2.
Connect a lead or leads to wire, cable or terminal to be traced. See
Connection Variations section for common configurations.
3.
Slide TONE momentary switch to the left. The LED above the
switch will begin blinking. Select a different signal type if desired as
described in Setting Tone Sounds section.
4.
To turn off the signal, slide TONE switch to the left briefly. LED will turn off.
5.
On the PROBEplus, press or tap the On/Off button.
1
2
3
4
1
3
4
2
5
5
Dwg Name:
139651TART
Dwg No:
139651TART
ECO No:
017192 Pkg Dwg Ref: 1753
Rev:
C Color Reference: N/A
139651TART.indd 4-5
7/7/14 10:10 AM