INCRA Wonder Fence User Manual
Page 9
9
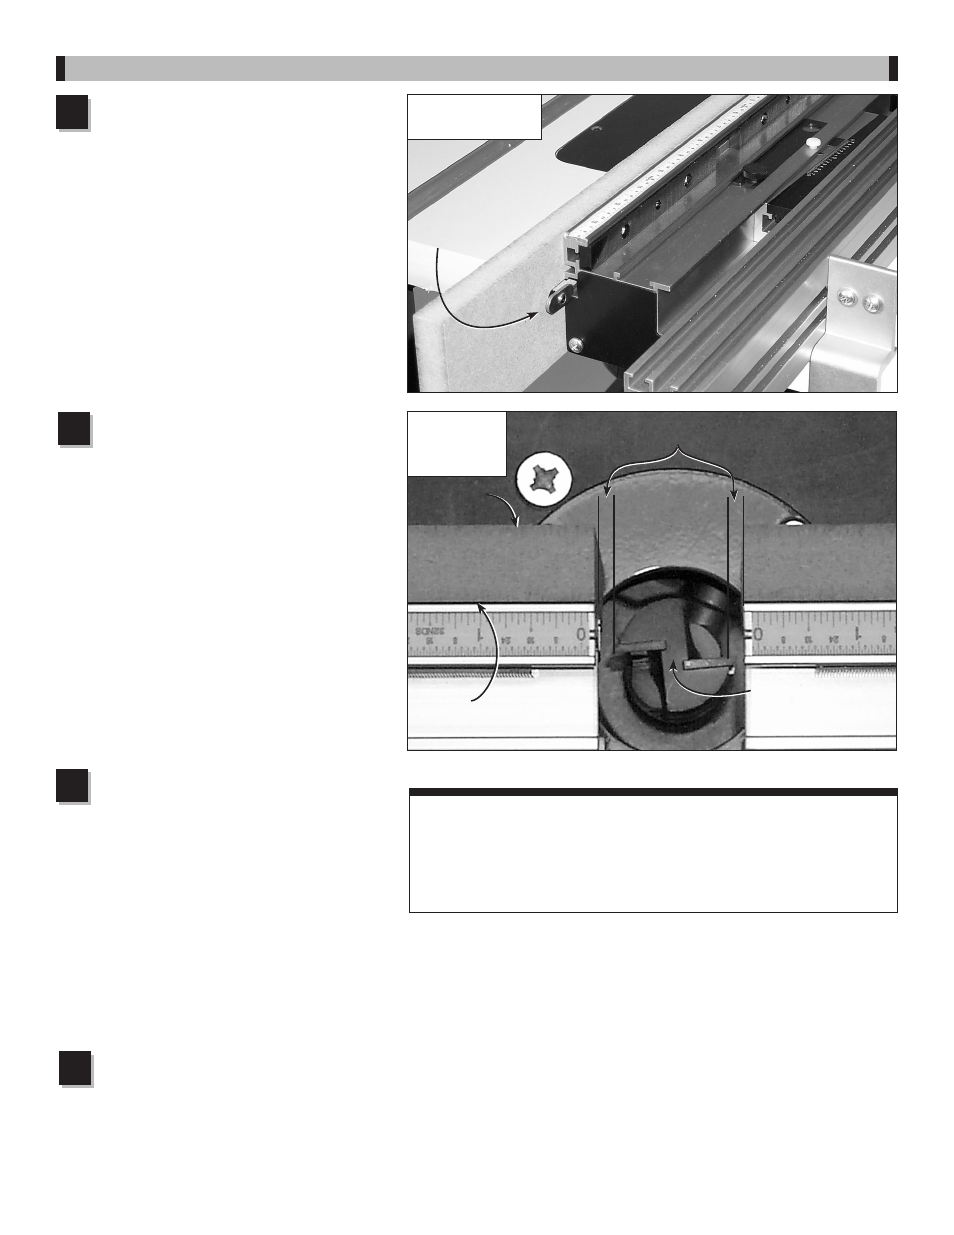
Fig. 22
Position fence
for initial cut
attach subfences to infeed and
outfeed fences.
Place a washer on each of the (4)
1
⁄
4
-
20-x
3
⁄
4
" socket head cap screws provided and
insert into the counterbores . Loosely thread on
the
1
⁄
4
-20 rectangular nuts, then slide the nuts
into the T-slot located on the front of the Wonder
Fence . Both subfences must be inserted
from the end of the infeed fence . Slide both
subfences to align the ends flush with the ends
of the aluminum fences (nearest the cut area)
and tighten the fasteners .
Fig. 21 .
Position fence for initial profile
cutting
Install desired cutter and set the fence
gap as described on page 5 . The fence ends
should be no closer than
1
⁄
8
" from the cutter .
Tighten the fasteners . Slide the entire Wonder
Fence up to the cutter and position it so the rear
face of the subfence is in front of the center of
the cutter . See overhead view,
Fig. 22 . Lock
your Incra Jig’s carriage clamp or, if using the
Wonder Fence in the freestanding mode, tighten
the two table clamps .
Make the profiling cuts
Loosen the two socket head cap screws
that secure the infeed subfence . Now turn
on the router and, using a good rubber soled
push block, advance the subfence forward into
the cut . When the subfence touches the outfeed
fence (or the bearing on some cutters), back the
subfence out of the cut and turn off the router .
Unlock your Incra Jig, or loosen the table clamps
if using in the freestanding mode, and move the
Wonder Fence back
1
⁄
8
" . Relock the clamps,
then repeat the cut . Continue this process until
you have cut completely through the subfence .
1
Fig. 21
Attach subfences
2
3
Slide
1
⁄
4
-20
rectangular nut
into T-slot on
Wonder Fence
Cutting the Zero Clearance Profile
1
⁄
8
" minimum
Rear face of
subfence in front of
center line of cutter
slide the subfence into final
position
Now you can slide the completed subfence
into its final position on the infeed fence and
tighten the mounting screws . Final positioning
should always be done with the router turned off
and the carriage clamp locked .
4
CauTIOn: The nature of zero clearance places the subfence
very close to the cutter. NEVER attempt to move your fence or
make any adjustment to the setup until the router bit has come to a
complete stop.
Front of
subfence
Rear of
subfence