INCRA Wonder Fence User Manual
Page 5
5
Adjust the fence by sliding the
black rear wedge:
+
To move the fence forward, slide the
wedge to the left . (This moves the
+
end of the scale towards the cursor.)
–
To move the fence backward, slide
the wedge to the right . (This moves the
–
end of the scale towards the cursor.)
Tighten the three socket
head cap screws to secure
the fence position then slide
the view panel back in place and
tighten the thumbscrew .
Using the supplied hex tool,
loosen the two socket head
screws through the
large holes
in the front of the Wonder Fence half .
Also loosen the wedge locking screw .
The access hole for the wedge locking
screw is located between the two large
holes . Loosen each of the (3) screws
one to two full turns depending on the
amount of adjustment range needed .
For a clear view of the screw heads,
loosen the thumbscrew and slide the
black view panel located on the top of
the Wonder Fence .
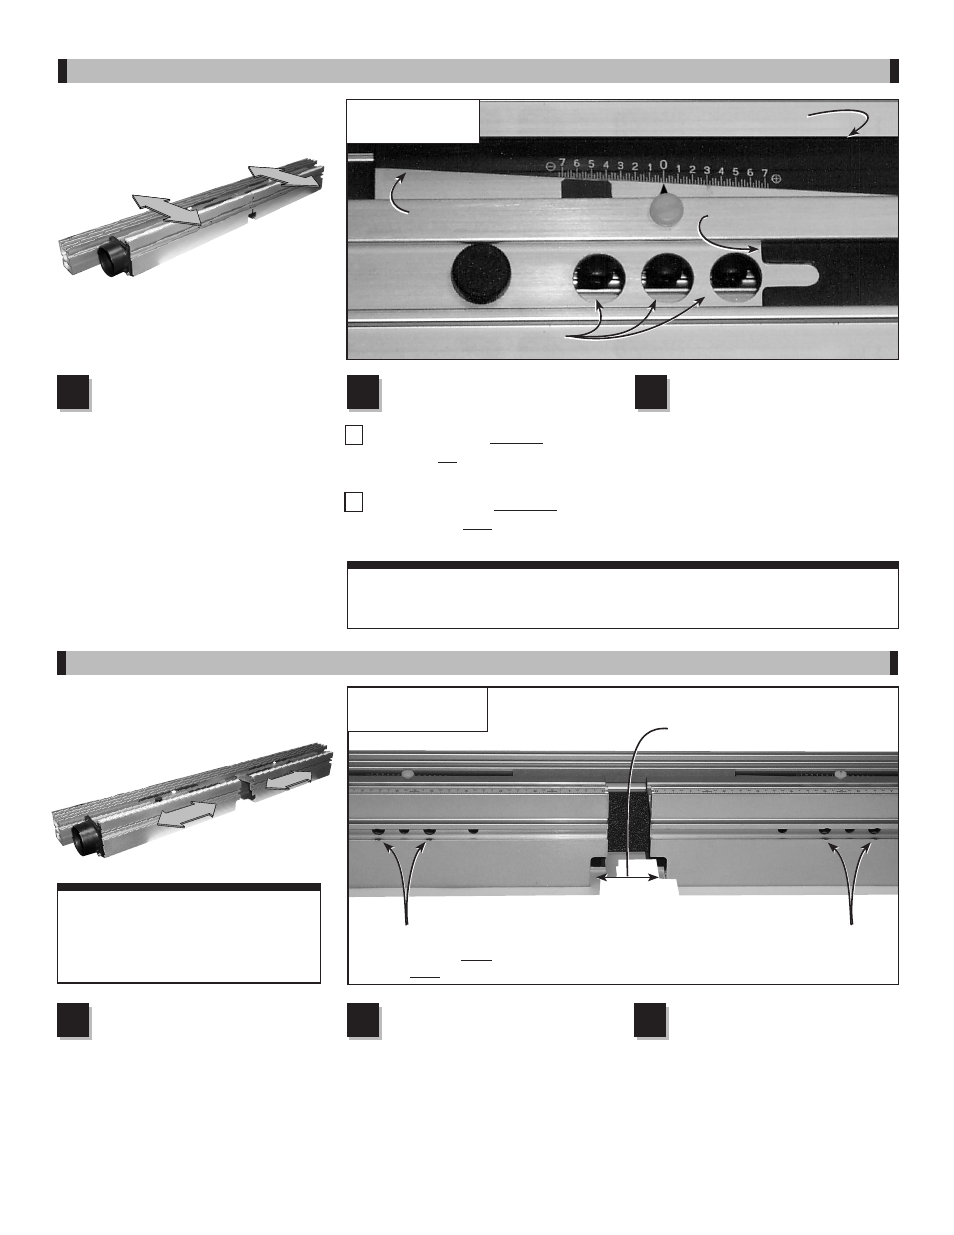
Offset adjustment
Fig. 9
Offset adjustment
FIRST: Loosen (3) socket head
screws through access holes in fence.
THIRD: Retighten (3) socket head
screws and slide view panel back in place.
Black rear wedge
1
2
3
Slide view panel to the side
Using the supplied hex key, loosen
the two socket head screws
through the
large access holes
located in the front of each Wonder
Fence half . DO NOT loosen the wedge
locking screw located between the two
large holes . For a clear view of the screw
heads, loosen the thumbscrews and slide
the black view panels located on the top
of each half of the Wonder Fence .
SECOND: Slide fences to
open or close fence gap.
THIRD: Tighten (2) socket head screws
on each fence and slide view panels back
in place.
CauTIOn: When adjusting the
fence gap, never position the ends
of the aluminum fences closer
than
1
⁄
8
" from the router bit.
1
Gap adjustment
Follow these steps to adjust the
opening between the infeed and outfeed
fences, see
Fig 10 .
Fig. 10
Gap adjustment
Tighten the two socket head
screws on each fence half,
then slide the view panels
back in place and tighten the
thumbscrews .
3
Slide the infeed and/or outfeed
fences to open or close the
fence gap .
2
FIRST: Loosen (2) socket head
screws through large access
holes in each fence half.
nOTe: The numbers on the scale represent hundredths of an inch fence offset.
Each of the smaller tick marks on the scale represent .002" (2 thousandths of an inch).
SECOND: Slide black rear wedge left to move
fence forward or right to move fence backward.
Follow these steps to adjust either
the infeed or outfeed fence for
“in-line” or “offset” fence applications .
See
Fig. 9 .
CauTIOn: To avoid disengaging the
nut, do not loosen any of the socket head
screws more than one or two full turns.