Operation – changing angle settings, And 67, Vernier instructions on page 8 – INCRA Miter 1000SE User Manual
Page 4
INCRA MITER1000SE OWNER’S MANUAL
Manufactured by Taylor Design Group, Inc. P.O. BOX 810262 Dallas, TX 75381
W W W . I N C R A . C O M
Page 4
Operation – Changing Angle Settings
Before using your new INCRA Miter1000SE for
the first time, take a few moments to review these
important operational procedures.
1. 5° Indexing (including 22
1/2
° and 67
1/2
°
settings)
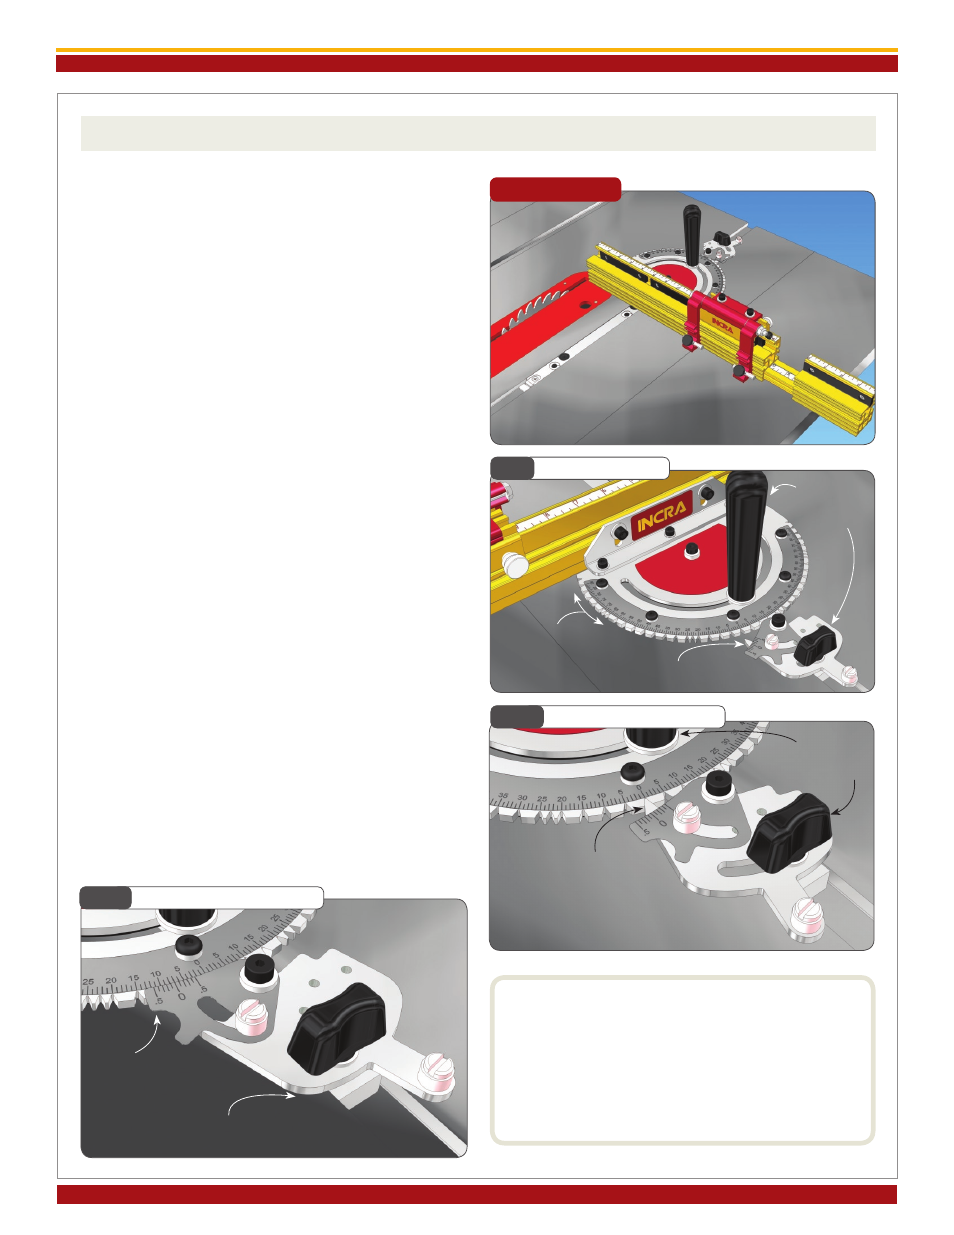
Loosen the actuator thumbscrew and pivot the
actuator tooth away from the notches located on the
perimeter of the protractor head. Loosen the large
clamping knob and rotate the protractor head and
fence to the desired angle,
Fig. 9. Then firmly engage
the tooth on the actuator with the corresponding
notch on the protractor head. The actuator tooth
should point directly to the desired angle on the scale.
Tighten the large clamping knob, then tighten the
actuator thumbscrew,
Fig. 10.
2 . Cont in uo us Adj ust m e nt s (for a ngle
settings finer than 5° increments)
Pivot the actuator tooth away from the notches on
the protractor head, aligning the arm over the miter
bar, and tighten the thumbscrew. Now loosen the
small nylon thumbscrew on the actuator and pivot the
1/10
° vernier cursor toward the scale. Rotate the cur-
sor until it is aligned edge to edge with the scale and
tighten the thumbscrew. When you change miter
angles, just align the desired angle on the scale with
the “0” cursor line,
Fig. 11. For
1/10
° adjustments,
use the alignments as described in the
1/10
° vernier
instructions on page 8.
CAUTION:
AFTER MAkINg ANY AdJUSTMENTS TO Th E
MITER ANgLE OF YOUR INCRA MITER1000SE,
ALWAYS vERIFY SAFE CLEARANCE BETWEEN
ThE FENCE ANd ThE BLAdE BEFORE TURNINg
ON ThE SAW.
Fig. 10
Locking the Protractor
Miter1000SE
Fig. 9
Changing Angles
Fig. 11
Continuous Adjustments
Loosen large
clamping knob
and actuator
thumbscrew
Pivot the actuator tooth
away from protractor
Tighten large clamping
knob then tighten
actuator thumbscrew
Rotate protractor
Firmly engage
actuator tooth with
protractor
Pivot cursor
to scale
Pivot actuator tooth away from
protractor and tighten thumbscrew