Squaring the fence to your table saw top – INCRA Miter 1000SE User Manual
Page 3
INCRA MITER1000SE OWNER’S MANUAL
©2008 by Taylor Design Group, Inc. All rights reserved. Rev.07.08.08
Page 3
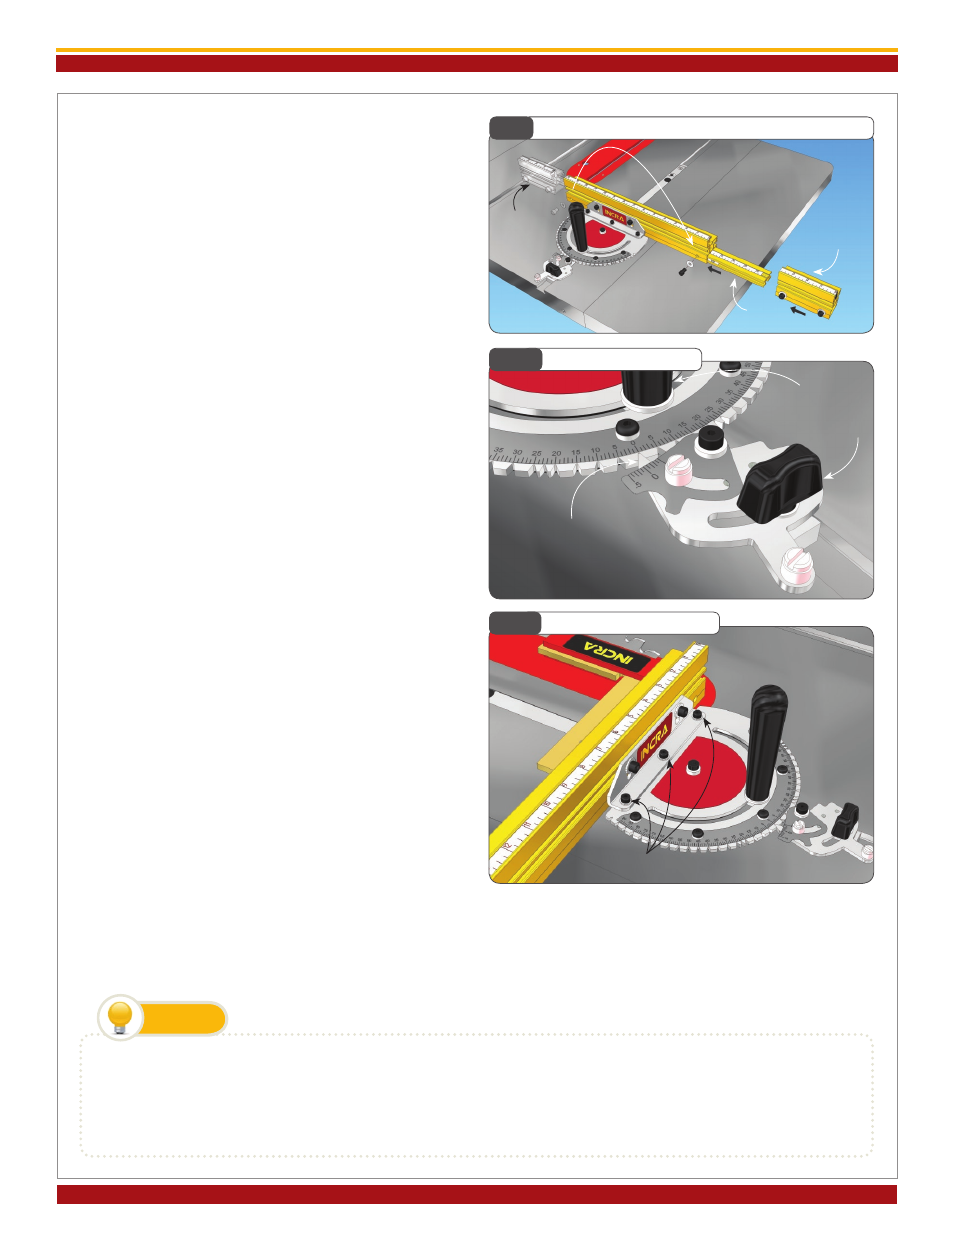
4. Left or Right of Blade
Your new Miter1000SE fence is factory configured for
use to the left of the blade. If you prefer to use your
Miter1000SE in the right hand miter slot just follow
the steps below.
Loosen the
1/4
-20 socket head screw located at the
end of the 14” section of the fence, then slide out the
4” section of fence along with the attached extender
bar. Move the socket head screw, washer and rectan-
gular nut to the hole on the opposite end of the fence.
Slide the extender bar assembly into the end of fence,
capturing the rectangular nut in the T-slot on the
extender bar. The higher numbers on the extender
bar scale should be closest to the saw blade. Loosen
the (2) socket head fasteners that secure the 4”
section of fence and reverse it. Tighten all fasteners,
Fig 6. Slide the scale in the top of the fence out
and replace with the included reverse reading (0-14”)
scale.
5. Adjust Fence Mounting Bracket 90°
to Saw Blade
Set the protractor head to read 0°, engaging the tooth
on the actuator firmly into the 0° notch on the protractor
head,
Fig. 7. Tighten the large clamping knob then tighten
the actuator thumbscrew.
Using the supplied
5/32
” hex key, loosen the (3) socket
head screws that secure the fence-mounting bracket
to the protractor head. Unplug your table saw, then
use a reliable machinist square to set the fence at 90° to
the saw blade,
Fig. 8. Tighten the (3) socket head screws.
The method used to join the fence-mounting bracket to the protractor head makes it easy to fine-tune the fence
perfectly perpendicular to your tabletop. To adjust, loosen the (3) socket head screws that secure the bracket and
slide a paper shim between the bracket and the protractor head. Placing the shim behind the screws will decrease
the angle. Placing the shim in front of the screws will increase the angle.
TIP
This one time calibration prepares your INCR A
Miter1000SE for work in either miter slot. Just remember that the accuracy of the INCRA Miter1000SE at
any subsequent setting is dependent upon the accuracy of your initial 90° calibration.
Verify this important
calibration with a test cut and fine tune as necessary.
Squaring the fence to your table saw top
Fig. 6
Converting Fence for use on Right Side of Blade
Fig. 7
Set Protractor to 0°
Fig. 8
Square Fence to Blade
Move fasteners to
opposite end of fence
4” fence section
Extender bar
Remove
extender bar
assembly
Tighten large
clamping knob, then
tighten actuator
thumbscrew
Actuator tooth
engaged at 0°
Loosen socket head screws and adjust
fence using reliable machinist square