COATS 9024E Tire Changer User Manual
Page 21
Important: Always read and follow the operating instructions.
• 17
Performance Tires & Wheels • Mounting
Before beginning any of the mounting activities,
review all of the caution, warning and danger instruc-
tions associated with mounting already listed in the
early part of the manual concerning tire/rim size match,
inspect for damage, etc.
19. Install or review condition of any pressure sen-
sor devices. This will prevent having to remount the tire
later.
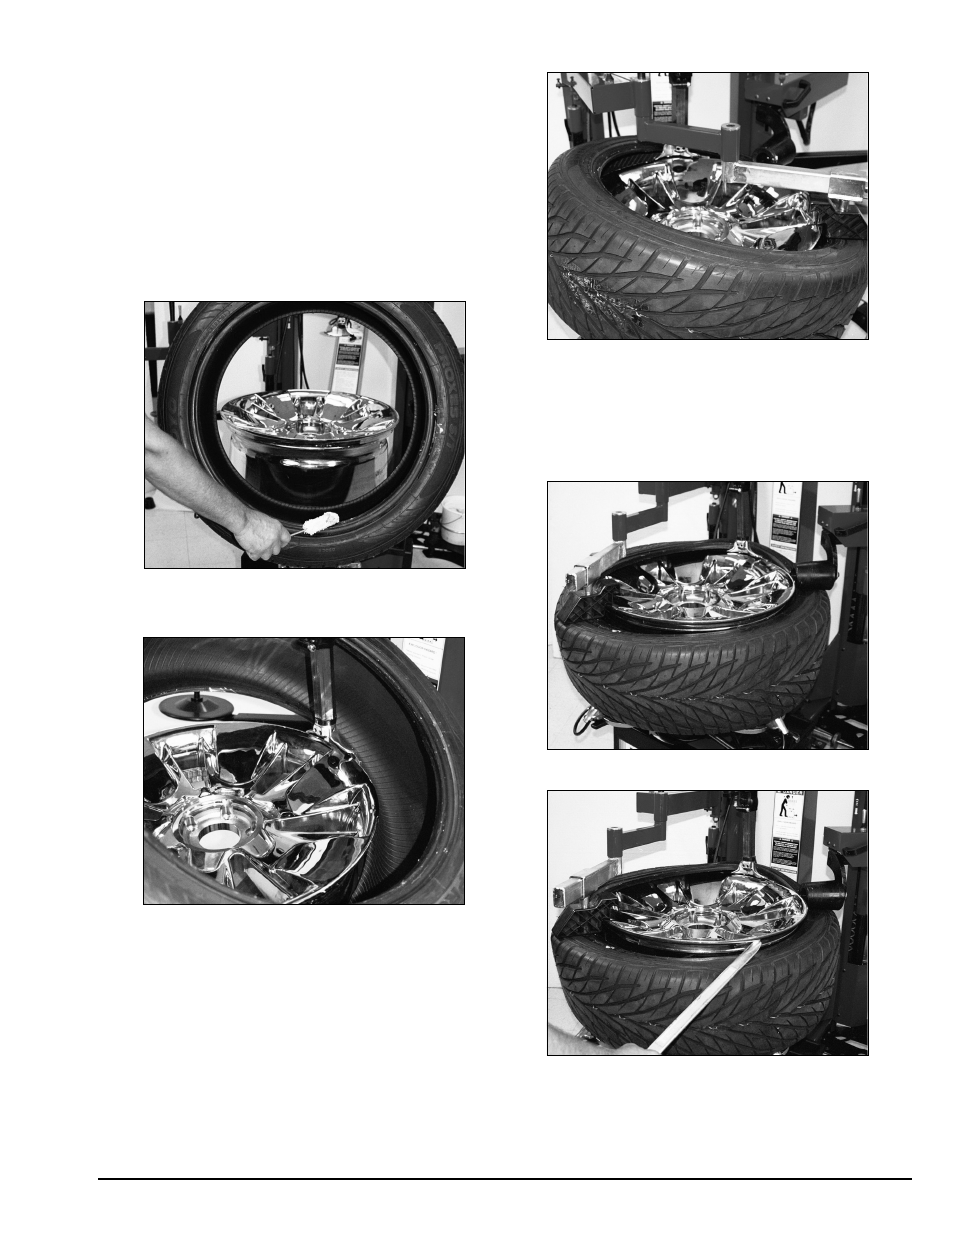
20. Begin the tire mounting process by lubricating
both tire beads and the rim if necessary (figure 38).
Figure 38 - Lubricate Tire Beads
21. For mounting the lower bead; position the tire at
an angle to the rim and mount (figure 39).
Figure 39 - Mount the Lower Bead
22. Next position the rim for the best mounting by
assuring the valve stem or sensor devices will not pre-
vent the upper bead from using the wheel’s full drop
center. Typically valves or sensor devices are posi-
tioned at 90 degrees forward of the duckhead.
23. Next position the R.H. taper roller on the tire
and press the sidewall down even with the wheel’s
drop center. Next position the L.H. drop center tool at
the 3 o’clock position and force down on the tire side-
wall allowing the step on the plastic duckhead to
engage the rim (figure 40)
Figure 40 - Position R.H. and L.H. Helpers
24. Start the mounting process by jogging the rota-
tion of the machine (figure 41). On very low profile
tires, it may be necessary to utilize the lift tool to assist
in maintaining the tire bead in the wheel’s drop center
(figure 42).
Figure 41 - Jog Machine Rotation
Figure 42 - Utilize the Lift Tool if Necessary