COATS 4070 Tire Changer User Manual
Page 21
Important: Always read and follow operating instructions.
• 17
Pressure Gauge Maintenance and Calibra-
tion
Check the tire pressure gauge function on the unit
daily, and perform an accuracy check monthly. Use a
pressurized tire and a high quality stick pressure gauge.
If necessary, calibrate the dial of the machine gauge.
1.
Pressurize a large 15” tire to 30 PSI and measure
the pressure exactly with a high quality extension type
tire gauge. Connect the air chuck to the tire.
2.
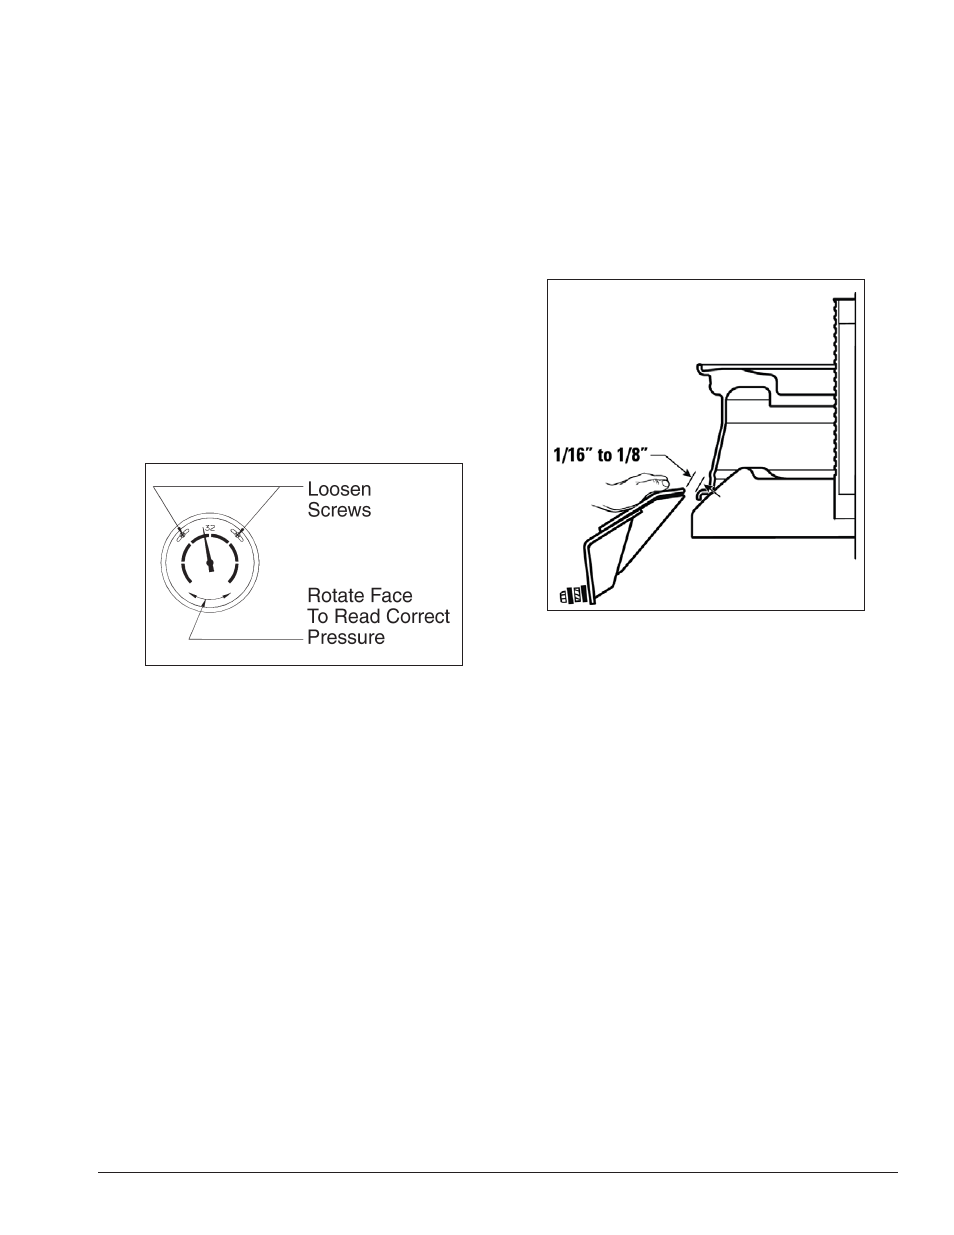
Remove the gauge lens and loosen the 2 screws at
the top of the gauge and rotate the gauge face until the
indicator is pointed at the correct pressure as read with
the extension type tire gauge (figure 26).
3.
Tighten gauge face screws and replace lens.
If gauge is defective, replace it immediately (part
#8107985).
Check the function of the pressure limiter weekly as
part of your pressure gauge maintenance and calibra-
tion.
Figure 26 - Calibrating Pressure Gauge
Lower Shoe Setting
Check the lower shoe setting periodically to make
sure that it operates properly and does not contact the
wheels.
1.
Place a 15” or 16” steel wheel on the machine and
secure with the centering cone.
NOTE: Make sure the wheel is centered.
2.
Depress the foot pedal and run the lower shoe up
to 45 degrees above the radius of the lower rim flange.
Refer to figure 29.
3.
Use your left hand to push against the shoe as
forcefully as possible.
4.
Measure the gap between the closest point of
the shoe and the rim flange. The ideal measurement is
between 1/16” and 1/8” .
• If the shoe contacts the rim, add another shim.
• If the gap is smaller than 1/16” , add another shim.
• If the gap is larger than 1/8” , remove one shim.
IMPORTANT: A high setting (greater than 1/8”) is
more desirable than a low setting (less than 1/16”).
If additional shims are required, a Shim Kit (part
#8101506) is available.