COATS Kit 85000805, Carrier User Manual
Page 2
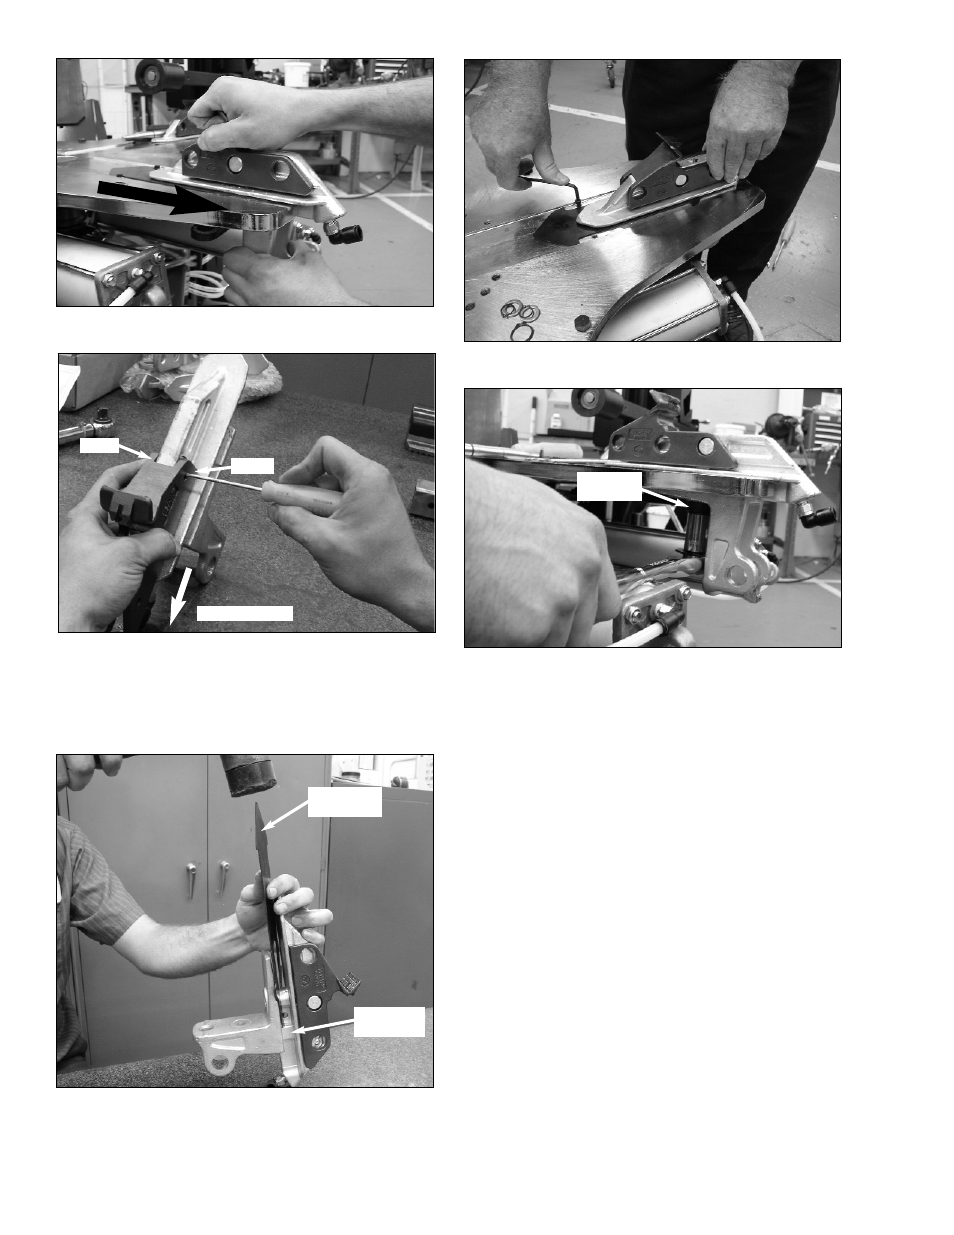
8. Use slight force to pull carrier assembly off table
top. Remove slide stopper screws and lift off slide.
9. Remove clamp, clamp button and air fitting from
old carrier and install them on the new carrier. Press
large button in and move clamp to outer position. Press
and hold large button and with a small screwdriver,
press back of button through small hole in clamp; then
slide clamp off clamp carrier.
10. Next, install slide stopper onto new carrier
assembly. Position slide at an angle on carrier and,
using a dead blow hammer, drive slide onto carrier so
that it passes the carrier’s ridge stop.
11. Install new carrier assembly and the slide stop-
per screws on the table top.
12. Apply loctite to the table top link bolt and install
new carrier assembly to the tabletop.
Note: Using a torque wrench, tighten the bolt holding
the carrier to 25-35 ft. pounds torque.
13. Repeat steps 6 - 12 for opposite side carrier
assembly.
14. Reassemble remaining components in reverse
order.
15. Functional test machine.
85000804 00 07/07 2 of 2
© COPYRIGHT 2007 HENNESSY INDUSTRIES AND COATS ALL RIGHTS RESERVED PRINTED IN U.S.A.
Carrier’s
Ridge Stop
Angle Slide
On Carrier
PUSH
PUSH
Remove Clamp
Table Top
Link Bolt