COATS Vero Series Calibration User Manual
Page 2
85609633 00 06/14 2 of 2
© COPYRIGHT 2014 ALL RIGHTS RESERVED PRINTED IN U.S.A.
8.
Lower the hood and press SPIN.
Note: Rotate laser dot toward inner flange
9.
After spin, raise the hood. Rotate wheel to line up/
center of 4-ounce calibration weight with laser dot. Hold
position while pressing NEXT.
Note: If desired, rotate laser dot toward inner flange.
10.
Press NEXT; then press EXIT.
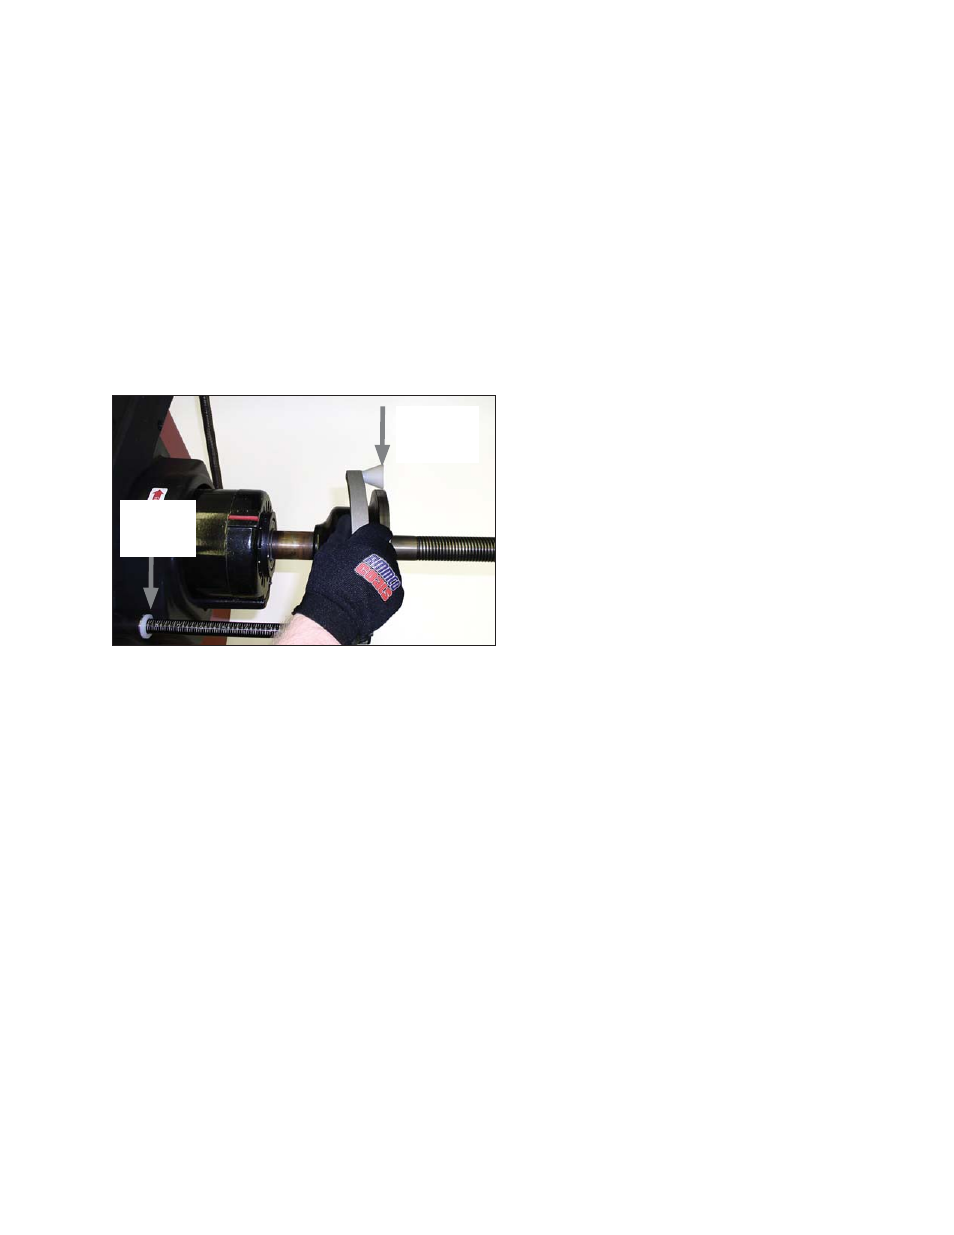
11.
Bring the tip edge of the arm precisely to the
outer edge of the faceplate and hold it there (through
step 12) while pressing the NEXT. (If necessary to reach
the faceplate accurately, loosen the calibration wheel
temporarily.)
12.
With arm still at the edge of the faceplate, enter
the A dimension (include decimal point) read off the arm
gauge; see figure 3. Press ENTER.
Figure 3 - While Holding Arm at Faceplate Edge, Enter A
13.
Move arm to its home position and press NEXT.
14.
Move arm to clip-on weight location on rim
flange and hold it there (through step 16). Wait for volt-
age reading to stabilize, then press NEXT.
15.
With arm still at clip-on weight location, enter
the D dimension (16.0 for a 16-inch wheel) that is the
diameter of the tire. Press EXIT.
16.
While still holding the arm at the wheel’s clip-on
weight location, enter the A dimension (include decimal
point) read off the arm gauge. Press ENTER
17.
Return the arm to home position; calibration is
complete. Press EXIT. Press STOP & EXIT to go back to
the main screen.
Hold Arm
Tip Edge
At Edge Of
Faceplate
Enter A
Value
Shown On
Arm Gauge