Caution – COATS Kit 814325 Hood Stop Retro User Manual
Page 2
5. Insert the 1/2-inch button head screw, as shown. It
will be a snug fit. Turn it with the supplied allen wrench
to get it all the way through the plates.
6. To install the 1/2-inch nut onto the button head on
the hood side, pry the hood back with a screwdriver (or
pliers) to get the nut on the screw.
7. Tighten both screws using the supplied allen
wrenches and two wrenches.
8. If the rubber hood stop is worn out, apply the 3/4-
inch socket wrench to the bolt on the rubber hood stop.
Turn 1/2-turn clockwise only, to expose the unworn sur-
face of the hood stop.
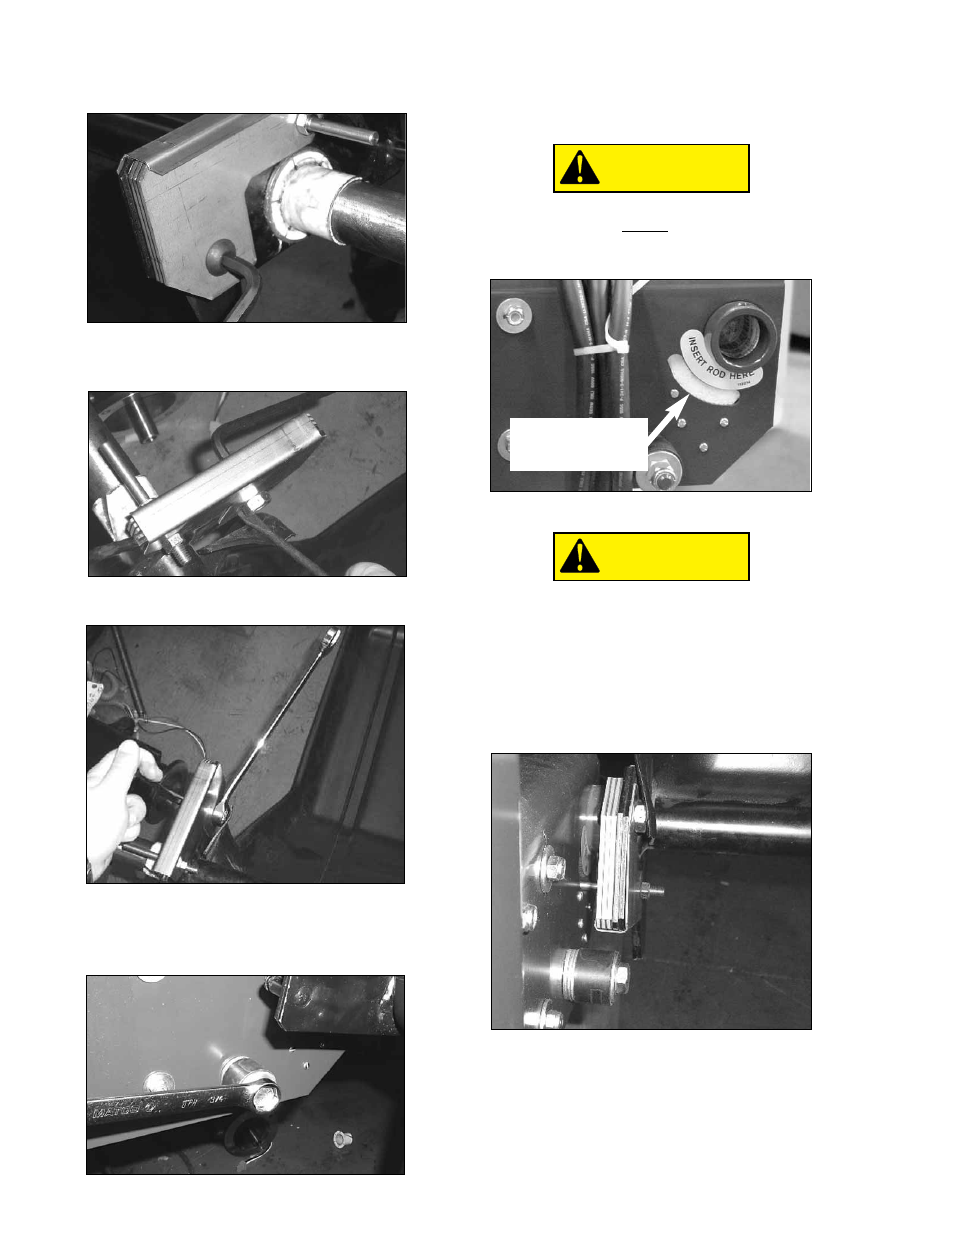
9. Slide the hood bar assembly, making sure the
hood switch actuator rod is aligned with the center of
the slot, back into the balancer and reinstall the
washer, lock washer, and cap.
Make sure the hood switch actuator rod is
inserted into the center of the slot. Failure
to do so will damage the pins in the switch
that will render the entire unit unusable.
10. Next, with the hood raised up reinstall the spring.
Be careful, the spring is under high tension.
Use help to hold the hood while attaching
the hood spring. Attaching the spring with-
out holding the hood in place may cause it
to snap open suddenly, resulting in personal
injury.
11. Raise the hood during a spin cycle to verify that
the hood interlock system is functioning properly.
CAUTION
CAUTION
8114324 00 06/05 Page 2 of 2
© COPYRIGHT 2005 ALL RIGHTS RESERVED PRINTED IN U.S.A.
Make sure Switch
Actuator Rod is aligned
in the middle of slot