COATS Kit 814325 Hood Stop Retro User Manual
Caution
8114324 00 06/05 Page 1 of 2
© COPYRIGHT 2005 ALL RIGHTS RESERVED PRINTED IN U.S.A.
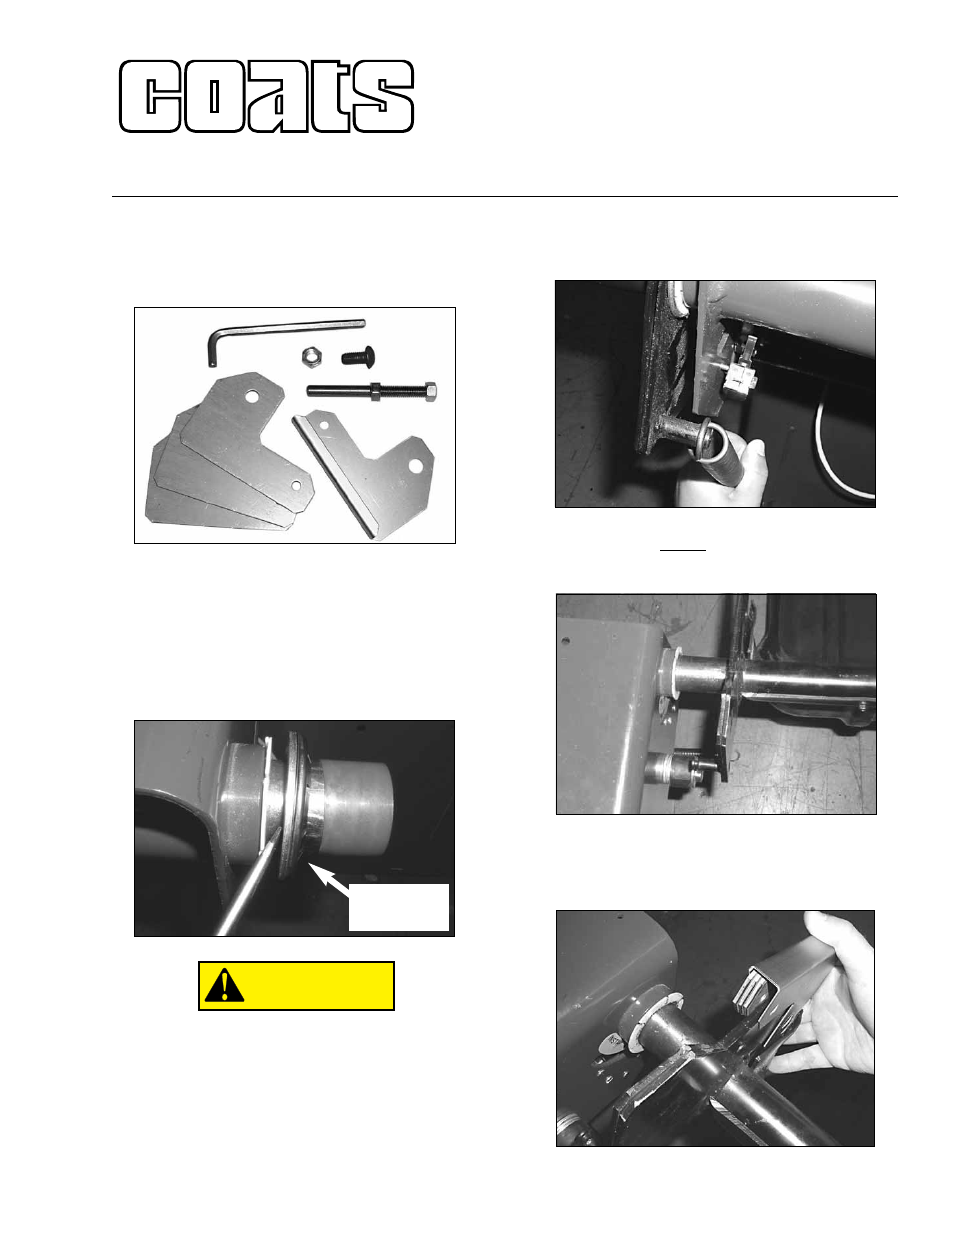
Kit Includes:
(3) Side Plates
(1) 1/2-inch Button Head Screw
(1) Cover Plate
(1) 1/2-inch Nut
(1) Actuator Rod
(1) 5/16-inch Allen Wrench
(2) Whiz Lock Nuts
Tools required (not included):
3/4-inch Wrench
Hammer
1/2-inch Wrench
Pliers
Instructions:
1. Using a screwdriver, remove the washer, lock
washer, and cap from the back of the hood support
bar. If necessary, tap the screwdriver with a ham-
mer.
Be careful, the spring is under high ten-
sion. Removing the spring without hold-
ing the hood in place may cause it to snap
open and drop suddenly, resulting in per-
sonal injury.
2. Remove the spring from the back of the hood
bar. While holding the hood with one hand, to pre-
vent it from dropping, remove the spring using your
other hand.
3. Slide hood and hood bar about 6-inches out from
the balancer. You do not need to remove the hood
from the balancer. Flip the hood over and rest it on
the floor.
4. Slide 3 side plates and 1 cover plate over the
cam, as shown. Secure the side plates to the cam
with the supplied actuator rod and nuts. Loosely
hand tighten.
CAUTION
Remove the
washer, lock
washer, and cap
H
Ho
oo
od
d S
Stto
op
p R
Re
ettrro
o
K
Kiitt 8
81
11
14
43
32
25
5
ffo
orr 9
95
50
0//1
10
05
50
0//1
10
02
25
5//1
10
05
55
5 S
Se
erriie
es
s W
Wh
he
ee
ell B
Ba
alla
an
nc
ce
errs
s
COATS, Inc. • Hennessy Industries • 1601 J.P. Hennessy Drive, LaVergne, TN 37086-3565
(800) 688-6359 • (615) 641-7533 • (615) 641-5104 FAX • www.ammcoats.com