It2000-ab, Setup & assembly instructions, 11 of 38 – BAND-IT IT2000-AB 1/4 Junior Tool User Manual
Page 11: 1/4” junior, Tool
Document # I17792 Rev G
© Copyright
BAND-IT-IDEX, Inc. 2009
All rights reserved
www.BAND-IT-IDEX.com
BAND-IT-IDEX, Inc.
A Unit of IDEX Corporation
4799 Dahlia Street Denver, CO 80216-0307 USA
P: 1-800-525-0758 F: 1-800-624-3925
11 of 38
IT2000-AB
1/4” Junior
®
Tool
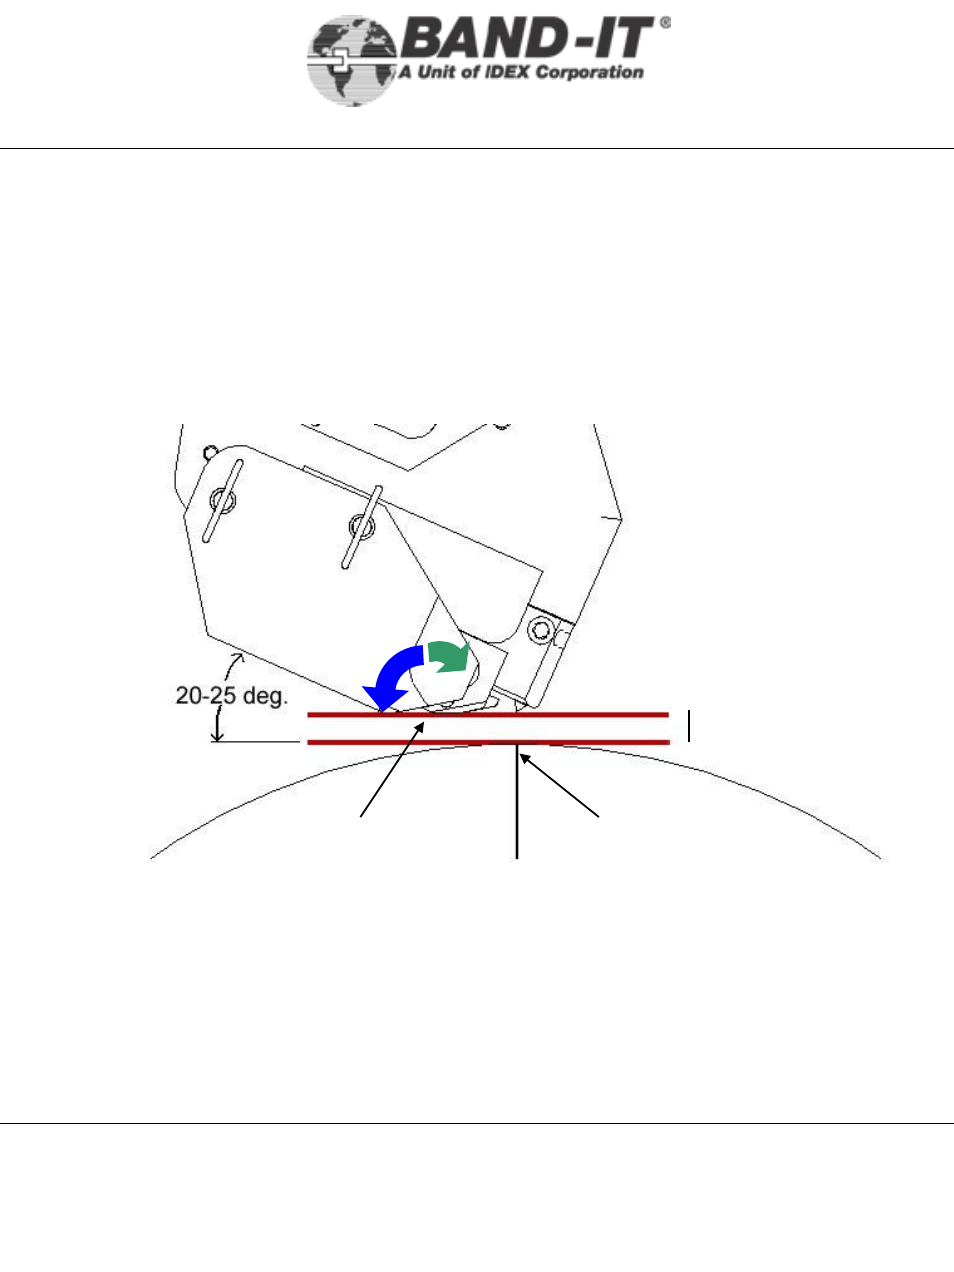
Part of insuring that the tool is producing a strong lock is making sure that it approaches
the application correctly and is fixed to allow repeatability. The tool should approach the
surface tangent to where the buckle of the band is to be applied. The tool should be
allowed to float 1/8” – 1/4” above the surface to allow the buckle to move to the proper
position for cut-off. Once the tool begins tensioning, the band will pull the tool down to
the surface.
Buckle Location
Pivot Point
As the band is tensioning, the tool may rotate clockwise up to 5 degrees about the pivot
point (Green Arrow). During the cut-off cycle, the tool must be allowed to rotate counter-
clockwise up to 35 degrees (Blue Arrow). Because of this movement, BAND-IT
recommends that the tool be mounted in a fixture that will provide adequate
rotation during both cycles.
1/8” – 1/4”
Setup &
Assembly
Instructions