Brake lathes, Warning – AMMCO 3860 Drum & Disc Brake Lathe User Manual
Page 19
AMMCO 3850, 3860 Brake Lathes • 13
Brake Lathes
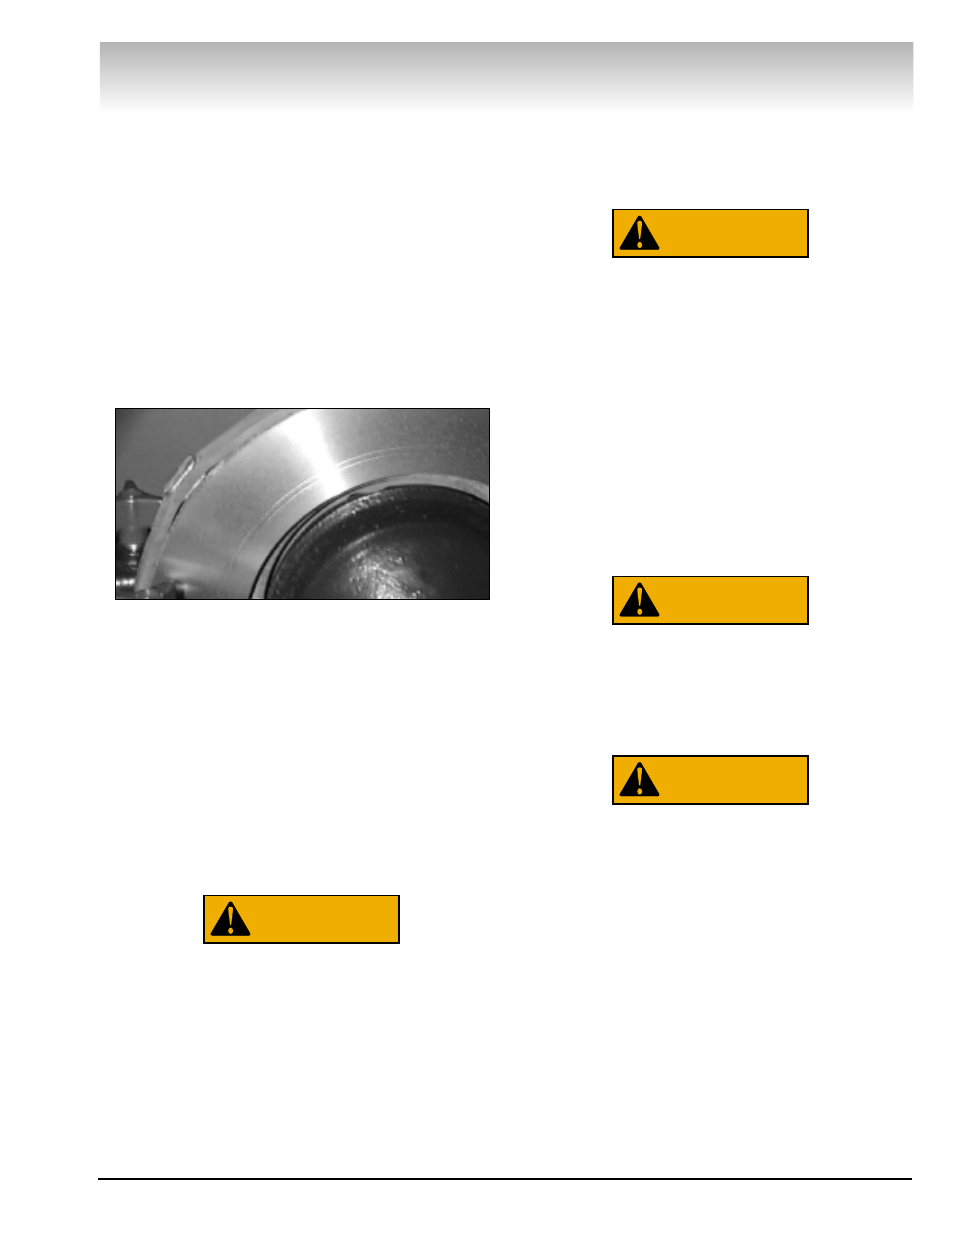
19. Turn the lathe on and move the tool bit in to the
rotor and make a second scratch cut. Back the tool bit
away and turn lathe off.
20. Inspect the scratch cuts.
If the cuts are side by side, the runout or wobble is
caused by the rotor condition. Use a dial indicator to
compare rotor runout with manufacturer’s specifica-
tions.
If the cuts are opposite each other (180° apart), the
rotor may not be mounted correctly. Remove the rotor
and examine the adapters for nicks, burrs, chips, dirt,
or rust. Inspect the rotor hub for loose or damaged
bearing cups. Clean, repair, remount, or replace as
necessary.
Figure 22 - Second Scratch Cut
21. Recheck the depth-of-cut collars that were set
to zero earlier. To compensate for runout, turn the
lathe on and move the tool bits in until they just just
scribe a line around the entire diameter. Depth-of-cut
collars should read zero. Reset as necessary.
22. Back the tool bits away from the rotor and turn
the lathe off. Turn the handwheel clockwise and move
the tool bits in towards the rotor hub.
Remember: The outside tool bit should reach all the
way in to just barely touch the rotor hat and the inside
tool bit should be positioned to clean the entire inner
surface.
Safety glasses, safety goggles, or face
shields must be worn during the recondi-
tioning process. Put them on before start-
ing the lathe.
23. Turn the lathe on. Use the handwheel in rotor
position to advance the outer tool bit in towards the
rotor to clean the rotor hat. Back the handwheel off a
half turn after hat is cleaned.
24. Dial both tool bit control knobs to zero and then
dial in an additional .005 inch minimum for positive
rake bits and .002 inch for negative rake bits depth-of-
cut. Lock them in place with the red lock knobs.
Important: Read and understand the description of
Negative and Positive rake bits on page 3.
Never operate the lathe with a worn or bro-
ken tool bit. This may cause the tool bit
holder to contact the drum or rotor surface.
The drum or rotor, as well as the tool itself,
may be damaged. Replace worn or broken
tool bits immediately.
25. Pull the engagement handle up to engage the
feed drive and move the tool bits outward across the
rotor surfaces. When the tool bits clear the edge of
the rotor, disengage the feed drive, turn the lathe off
and inspect the surfaces.
26. If either surface has not been completely
reconditioned by this first cut, reposition the tool bits
near the rotor hub, select new depth-of-cut, and make
a second cut across the rotor.
Keep rags and loose clothing away from an
operating lathe. Never wear gloves when
operating a lathe.These items may become
entangled in the arbor or spindle and pull
the operator into the lathe, causing per-
sonal injury.
Never operate the lathe without the pulley
cover securely in place over the drive belt
and pulleys. Operating the lathe without
this cover in place may cause `personal
injury.
WARNING
WARNING
WARNING
WARNING