Tj 231 cable shifter – Advance Adapters 715543231 User Manual
Page 7
ADVANCE ADAPTERS INC.
P/N: 715543-231
P.O. Box 247, 4320 Aerotech Center Way
New Item: (10/10)
Paso Robles, CA 93447
PAGE 7 of 8
Telephone: (800) 350-2223
Fax: (805) 238-4201
Page Rev. Date:
10-11-10
SPECIAL NOTE:
The components packaged in this kit have been assembled and machined for specific type of conversions. Modifications to any of the components
will void any possible warranty or return privileges. If you do not fully understand modifications or changes that will be required to complete your conversion, we
strongly recommend that you contact our sales department for more information. This instruction sheet is only to be used for the assembly of Advance Adapter
components. We recommend that a service manual pertaining to your vehicle be obtained for specific torque values, wiring diagrams and other related equipment.
These manuals are normally available at automotive dealerships and parts stores.
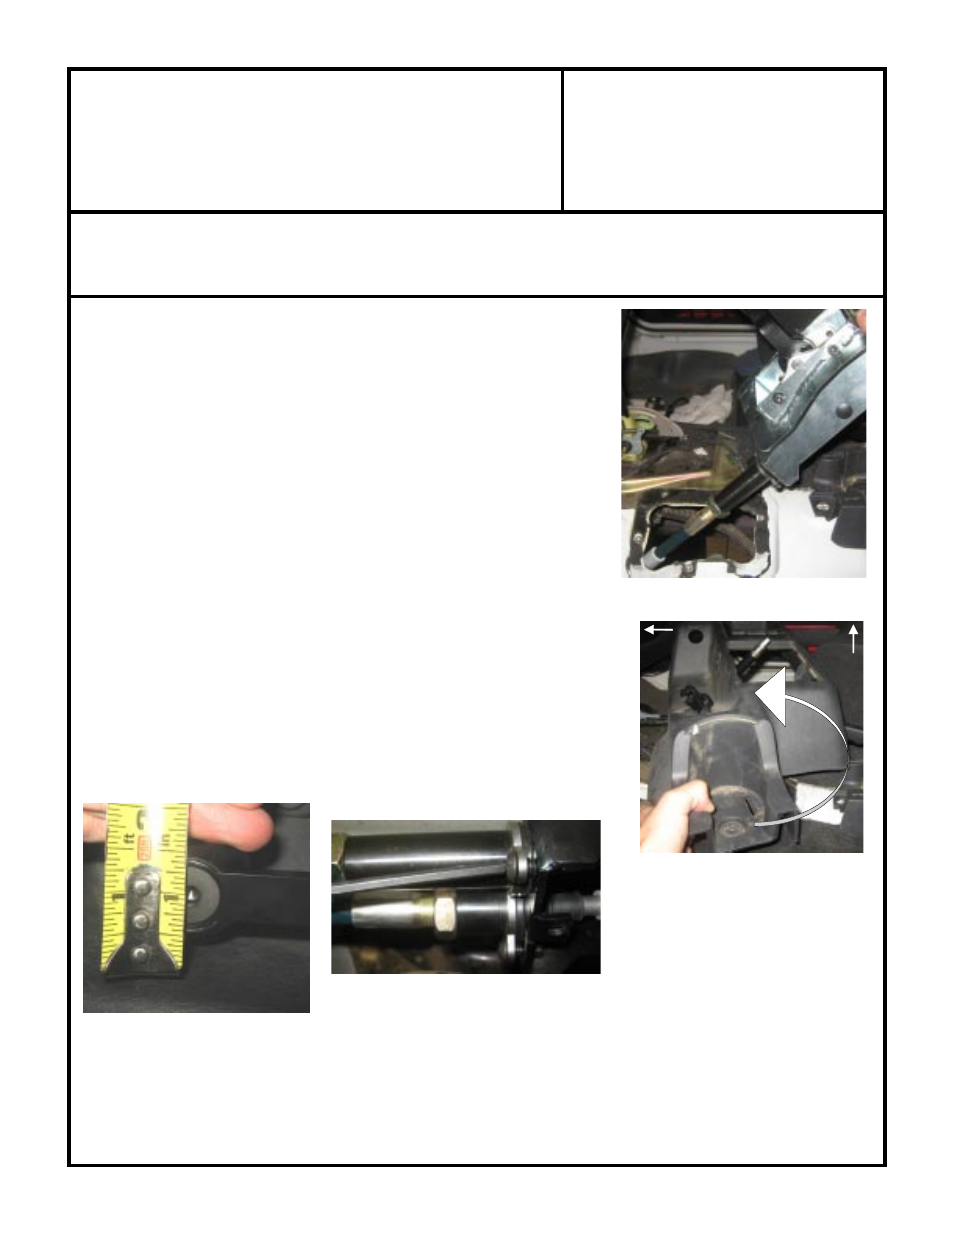
16. Move the transmission shifter into the "Neutral" position with the new
handle in the vertical position. Point the front of the console towards
the passenger side, then rotate the console counterclockwise as you
maneuver it down over the handle and transmission shifter. Bolt the
console down using a 10mm socket and the two bolts removed
earlier. Install the shift indicator back on to the console making sure to
plug in the indicator bulb before snapping it back in to place. (See
Figure 17)
17. Install the new shift knob using the supplied 3/8-16x1-1/4" flat head
cap screw.
Shifter Box Assembly End Cable Adjustment:
1.
Rotate the transfer case cable barrel until the center of the knob is 1"
from the console when in its lowest position. (See Figure 21)
2.
Tighten the three 1/4-28x5/8" bolts that retain the cable barrel retain-
ing clip. (See Figure 22)
3.
Using a 15/16" wrench, tighten the 5/8" jam nuts on the shift cables.
4.
Bolt on the bottom cover of the shifter box using the supplied 1/4-
20x3/8" button head cap screws. NOTE: Make sure you start all 3
before final tightening. Use RTV for a water tight seal.
TJ 231 CABLE SHIFTER
Shifter Box Assembly
Figure 17: Console Install
Passenger Door
dash
Figure 21: 1" from console
Figure 22: Tighten Retaining Clip