Danger – Snorkel S3010E User Manual
Page 29
Chapter 8 – Prestart Inspection
S3010E - 514226-000-ANSI
25
3. Make sure there is nothing in the way to obstruct the
platform when it lowers. Push downward on the lever
to lower the platform.
4. Make certain the lever/handle is fully released and
the emergency lowering valve is fully closed before
operating the aerial platform.
Structures
Visually inspect all weldments and related components.
It is important to inspect the fasteners that connect the
components.
Weldments
To inspect the weldments:
1. Visually inspect all weldments for abnormal wear,
abrasion, or deformation that could cause interfer-
ence between moving parts.
2. Inspect the welds on the structural components. The
area to be inspected should be clean and free of dirt
and grease.
3. Look for visible cracks in the welds and at the weld
to parent material joints. A bright light may be used
to provide adequate visibility of the inspection area.
4. Pay close attention to welds in areas where changes
in cross section take place and near the attachment
points of highly loaded components.
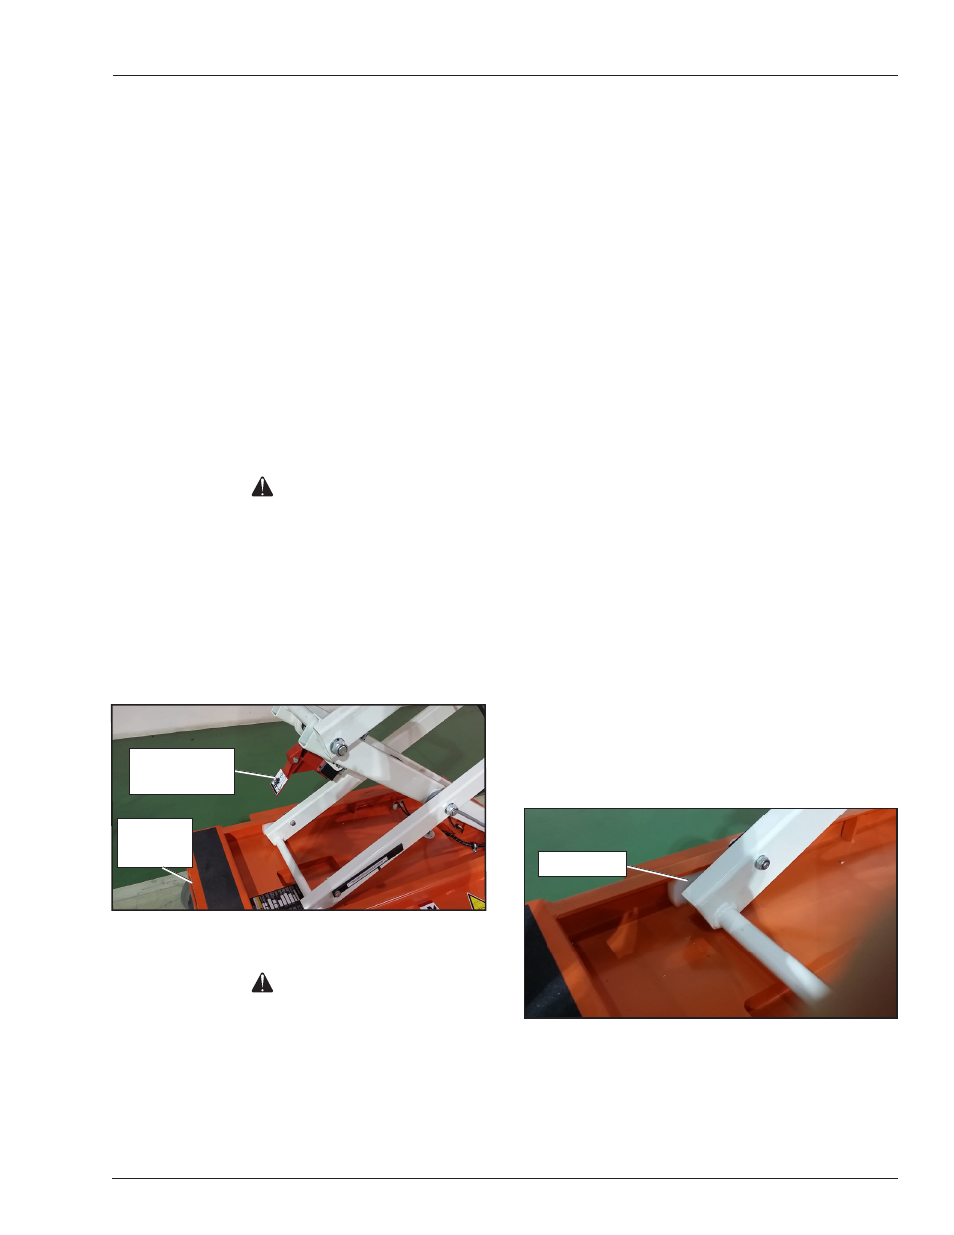
Slide Blocks
To inspect the slide blocks:
1. Visually inspect the scissors arm slide blocks (refer
to Figure 8.12). They must be free to move without
obstruction. There is one slide block on each side of
the chassis.
Figure 8.12 – Front of Chassis
Emergency Stop
To test the emergency stop button from the lower
controls:
1. Push the emergency stop button inward to turn off
electrical power.
2. Test the lower control functions to make sure they do
not operate with the emergency stop in this position.
Lowering Alarm
To test the lowering alarm from the lower controls:
1. Raise the platform approximately 6′ (1.8 m).
2. Lower the platform and make sure the alarm sounds.
Emergency Lowering System
Use the following procedure to test the emergency lower-
ing system:
Danger
Pinch points may exist between moving components.
Death or serious injury will result from becoming
trapped between components. Stand clear of moving
components while test operating the machine.
1. Use the lower controls, fully raise the platform. Push
the emergency stop button inward.
2. Locate the emergency lowering control. The lowering
lever is at the front of the machine located between
the 1st and 2nd Scissors (refer to Figure 8.11).
Figure 8.11 – Emergency Lowering Control
Danger
Pinch points may exist between moving components.
Death or serious injury will result from becoming
trapped between components. Make sure all person-
nel stand clear while lowering the platform with the
emergency lowering lever.
Emergency
Lowering Lever
Slide Block
Front of
machine