Snorkel SL30SL-sn13772-49999 User Manual
Page 13
Seite 46
Betriebsanleitung
060588-026 SL26/30SL
Schleppen oder Windenbetrieb
S
CHLEPPEN ODER
W
INDENBETRIEB
Die folgenden Maßnahmen sind nur durchzuführen, wenn die Maschine nicht mit eigener Kraft fahren kann und
örtlich bewegt oder mit einer Winde vom Transportfahrzeug gezogen werden muss (siehe „Transport der
Arbeitsbühne“ auf Seite 48).
F
R E I G A B E D E R
F
E S T S T E L L B R E M S E
( A
B B I L D U N G
4 )
Folgende Schritte nur durchführen, wenn die Maschine nicht mit eigenem Antrieb arbeitet und bewegt oder
bergauf bzw. zum Transport auf einem Anhänger gezogen werden muss.
1. Nadelventil durch Rechtsdrehung des Knopfes schließen.
2. Bremslösepumpe so lange betätigen, bis sich die Feststellbremse löst und die Räder drehen lassen.
3. Die Maschine lässt sich dann durch Schieben oder Ziehen rollen.
4. Vor Inbetriebnahme der Maschine unbedingt das Nadelventil öffnen und prüfen, dass die Bremsen im Eingriff
sind.
W A R N U N G
!
!
Arbeitsbühne niemals bei stillgelegten Feststellbremse in Betrieb nehmen. Schwere Verletzungen oder Schäden
können die Folge sein.
Die Bremsen niemals lösen, wenn die Maschine auf einer Böschung steht.
Die Räder mit Keilen sichern, bevor die Feststellbremse gelöst wird.
Maschine vor Freigabe der Feststellbremse zum Abschleppen anhängen.
Beim Schleppen niemals schneller als 0,3 m/s (1 ft./s) fahren.
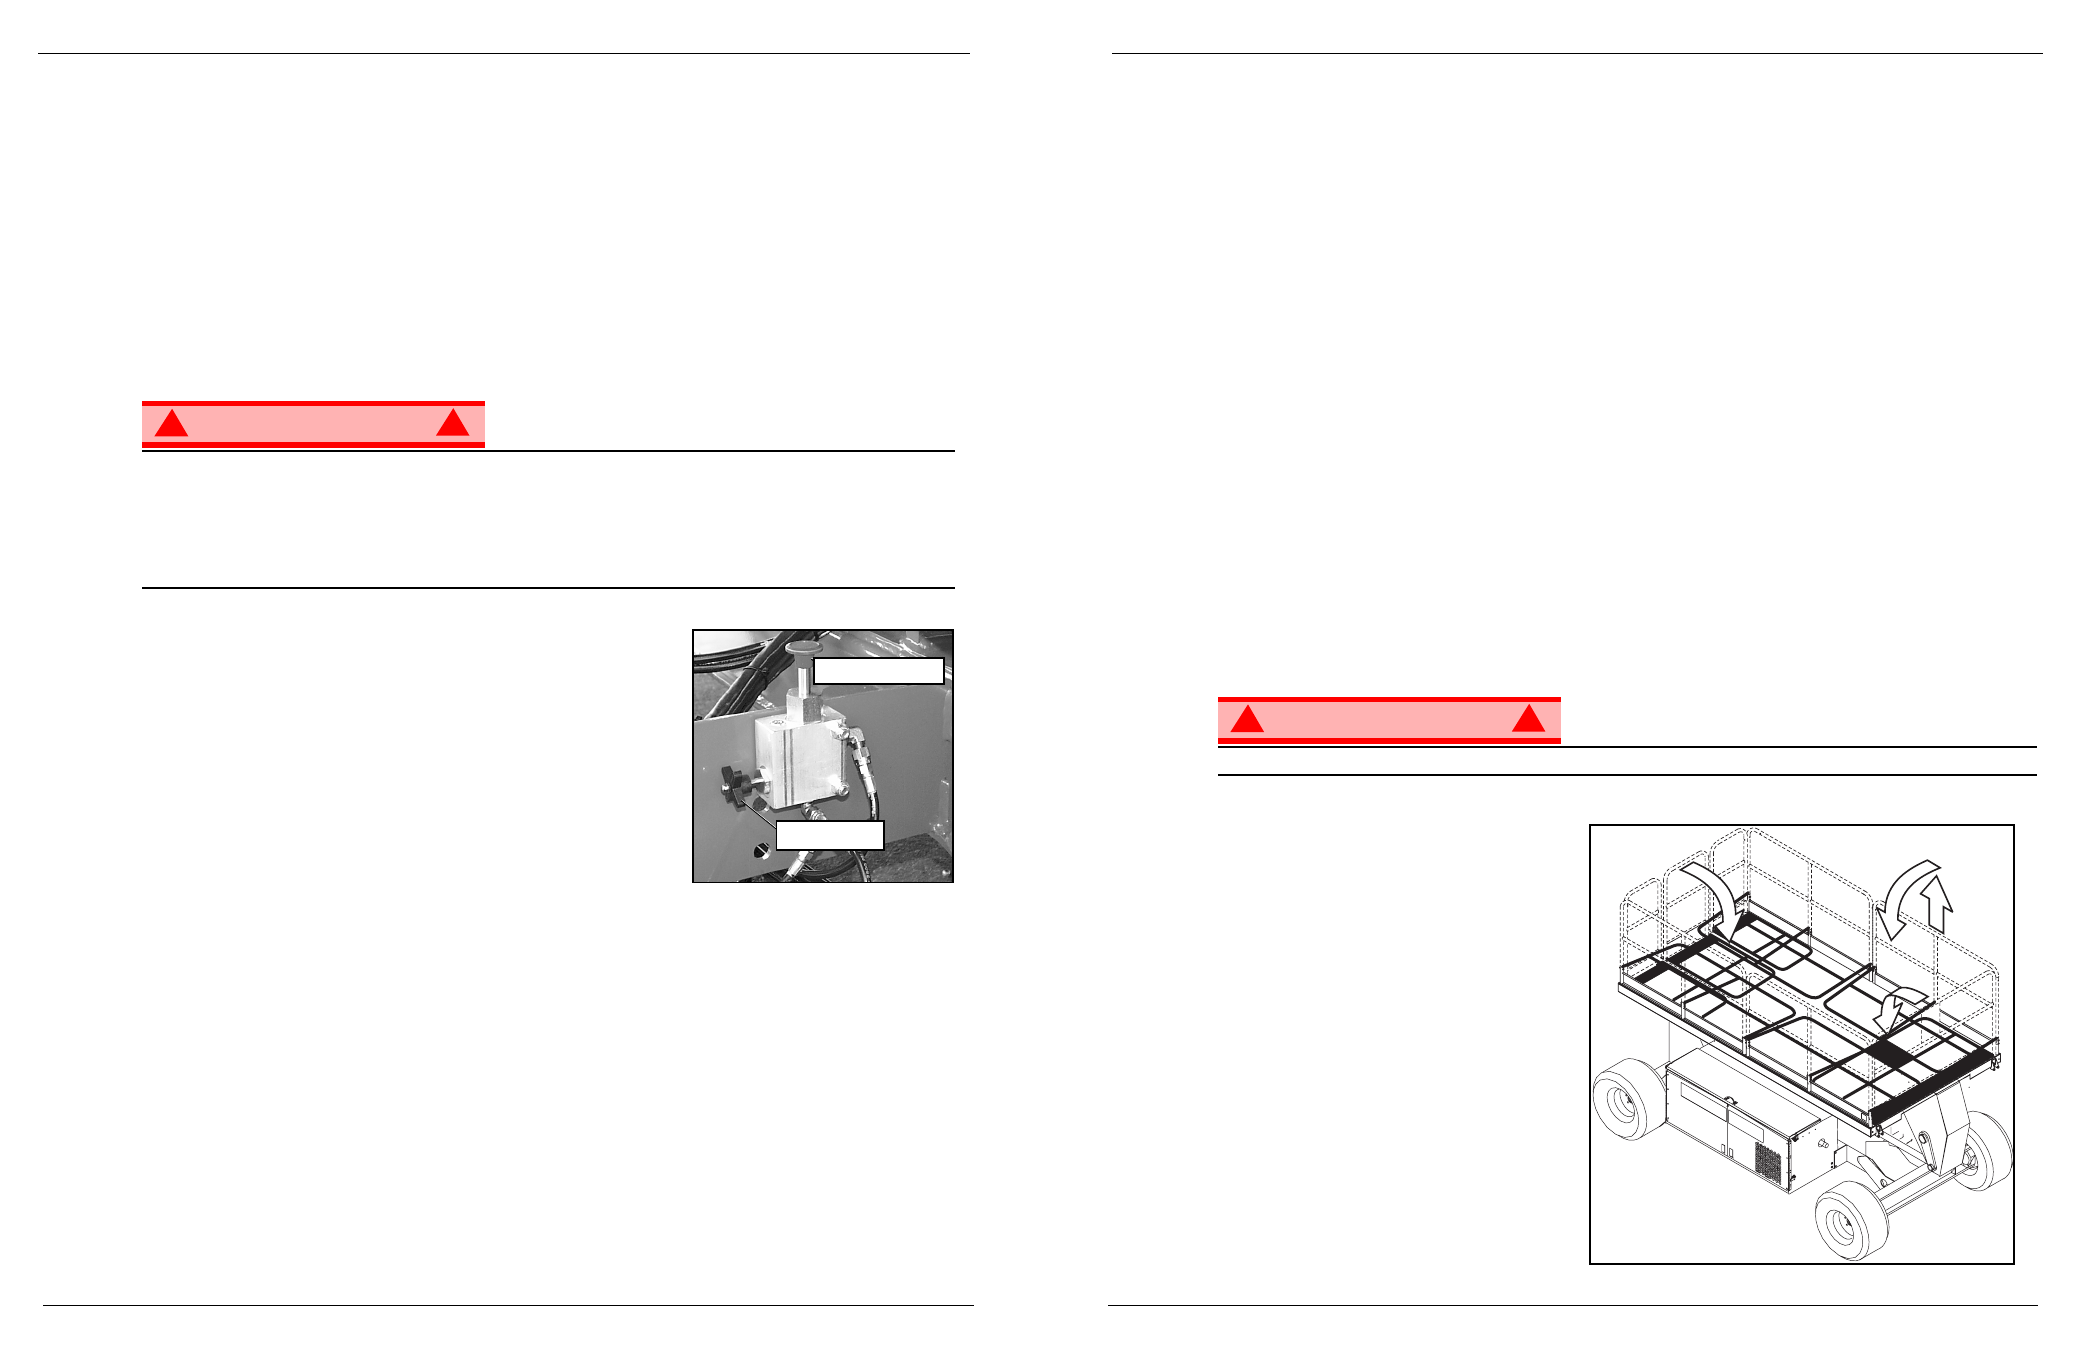
Abbildung 4:
Bremslösepumpe
N
ACH TÄGLICHEM
G
EBRAUCH
1. Sicherstellen, dass die Arbeitsbühne vollständig abgesenkt ist.
2. Maschine auf ebenem Boden abstellen, vorzugsweise überdacht, und gegen mutwillige Beschädigung,
Eingriffe durch Kinder und unbefugte Inbetriebnahme sichern.
Schlüsselschalter auf AUS drehen und Schlüssel abziehen, um eine unbefugte Inbetriebnahme zu verhindern.
Bremslösepumpe
Nadelventil
Fold Down Guardrails
060588-026 SL26/30SL
Operator Manual
Page 11
F
OLD
D
OWN
G
UARDRAILS
This procedure is only for passing through doorways. Guardrails must be returned to proper position
before using the machine.
F
O L D
D
O W N
P
R O C E D U R E
( F
I G U R E
5 )
NOTE: When performing the following procedures retain all fasteners.
1. Place controller on platform.
2. Starting at the front of the platform, remove nuts, bolts and washers from the top of the front guardrail.
Fold the front guardrail down onto the platform.
3. Close and latch the gate.
4. Remove nuts, bolts and washers from the top of the rear guardrail. Fold the rear guardrail down onto the
platform being careful to keep gate latched at all times.
5. Remove nuts, bolts and washers from the top of the side guardrails and from the slideout deck midrail.
Lift up and fold one side guardrail in so it rests on the deck. Repeat with other side guardrails.
E
R E C T I O N
P
R O C E D U R E
1. Raise side guardrails making sure each is pushed down to secure the guardrail in the vertical position.
2. Install bolts, washers and nuts between the side guardrails, tighten securely.
3. Raise rear guardrail assembly, aligning holes and install bolts, washers and nuts. Tighten securely.
4. Raise front guardrail, aligning holes and install bolts, washers and nuts. Tighten securely.
5. Hang controller from front guardrail.
6. Before operating work platform check that all fasteners are in place and properly torqued (See Specifica-
tions).
W A R N I N G
!
!
Before entering the work platform, guardrails must be securely fastened in their proper position.
Figure 5:
Fold down guardrails