Apple iWeb User Manual
Page 29
Chapter 2
Inspectors and Other Windows at a Glance
29
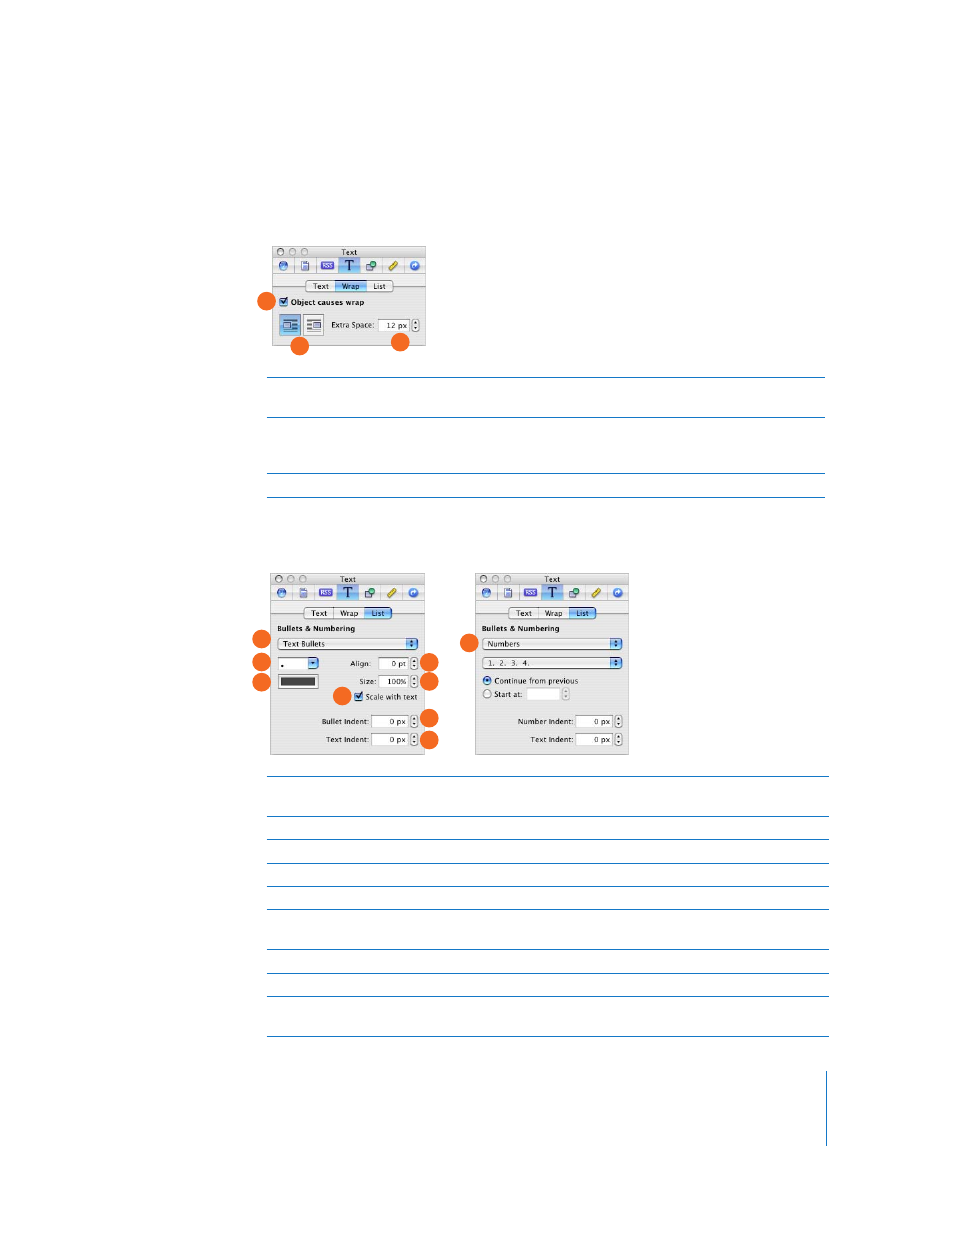
The Wrap Pane (Text Inspector)
Use the Wrap pane to adjust the way text wraps around an inline object, such as a
shape or photo.
The List Pane (Text Inspector)
Use the List pane to create and modify bulleted or numbered lists.
A
“Object causes wrap” checkbox: Select to make text wrap around the selected object.
Note: Only inline objects can have text wrapped around them.
B
Text wrap alignment buttons: Click to select how you want the text to wrap around the object.
The first button wraps text to the right of the object. The second button wraps text around the
left side of the object.
C
Extra Space field: Set how much space to leave between the object and the surrounding text.
A
B
C
A
Bullets & Numbering pop-up menu: Choose the bullet type (regular text bullets or an image)
or choose to use numbers. If your list uses numbers, you see different options (see I, above).
B
Bullet style pop-up menu: Choose a bullet or type a character (or characters) to use as a bullet.
C
Bullet color well: Click to change the bullet color.
D
Align field: Set the vertical alignment of a bullet relative to its text.
E
Size field: Set the bullet size.
F
“Scale with text” checkbox: Select to maintain the bullet-to-text ratio specified in the Size field,
even if you change the font size.
G
Bullet Indent field: Set the distance the bullet indents. (Note: “px” means pixels.)
H
Text Indent field: Set the distance between the bullet and its text.
I
Number controls: If your list uses numbers instead of bullets, you can choose the number style
from the pop-up menu, and indicate when to start a new list.
A
B
C
D
E
F
G
H
I