Prepare to install kit – OR-Fab 84450 JEEP CHEROKEE XJ QUARTER ARMOR WITH RAIL User Manual
Page 2
2
JEEP XJ Armor Kit
Prepare to Install Kit
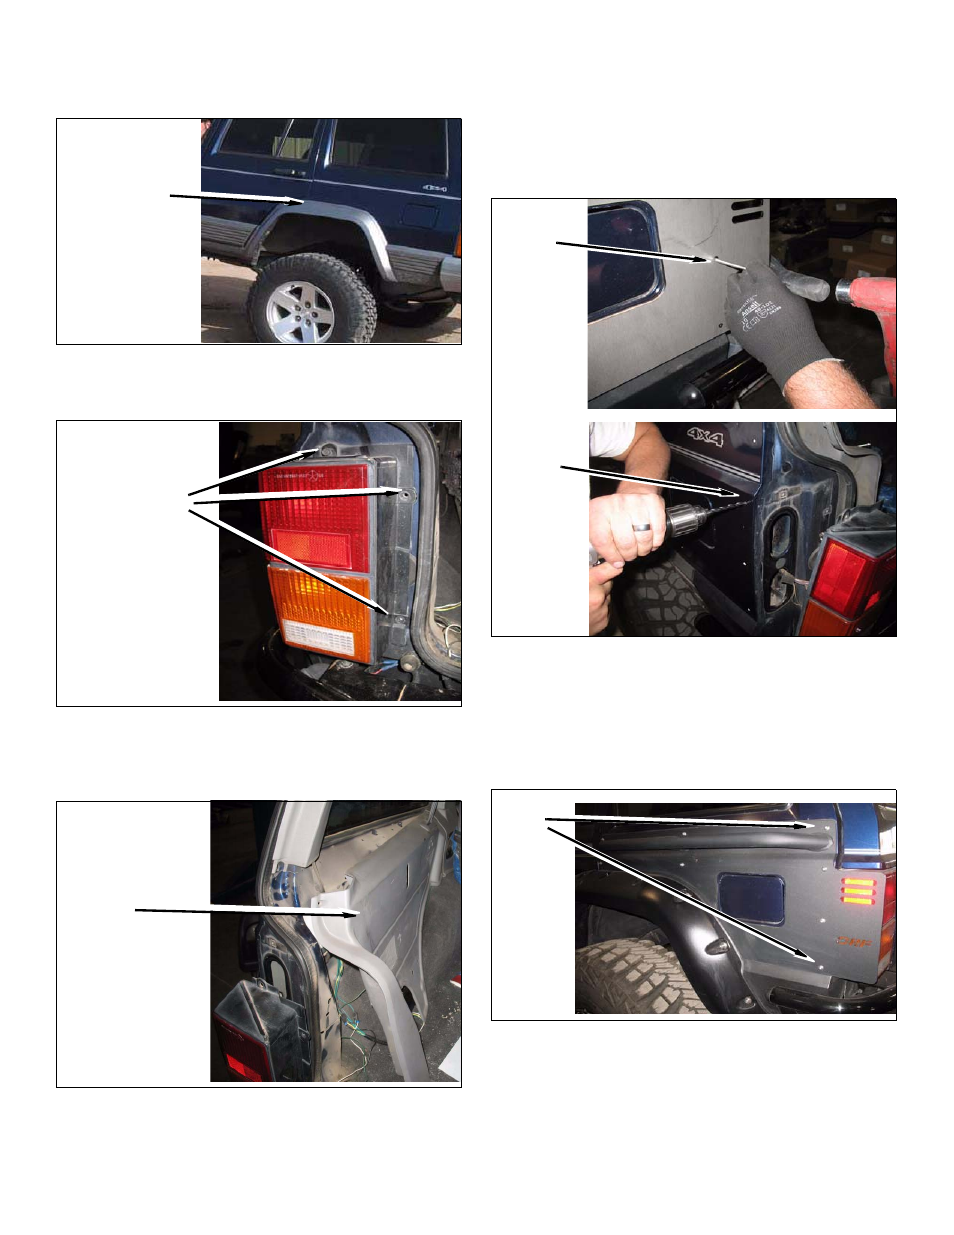
1. Remove rear fender flare from rear quarter panels.
2. Remove three OEM bolts from Drivers side tail
lamp. Note: Only ‘96 or earlier models need to have
tail lamp removed.
3. Remove several screws or clips from inner panel
from cargo area and remove cargo panel. Doing so
will give you access to back side of rear quarter
pannel. .
4. Prepare mounting points.
Remove Fender
Flares
Remove Bolts
From Tail Lamp
Remove
Cargo
Panel
a. Using an assistants, hold kit Armor in place and
mark the 11 holes for each panel. NOTE: Be
sure bend lines match up with kit Armor bend
lines, also marks are centered in Armor holes.
Use center punch to mark your holes.
b. Drill all marked holes to 11/32”. DO NOT drill
deeper then 1” anywhere.
c. After you have drilled your quarter panel, use an
assistant to hold kit Armor in place as you use
kit 5/16” hardware to secure kit Armor to
quarter pannel. Note: There is a slight bow in
the quarter panel, be sure that you install kit
5/16” hardware in every mounting hole before
tightening your panel. .
d. Aligh kit Armor and tighen all kit 5/16” hardware
at this time.
e. Follow steps 1-3 in reverse order at this time.
Note: Some trimming to fender flare may be
required for proper fitment.
Mark
Quarter
Pannel
Drill 11/32”
Holes
Bolts