Bacharach Fyrite INSIGHT User Manual
Page 12
Instruction 24-9460
18
Fyrite
®
INSIGHT
Instruction 24-9460
19
Fyrite
®
INSIGHT
NOTE:
The default CAL Reminder period is set to NEVER.
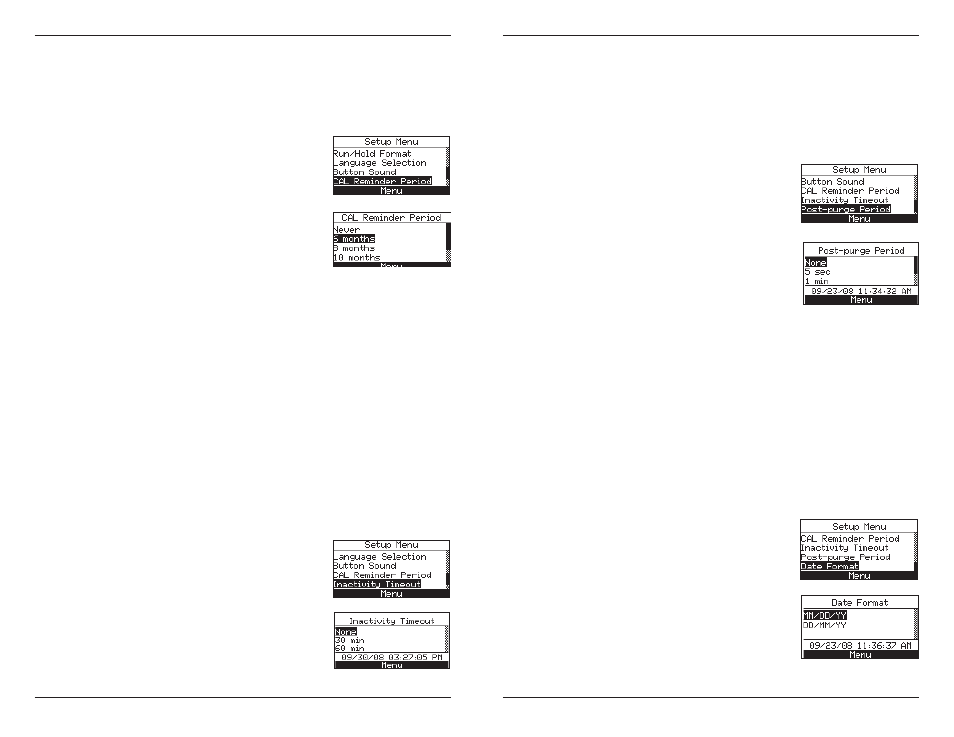
Set the calibration reminder period as follows:
1. Enter the SETUP MENU per Section 3.5.1. If necessary, press ESC
until MENU appears above F2.
2. Use the ▲▼ buttons to select CAL RE-
MINDER PERIOD. Press ENTER to dis-
play the Cal Reminder Period Menu.
3. Use the ▲▼ buttons to select the desired
time period.
4. Press ENTER to save selection and return to
the SETUP MENU or ESC to revert to the
previous setting.
NOTE:
The date and time settings must be correct to get ac-
curate cal reminders.
3.5.13 Inactivity Timeout
The analyzer can be placed in an inactivity timeout period of None, 30 or
60 minutes. With this time period set the analyzer will automatically shut
off if there have been no button pushes made in the set period of time. The
analyzer will not turn off if the CO value is greater than 50 ppm or the O2
value is less than 16%.
NOTE:
The default set time is NONE which will not allow the ana-
lyzer to automatically turn off.
Set the Inactivity Timeout Period as follows:
1. Enter the SETUP MENU per Section 3.5.1. If necessary, press ESC
until MENU appears above F2.
2. Use the ▲▼ buttons to select INACTIVITY
TIMEOUT. Press ENTER to display the
Inactivity Timeout Menu.
3. Use the ▲▼ buttons to select the desired
timeout period.
4. Press ENTER to save the selection and re-
turn to the SETUP MENU or ESC to revert
to the previous setting.
3.5.14 Post-Purge Period
The analyzer can be setup to purge the sensors following the combustion
test. It can be programmed to purge for None, 5 seconds, 1, 5, or 10 min-
utes.
Set the Post-Purge Period as follows:
1. Enter the SETUP MENU per Section 3.5.1.
If necessary, press ESC until MENU ap-
pears above F2.
2. Use the ▲▼ buttons to select POST-PURGE
PERIOD. Press ENTER to display the Post-
Purge Period Menu.
3. Use the ▲▼ buttons to select the desired
time period.
4. Press ENTER to save the selection and re-
turn to the SETUP MENU or ESC to revert
to the previous setting.
3.5.15 Date Format
The date format options and the clock settings are interdependent.
MM/DD/YY format - Used with a 12 hour time clock. This set up menu
includes an AM/PM option.
DD/MM/YY format - Used with a 24 hour time clock.
Change the date format as follows:
1. Enter the SETUP MENU per Section 3.5.1.
If necessary, press ESC until MENU ap-
pears above F2.
2. Use the ▲▼ buttons to select DATE FOR-
MAT. Press ENTER to display the Date
Format Menu.
3. Use the ▲▼ buttons to select the desired
date format.
4. Press ENTER to save the selection and re-
turn to the SETUP MENU or ESC to revert
to the previous setting.