Din rear-mount 25, Fixing the front panel 25, Installation – Pioneer AVIC-X3 User Manual
Page 25: Din rear-mount, Fixing the front panel, English
182
53
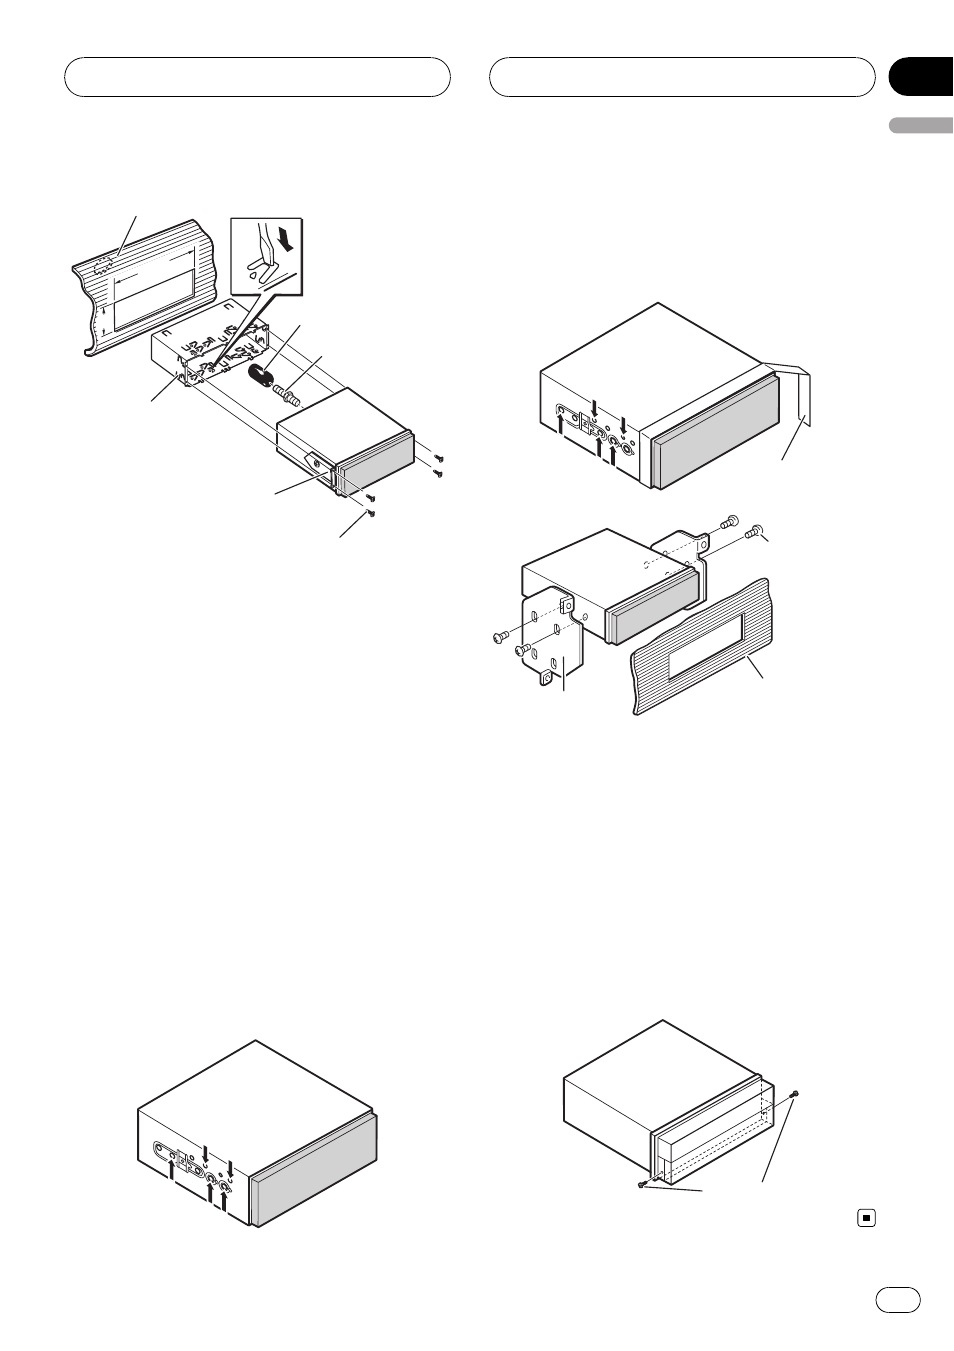
Rubber bush
Dashboard
Side bracket
Screw (2 mm 3 mm)
Holder
Double-ended
screw
! When using the side brackets (large), reat-
tach the frame.
DIN Rear-mount
Installation using the screw holes on
the side of the unit
% Fastening the unit to the factory radio-
mounting bracket.
Select a position where the screw holes of the
bracket and the screw holes of this product
become aligned (are fitted), and tighten the
screws at 2 places on each side. Use any of
screws (4 mm × 3 mm), binding screws (5 mm
× 6 mm) or flush surface screws (5 mm ×
6 mm), depending on the shape of the screw
holes in the bracket.
*1 Use screws (4 mm × 3 mm) only.
*1
*1
! When installing in a shallow space, use the
following screw holes. In this case, stick
conceal tape on parts that protrude from
the dashboard.
Conceal tape
*1
*1
Dashboard or
Console
Factory radio
mounting bracket
Binding screw
(5 mm 6 mm)
Fixing the front panel
If you do not operate the removing and attach-
ing the front panel function, use the supplied
fixing screws to fix the front panel to the dis-
play unit.
% Fix the front panel to the display unit
using the fixing screws after removing the
frame.
Fixing screws
Installation
Engb
25
English
Section
04