Lenovo ThinkServer TD350 User Manual
Page 32
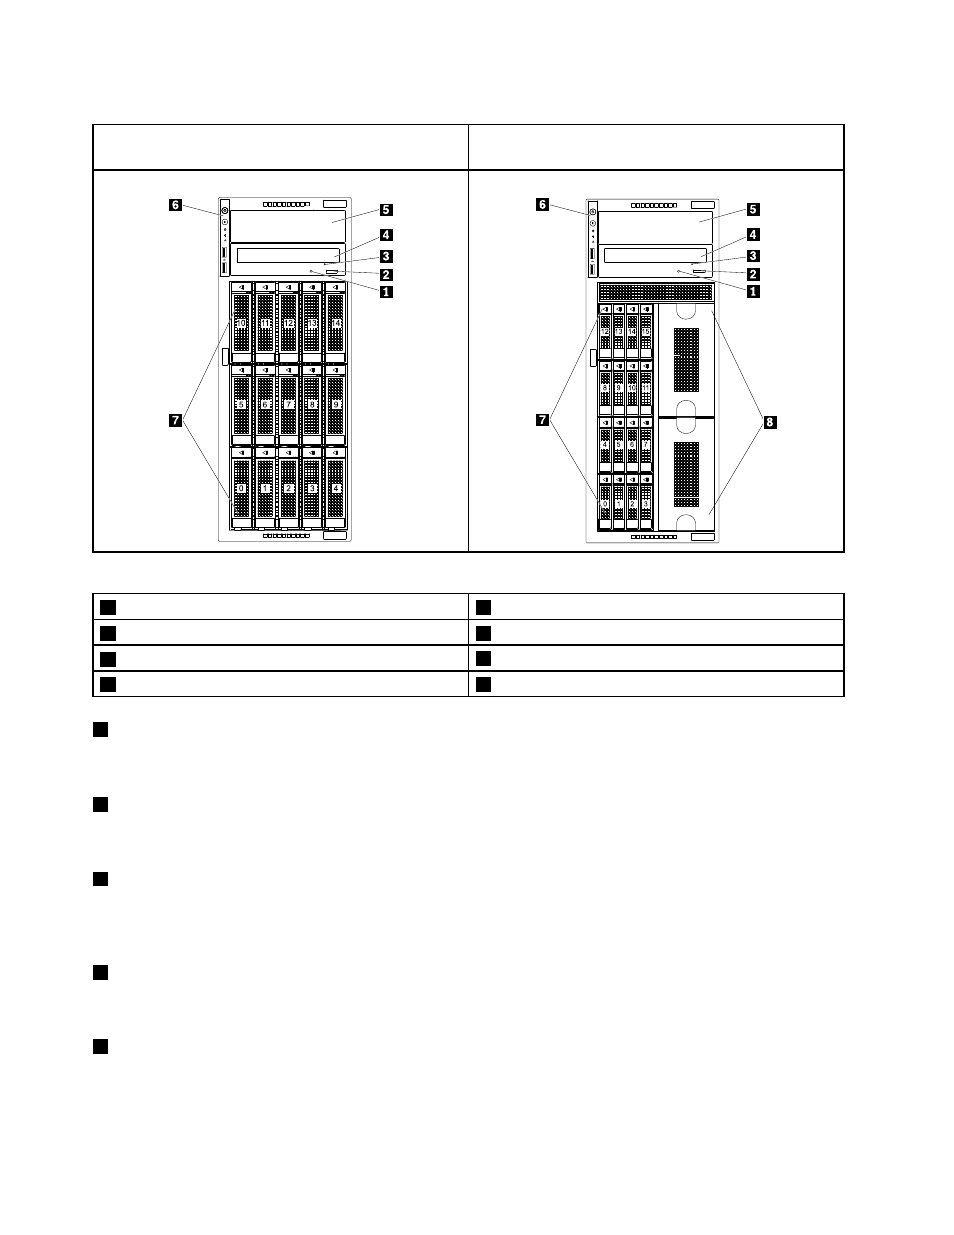
Front view of server models with fifteen
3.5-inch-drive bays
Front view of server models with sixteen
2.5-inch-drive bays
Figure 3. Front view of the server
1
Optical-drive status LED
2
Optical-drive eject/close button
3
Optical-drive manual-eject hole
4
Optical-drive bay 1
5
Optical-drive bay 2
6
Front panel
7
Storage-drive bays
8
Metal protective shields
1
Optical-drive status LED
The optical-drive status LED is blinking in green when the optical drive is working or in the POST process.
2
Optical-drive eject/close button
Press this button to eject or close the optical drive when the server power is on.
3
Optical-drive manual-eject hole
Insert a straightened paper clip into the optical-drive manual-eject hole to eject the disc tray when the
eject/close button does not work.
4
Optical-drive bay 1
Your server comes with either an optical drive or a tape drive installed in the 5.25-inch optical-drive bay 1.
5
Optical-drive bay 2
The 5.25-inch optical-drive bay 2 is for a secondary optical drive. Some models have a secondary optical
drive installed. For more information, see “Installing or replacing an optical drive” on page 109.
18
ThinkServer TD350 User Guide and Hardware Maintenance Manual