Replacing the easy-swap-drive module – Lenovo ThinkServer TD350 User Manual
Page 164
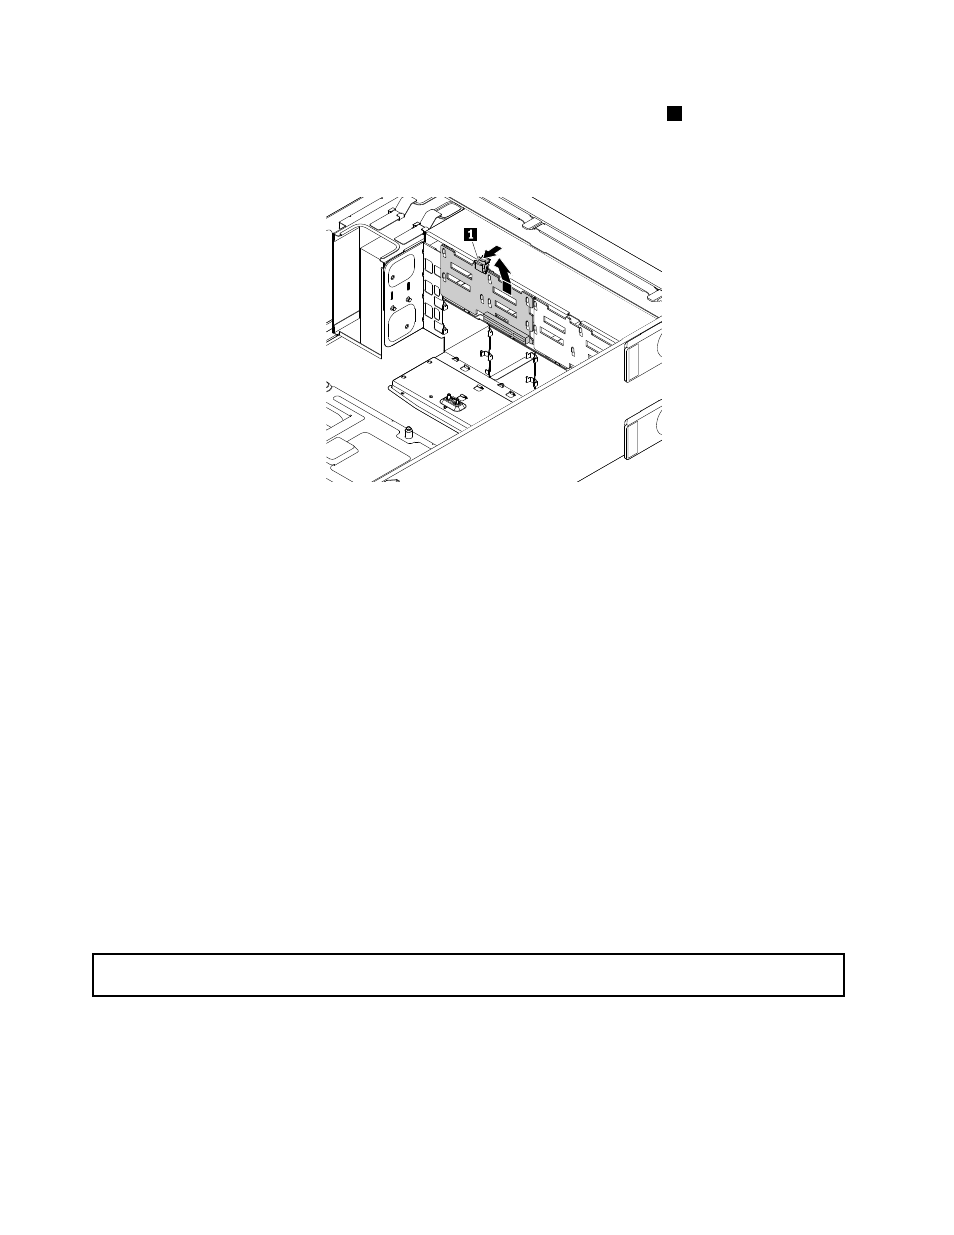
• For the server models with 2.5-inch-drive backplane, press the release tab
1
and gently lift the
2.5-inch-drive backplane a little bit upward so that it is released from the hooks on the chassis. Then,
carefully remove the 2.5-inch-drive backplane out of the chassis.
Figure 116. Removing the 2.5-inch-drive backplane
9. Touch the static-protective package that contains the new backplane to any unpainted surface on the
outside of the server. Then, remove the new backplane from the package.
Note: Carefully handle the backplane by its edges.
10. Position the new backplane on the drive cage so that the holes in the new backplane are aligned with the
corresponding hooks on the chassis. Then, slightly press the new backplane until it snaps into position.
11. Reinstall all the hot-swap storage drives and dummy trays. See “Installing or replacing a hot-swap
internal storage drive” on page 112.
12. Reinstall the AnyRAID adapter or the pass-through board. See “Replacing the AnyRAID adapter or
the pass-through board” on page 143.
13. Refer to your note to reconnect the cables to the backplane.
14. If you are instructed to return the old backplane, follow all packaging instructions and use any packaging
materials that are supplied to you for shipping.
What to do next:
• To work with another piece of hardware, go to the appropriate section.
• To complete the replacement, go to “Completing the parts replacement” on page 164.
Replacing the easy-swap-drive module
Attention: Do not open your server or attempt any repair before reading and understanding “Safety information”
on page iii and “Guidelines” on page 63.
This topic applies only to server models that have easy-swap internal storage drives installed.
Before you begin, print all the related instructions or ensure that you can view the PDF version on another
computer for reference.
150
ThinkServer TD350 User Guide and Hardware Maintenance Manual