Lenovo ThinkServer TD350 User Manual
Page 105
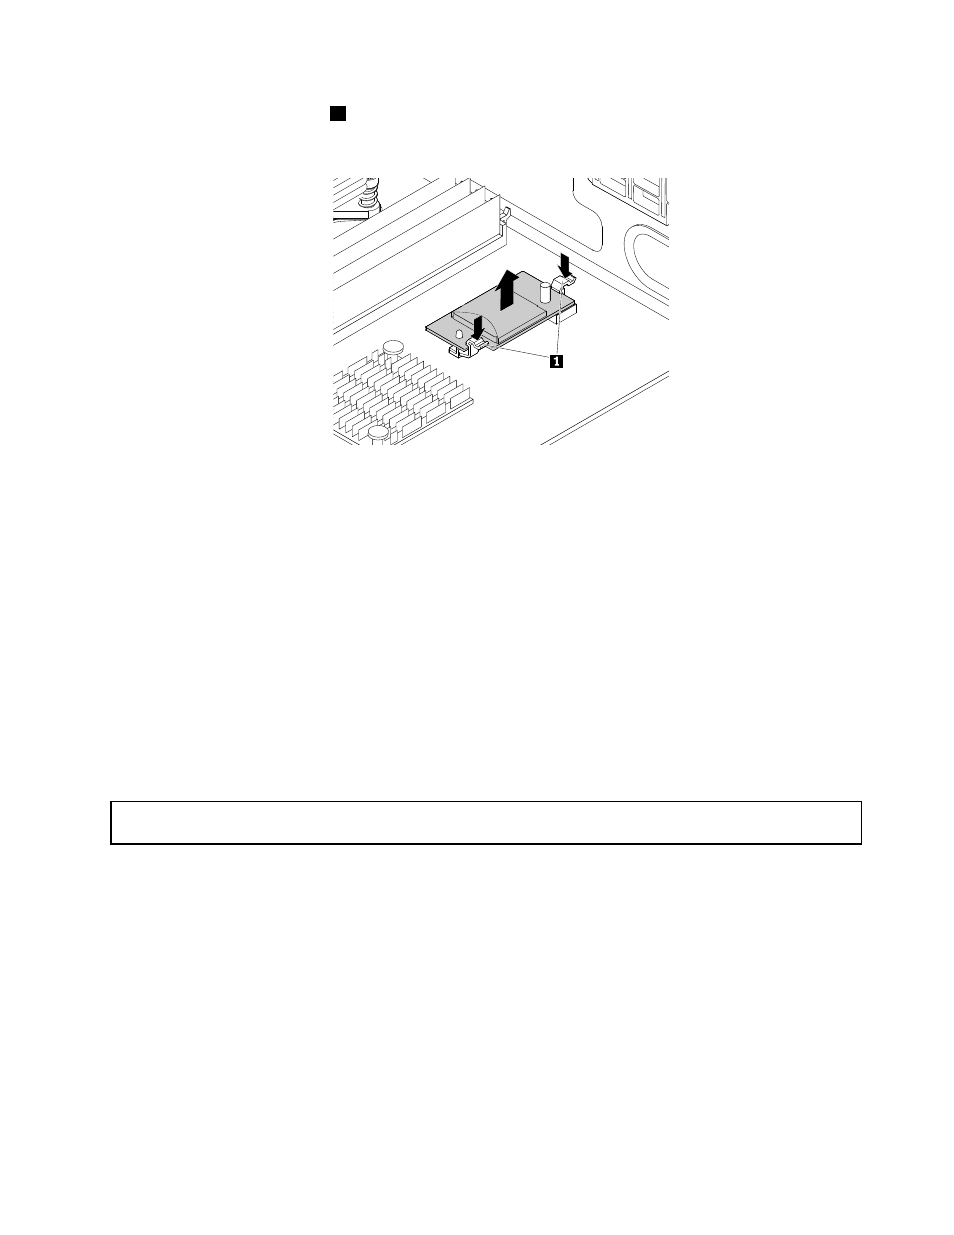
7. Press the two release tabs
1
and grasp the SD module by its edges at the same time. Then, lift the
SD module straight up and off the system board.
Figure 52. Removing the SD module
8. Push the SD card inward a little until you hear a click. Then, the SD card ejects. Gently slide the
card out of the card slot.
What to do next:
• To work with another piece of hardware, go to the appropriate section.
• To complete the removal procedure, go to “Completing the parts replacement” on page 164.
Installing or removing the Lenovo ThinkServer RAID 110i upgrade key
The Lenovo ThinkServer RAID 110i upgrade key expands the capability of the system board by activating
RAID 5 for the onboard SATA software RAID. You can purchase a Lenovo ThinkServer RAID 110i upgrade
key (hereinafter referred to as the RAID 110i upgrade key) from the Lenovo Web site at:
Installing the RAID 110i upgrade key
Attention: Do not open your server or attempt any repair before reading and understanding “Safety information”
on page iii and “Guidelines” on page 63.
Before you begin, print all the related instructions or ensure that you can view the PDF version on another
computer for reference.
Note: Use any documentation that comes with the RAID 110i upgrade key and follow those instructions in
addition to the instructions in this topic.
To install the RAID 110i upgrade key, do the following:
Attention: Installing the RAID 110i upgrade key might impact your RAID configurations. Back up your data
before you begin to avoid any data loss due to a RAID configuration change.
1. Remove all media from the drives and turn off all attached devices and the server. Then, disconnect all
power cords from electrical outlets and disconnect all cables that are connected to the server.
91