1 connecting via rs-232, 2 connecting via rs-485, Connecting via rs-232 – Kramer Electronics VS-81SP User Manual
Page 12: Connecting via rs-485
Connecting the VS-81SP 8 x 1 Loudspeaker Switcher
9
9
6.1
Connecting via RS-232
To connect a PC to the VS-81SP, using the null-modem adapter provided
with the machine (recommended):
• Connect the RS-232 IN 9-pin D-sub rear panel port on the
VS-81SP to the null-modem adapter and connect the null-modem
adapter with a 9-wire flat cable to the RS-232 9-pin D-sub port on
your PC
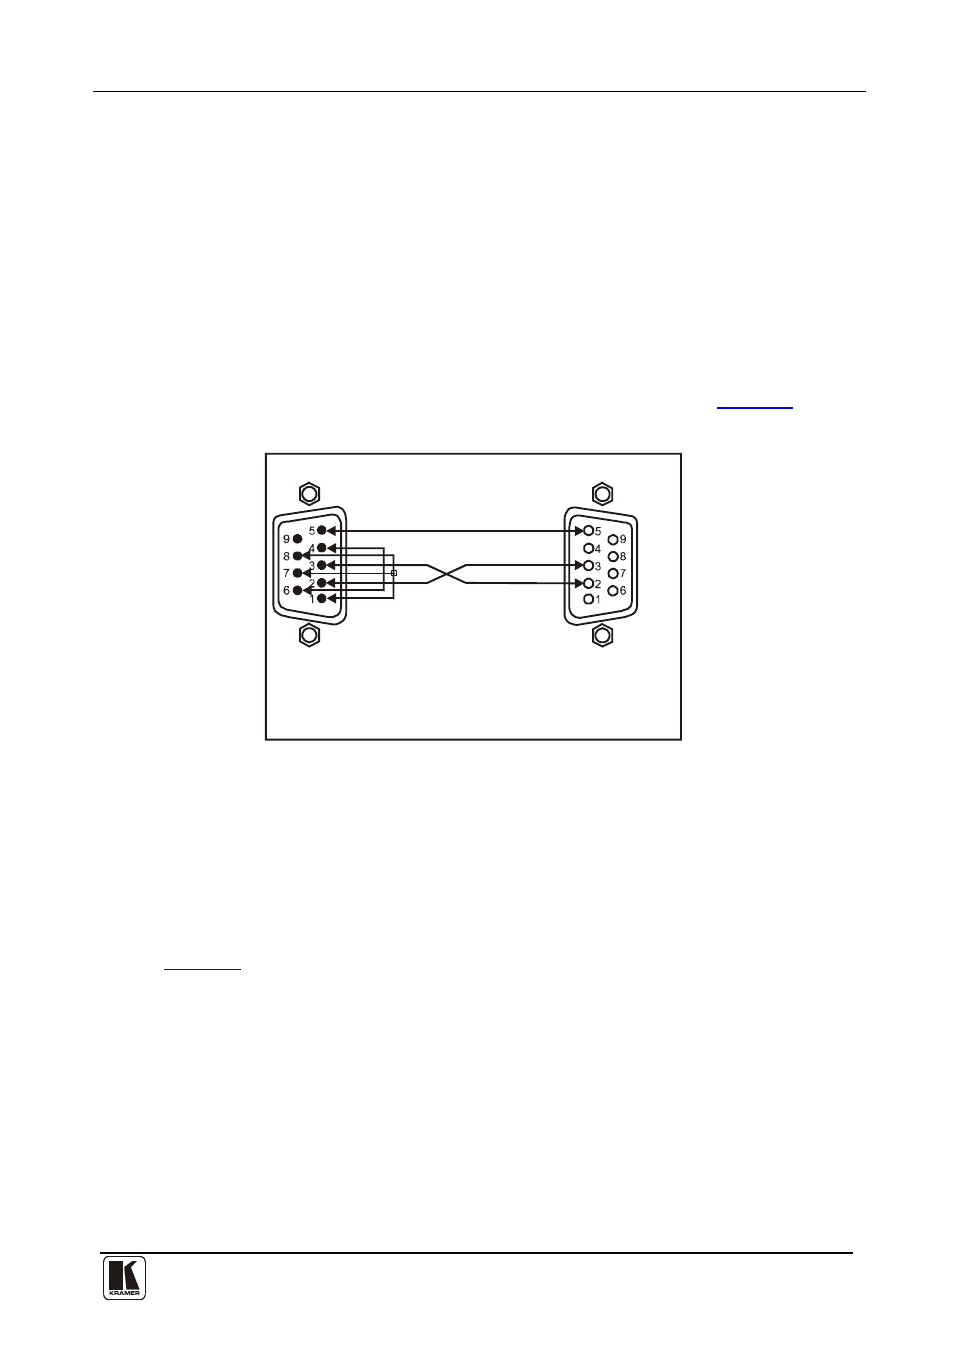
To connect a PC to the VS-81SP, without using a null-modem adapter:
• Connect the RS-232 IN 9-pin D-sub port on your PC to the
RS-232 9-pin D-sub rear panel port on the VS-81SP, as
illustrates
Female DB9 (From PC)
PIN 4 Connected to PIN 6
PINS 8, 7, 1 Connected together
If a Shielded cable is used, connect the shield to PIN 5
PIN 5 Connected to PIN 5 (Ground)
PIN 3 Connected to PIN 2
PIN 2 Connected to PIN 3
Male DB9
Figure 4: Connecting a PC Without Using a Null-modem Adapter
6.2
Connecting via RS-485
You can control the VS-81SP via any RS-485 remote controller or a PC
(equipped with an RS-485 interface).
To connect an RS-485 remote controller to two VS-81SP units (see
1. Connect the RS-485 port on the RS-485 remote controller to the RS-485
ports on the VS-81SP, as follows:
• Connect the “A” (+) PIN on the RS-485 remote controller to
the “+” (A) PINs on the RS-485 ports of the VS-81SP units
• Connect the “B” (–) PIN on the RS-485 remote controller to
the “B” (–) PINs on the RS-485 ports of the VS-81SP units
• If shielded twisted pair cable is used, the shield may be
connected to the “G” (Ground) PIN on one of the units (for
example, on the RS-485 remote controller)