The vs-44hc underside is illustrated in figure 2, Figure 2: vs-44hc underside view – Kramer Electronics VS-44HC User Manual
Page 10
KRAMER: SIMPLE CREATIVE TECHNOLOGY
Your VS-44HC 4x4 Home Entertainment Matrix Switcher
6
Table 3: Rear Panel VS-44HC 4x4 Home Entertainment Matrix Switcher Features
#
Feature
Function
17
Pb/Cb
RCA
Connectors
18
Pr/Cr
RCA
Connectors
19
C
om
po
ne
nt
Y
RCA Connectors
Connect to the component (Y, Pb/Cb, Pr/Cr) video source (from
IN 1 to IN 4)
20
IN
S/PDIF
Connect to the digital audio source (from IN 1 to IN 4)
21
Pb/Cb
RCA
Connectors
22
Pr/Cr
RCA
Connectors
23
C
om
po
ne
nt
Y
RCA Connectors
Connect to the component (Y, Pb/Cb, Pr/Cr) video acceptor (from
OUT 1 to OUT 4)
24
OUT
S/PDIF
Connect to the digital audio acceptor (from OUT 1 to OUT 4)
25
OUT 2
TOSLINK Connector
Connect to the digital audio acceptor
1
26
IN 2
TOSLINK Connector
Connect to the digital audio source
1
27
SETUP
Dipswitches
Dipswitches for setup of the unit (1, 2, 3 and 4 are for setting the
machine #; 6 and 7 are for selecting the digital audio source for IN
2, and 8 is for RS 485 termination)
28
ETHERNET
Connector
Connects to the PC or other Serial Controller through computer
networking LAN
29
RS-485
Terminal Block Port
Pins B (-) and A (+) are for RS-485 connection. If shielded cabling
is used for RS-485, then the shield may be connected to PIN G if
desired
30
RS-232
DB 9F Port
Connects to the PC or the Remote Controller
31
FLASH Upgr.
Button
Push in
2
for “Program” to upgrade the switcher microcontroller to the
latest Kramer firmware (see
section 9.1.2), or release (the factory
default) for normal operation
32 Power Connector with Fuse
AC connector enabling power supply to the unit
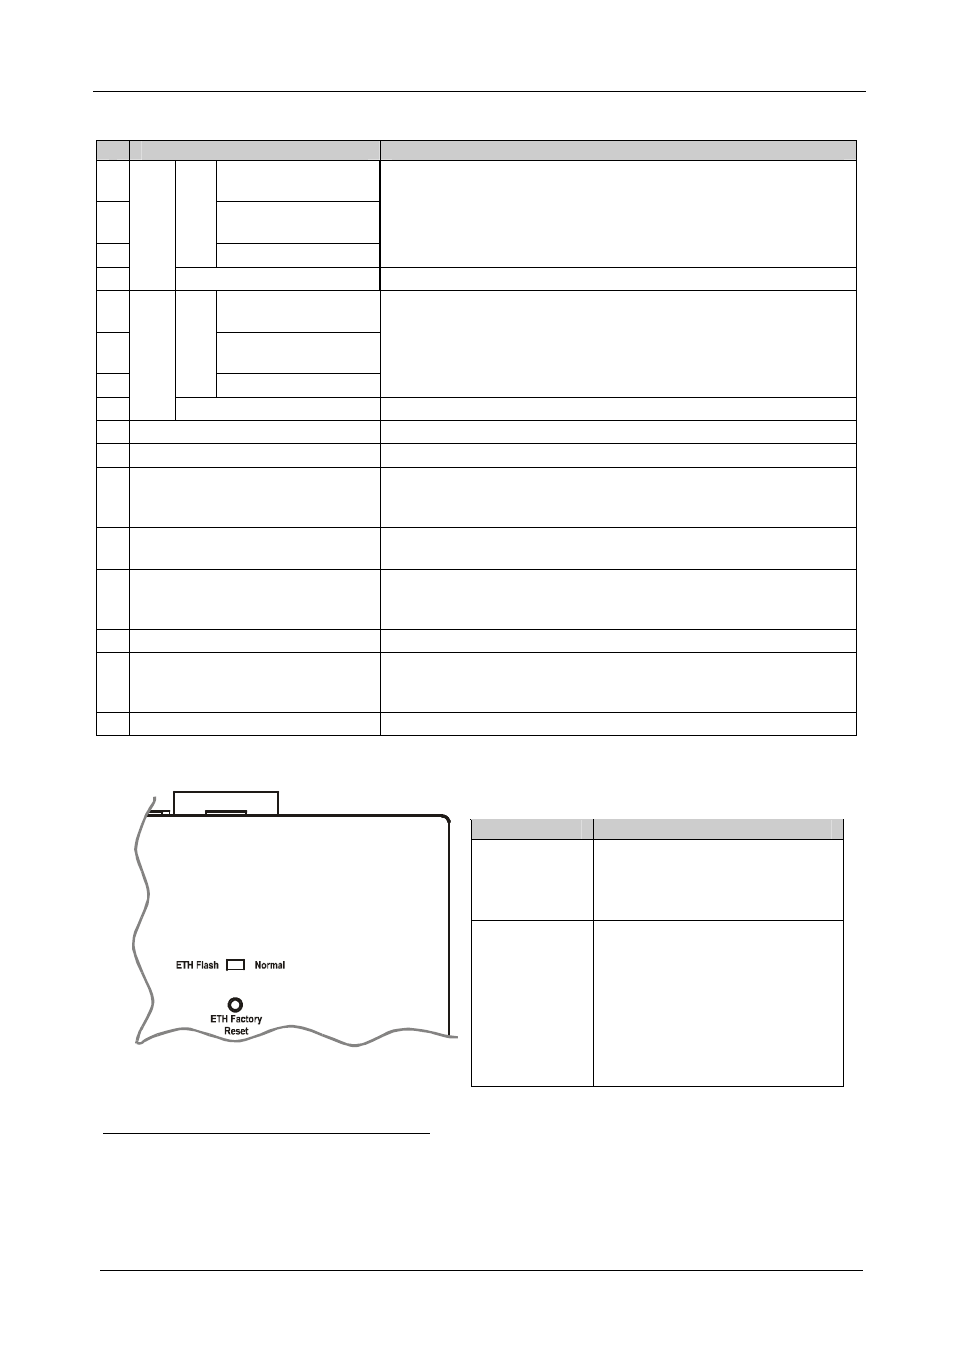
The
VS-44HC underside is illustrated in Figure 2:
Feature
Function
ETH Flash –
Normal
Switch
Set to ETH Flash to upgrade
firmware (see section 9.2);
Set to Normal for normal
operation
Figure 2: VS-44HC Underside View
ETH Factory
Reset
Button
Press to reset to factory default
definitions
3
:
IP number 192.168.1.39
Mask – 255.255.255.0
Gateway – 192.168.1.1
1 Use an optical cable, such as Sony’s POC-15A (not included in the package)
2 Using a screwdriver if required
3 First disconnect the power cord and then connect it again while pressing the ETH Factory Reset button. The unit will power
up and load its memory with the factory default definitions