Aastra Telecom M6320 User Manual
Page 46
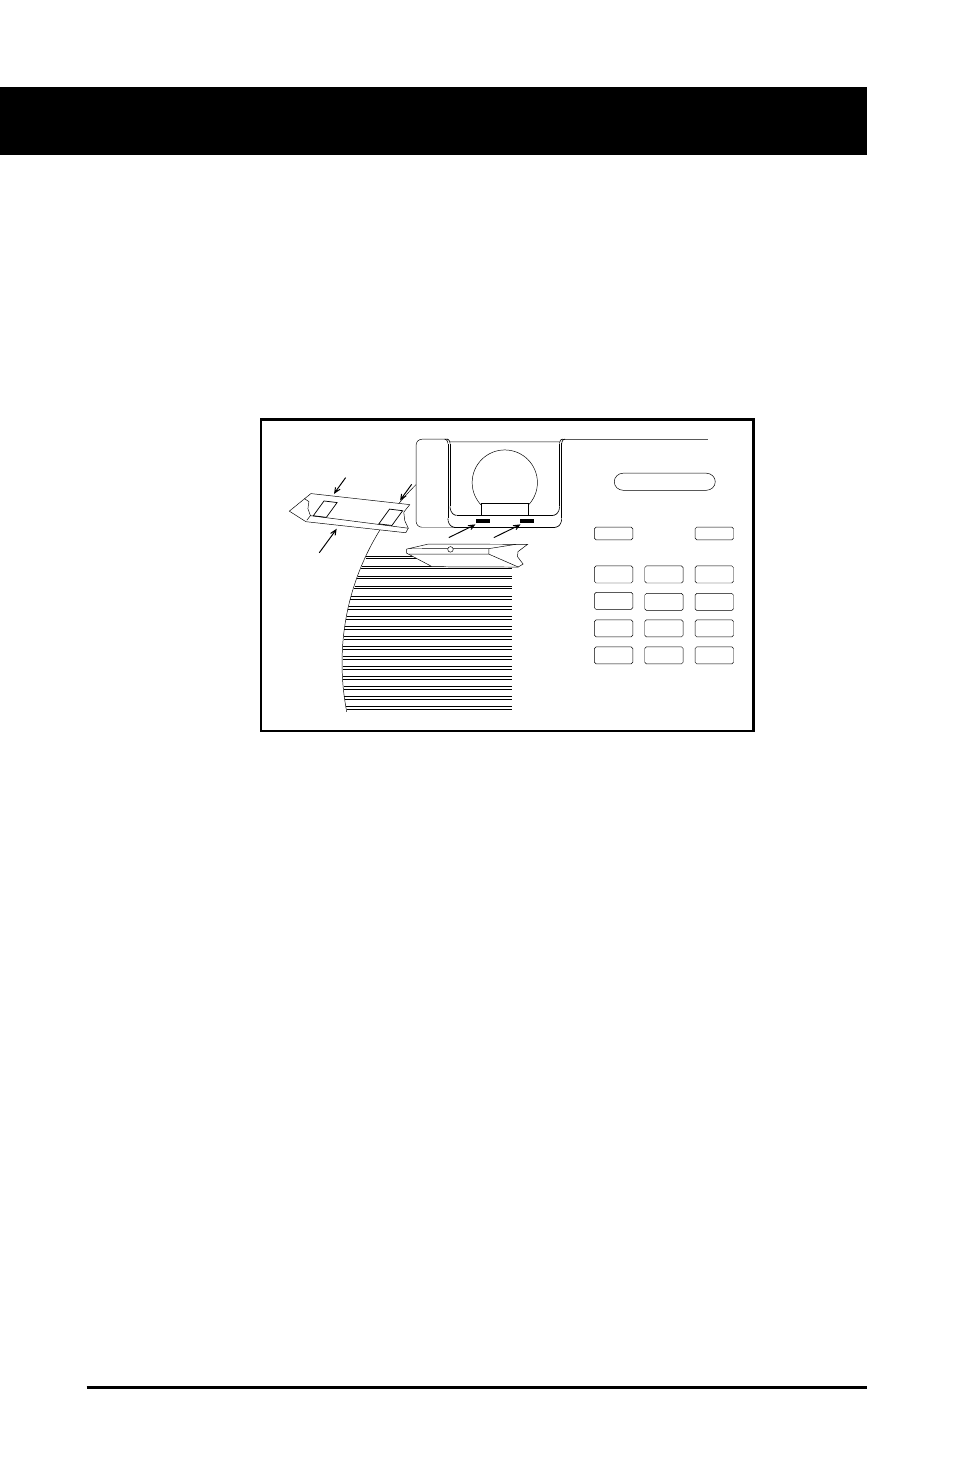
Wall mounting the M6320: continued
45
5.
Position the handset retainer (C in Figure 2) into the handset cradle.
The handset retainer is included in the stand assembly. Insert the two
plastic tabs (D) on the retainer into the two holes provided. Press firm-
ly until the retainer clicks into place.
6.
Attach the telephone set to a standard wall bracket using the mounting
holes provided on the wedge-shaped base. Once mounted on the wall
bracket, the telephone set should hang flush to the wall. Note that the
knock-out section removed in step 3 allows enough space to accom-
modate the line cord connecting block, if present.
D
C
Figure 2 - Handset retainer installation
See also other documents in the category Aastra Telecom Phones:
- 57i CT IP Phone (166 pages)
- 9112I (22 pages)
- AastraLink RP 500 (16 pages)
- SIP 480I CT (504 pages)
- 6739I (32 pages)
- 9110 (15 pages)
- AastraLink RP 6753i RP (2 pages)
- AASTRA 9133 I (60 pages)
- 5i Series (16 pages)
- 9316CW (2 pages)
- AastraLink RP 6757i CT RP (110 pages)
- SIP 57I CT (818 pages)
- 8009 (2 pages)
- IP Phone (210 pages)
- 9112i IP PHONE (47 pages)
- 9133i (USER GUIDE) (53 pages)
- 536M (2 pages)
- 480i (54 pages)
- 9143i (72 pages)
- M760E (60 pages)
- 57I (2 pages)
- 6755i (276 pages)
- MERIDIAN 9417CW (52 pages)
- Telephone 9110 (2 pages)
- 9116LP (28 pages)
- 53i IP Phone (102 pages)
- AastraLink RP 6751i RP (2 pages)
- 57i IP Phone (142 pages)
- 480i CT (Release 1.4.2) (18 pages)
- VentureIP (48 pages)
- AastraLinkRP IP-PBX (2 pages)
- Aastra 51i (9 pages)
- SISIP 57I (602 pages)
- 480i SIP (21 pages)
- 57I CT (40 pages)
- POWERTOUCH 390 (2 pages)
- 6751I (128 pages)
- 470 (27 pages)
- 53I (124 pages)
- 55i IP Phone (152 pages)
- Dialog 4000 (4 pages)
- IP TELEPHONES 51I (2 pages)
- 9417CW (52 pages)
- 6757I (276 pages)