Vaddio TrackVIEW User Manual
Page 23
TrackVIEW Install Guide 341-337 Rev. G
Page 23 of 30
TrackVIEW and Peripherals Install Guide
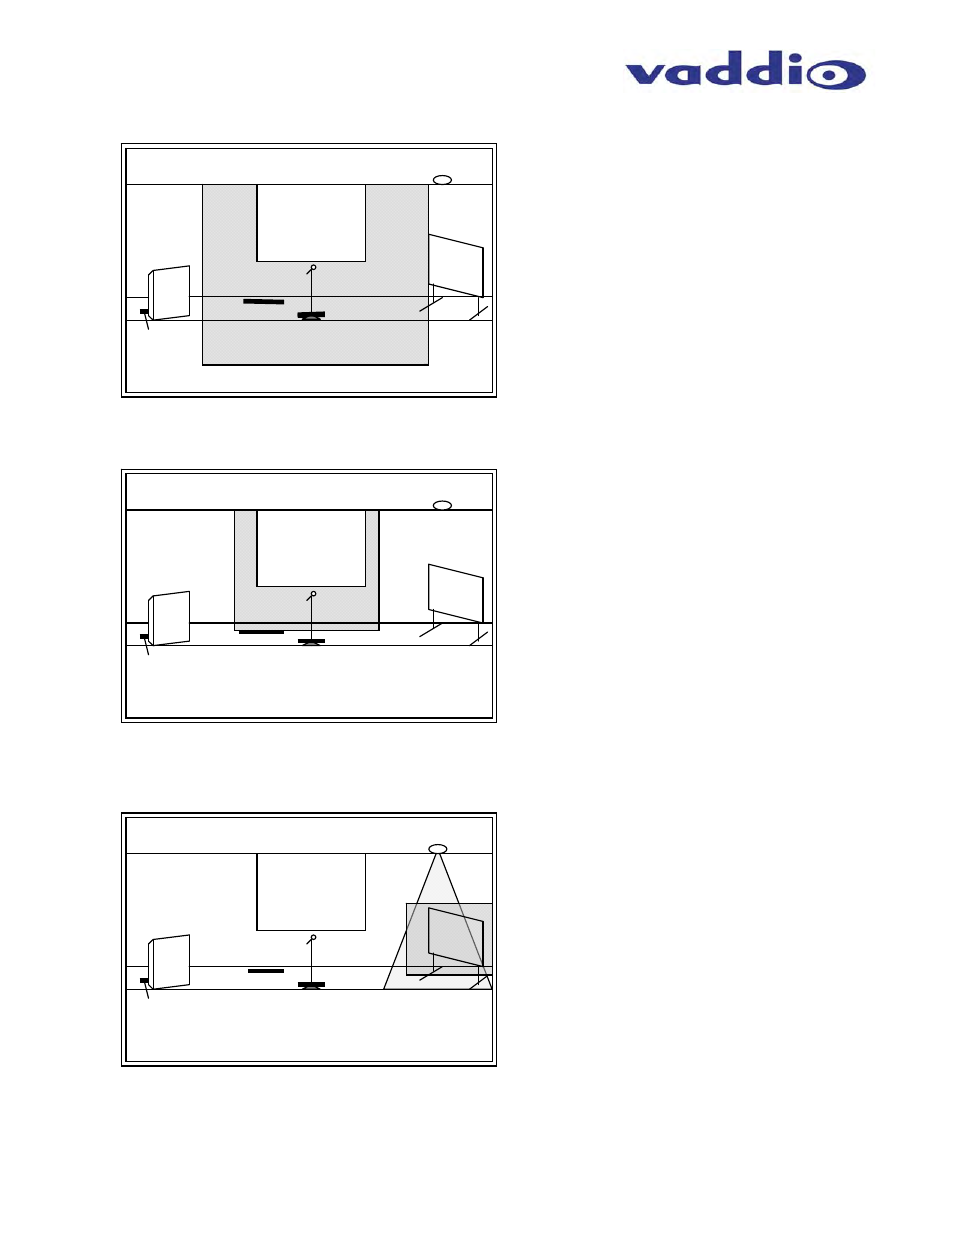
Preset Camera Shot # 2 – Front and Center Mic Position
Preset Camera Shot # 3 – Screen Position
Preset Camera Shot # 4 – Whiteboard Position
This concludes the installation example of the TrackVIEW System.
Figure 35:
Preset 2 is the Front and Center Mic
position preset and is triggered by the
presenter stepping on Mat #2.
This wide shot is framed to include
part of the seating area and much of
the background area. This is the
announcement/introduction area and
generally the screen will be up.
Ceiling Area
Seating Area
Screen
Lectern
Whiteboard
Stage
Background
Mic & Stand
Mat 1
Mat 2
Mat 3
IR Sensor
Ceiling Area
Seating Area
Screen
Lectern
Whiteboard
Stage
Background
Mic & Stand
Mat 1
Mat 2
Mat 3
IR Sensor
Ceiling Area
Seating Area
Screen
Lectern
Whiteboard
Stage
Background
Mic & Stand
Mat 1
Mat 2
Mat 3
IR Sensor
Figure 36:
Preset 3 is the Screen position preset
and is triggered by the presenter
stepping on Mat #3.
This shot is framed to include part of
the presenter and the entire screen.
Note that movement on the screen
can interfere with the camera
tracking, and is masked off.
When the projected image is to be
sent to the far-end or for broadcast, it
is recommended to have a Screen
position preset.
Figure 37:
Preset 4 is the Whiteboard position
preset and is triggered by the
presenter stepping into the IR
sensor’s activation zone.
This shot is framed to include part of
the presenter and the entire
whiteboard.
The tracking camera will not do a
good job with the whiteboard since
the presenter is moving rapidly when
writing. A whiteboard preset is
recommended to ensure that the
camera sees all of the whiteboard.