Vaddio TrackVIEW User Manual
Page 22
TrackVIEW Install Guide 341-337 Rev. G
Page 22 of 30
TrackVIEW and Peripherals Install Guide
Setting Up the Triggered Preset Shots
The mats and IR Sensor trigger the camera presets stored in the TrackVIEW. The following examples are
recommended preset shots and the reasoning behind the shots for presentation purposes.
Preset Camera Shot # 1 – Presenter behind Lectern
Figure 32:
The black area is the Motion Mask for
the installation example. The black
area is the only area in which
movement will be detected. The
seating areas have been masked
white as well as the ceiling and any
background that the presenter cannot
occupy. The large notch in the mask
is to ignore movement on the screen
area. The small notch is to eliminate
lighting reflections of the whiteboard.
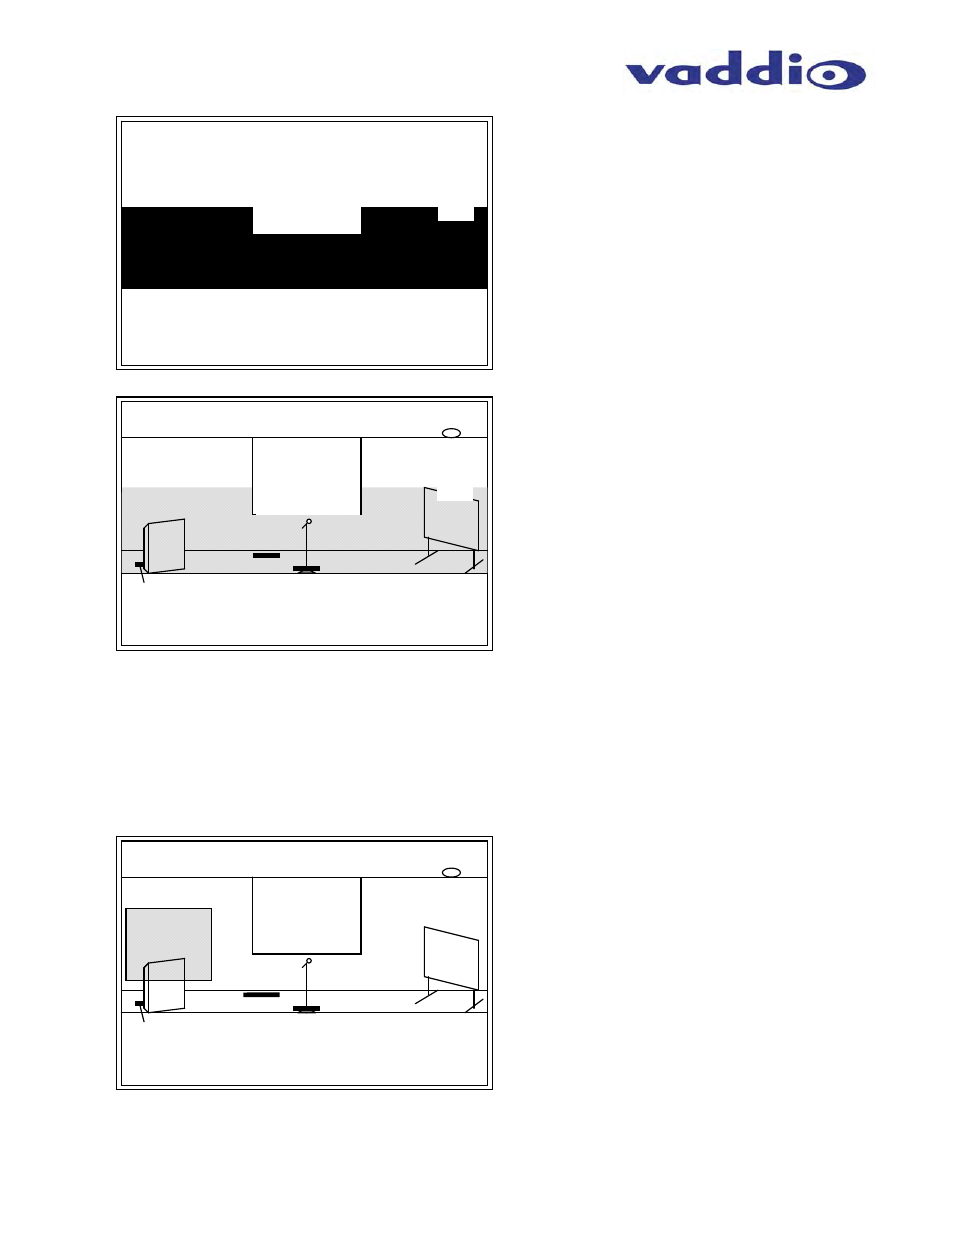
Figure 33:
The mask in this example is overlaid upon
the stage area. The gray area is the area
that the presenter occupies. Note the
screen and whiteboard notches to
eliminate any possibility of false
movement information from screen
movement, reflections or shadows.
Important: The Tracking Camera will pan
at a preset zoom level and tilt angle within
the shaded area, tracking the movement
of the presenter on the stage and between
the preset triggers. The tracking camera
cannot leave the shaded area in Tracking
mode. However in Preset mode the
camera can set pan/tilt and zoom to areas
independent from the motion mask.
Ceiling Area
Seating Area
Screen
Lectern
Whiteboard
Stage
Background
Mic & Stand
Mat 1
Mat 2
Mat 3
IR Sensor
Figure 34:
Preset 1 is the Lectern position
preset and is triggered by the
presenter stepping on Mat #1.
The shot is framed to include part of
the lectern, the logo behind the
presenter and the presenter in the
center of the shot.
Ceiling Area
Seating Area
Screen
Lectern
Whiteboard
Stage
Background
Mic & Stand
Mat 1
Mat 2
Mat 3
IR Sensor
XYZ Corp