Walk-in, Fold membrane – Nor-Lake Capsule Pak Refrigeration Systems User Manual
Page 16
16
07/14 Rev. H 040086
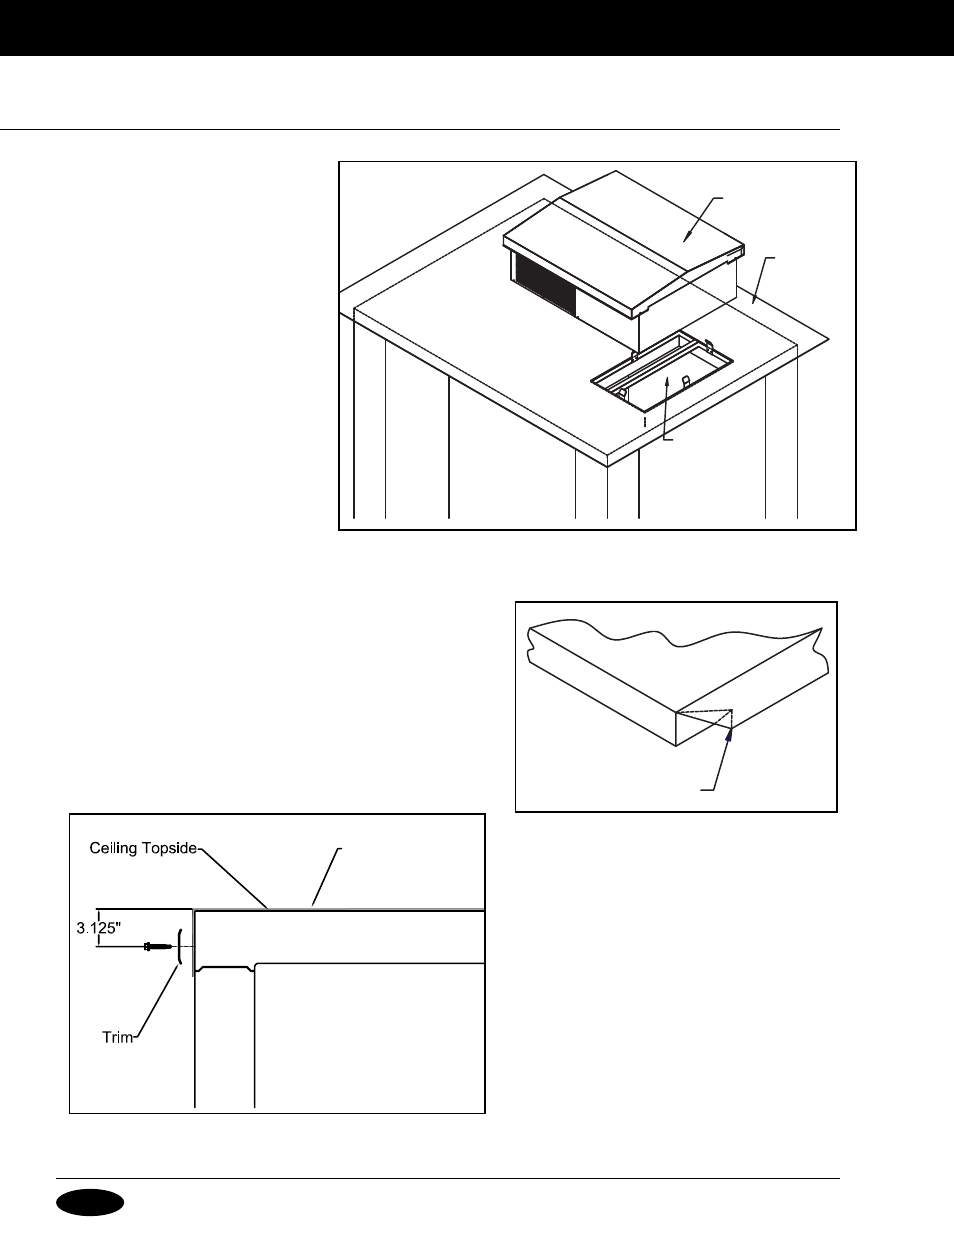
4. Set the Refrigeration System over
the opening in the curb. Remove
the enclosure from the condens-
ing unit portion of the system and
drill two 9/16” holes through the
condensing unit base plate, mem-
brane roof material and the foamed
ceiling section. The holes should
be located on opposite sides of the
unit. Insert one 1/2” threaded nylon
rod into each hole. Apply silicone
sealant around each nylon rod and
hole and place one washer and nut
on the condensing unit end of each
threaded nylon rod. Place a sec-
ond washer and nut on the inside
of the walk-in and tighten securely.
Replace the enclosure and attach
the outdoor hood with the drive
screws provided. Refer to Figure 3.
The nylon rods, washers, and nuts
are provided.
Note: Seal gasket at top of curb with silicone.
5. Fold all four corners of the membrane roofing material over
the walk-in corners as shown in Figure 4.
6. Attach the trim and door hood by using the provided hex
head sheet metal screws. All pieces should be held down
3-1/8” from the ceiling top as shown in Figure 5. Ensure the
trim and membrane roof material cover the joint between
the ceiling and wall panels. Note: The trim may have to be
cut to fit.
7. Trim off all excess membrane roofing material
from under the terminatin bar with a utility
knife. Do not allow the knife to cut the metal
panel, as this will damage the coating and
cause rust.
NOTe: In outdoor installations, the condensate
should be plumbed to the nearest drain. Check
local building codes. Outside drain lines must also
be wrapped with a suitable heater wire if they are
ever subjected to below freezing temperatures.
Fold Membrane
Membrane
Roofing Material
Figure 4
Figure 5
o
utdooR
S
yStemS
Capsule Pak™
With Hood
Membrane
Roofing
Opening
Walk-In
Figure 3