3. removing the temperature and rh sensor cover – Campbell Scientific TurfWeather Weather Station User Manual
Page 50
TurfWeather Weather Station
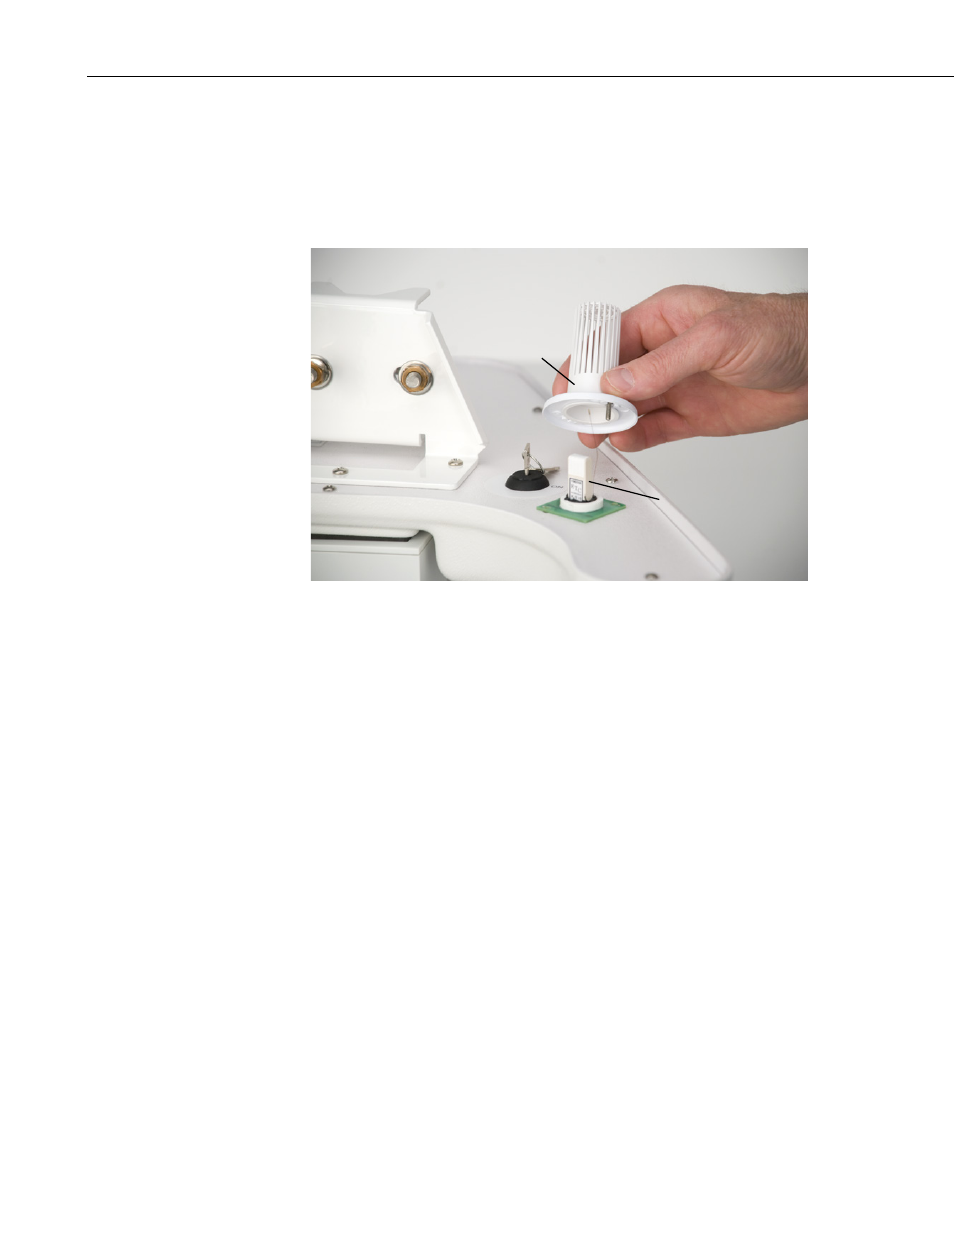
d. Remove the two Phillips head screws on the base of the main body
that hold the mounting cover over the tube that covers the
temperature/relative humidity sensor (FIGURE 6-3).
e. Gently separate these components and pull out the temp/RH sensor
until the connector is exposed.
FIGURE 6-3. Removing the temperature and RH sensor cover
2. Sensor Replacement:
a. Do not contaminate either of the sensor elements by exposing them to
solvents.
b. Unplug the old sensor, and plug in the new sensor.
3. Reassemble the mounting cover and tube assemble with the new sensor
onto the main body.
4. System Test:
a. Connect the weather station to the host computer using the short
RS-232 test cable (if a wired system) and turn on the weather station
power switch. Initiate communications with the weather station using
PC200W.
b. Verify that the temperature and relative humidity sensors are reporting
values. Gently blow air into the sensor protective screen on the
bottom of the weather station and verify that both the temperature and
relative humidity values increase. Stop blowing air on the sensors,
and after a brief period the values should slowly decrease until the
sensors return to equilibrium with the surrounding environment.
c. Reinstall the weather station on its mast, and then reconnect power
and earth ground cables.
Cover
Temperature
and RH sensor
40