1 installation examples – Videotec MAXIMUS WASEX User Manual
Page 11

Instruc
tions manual - English - EN
9
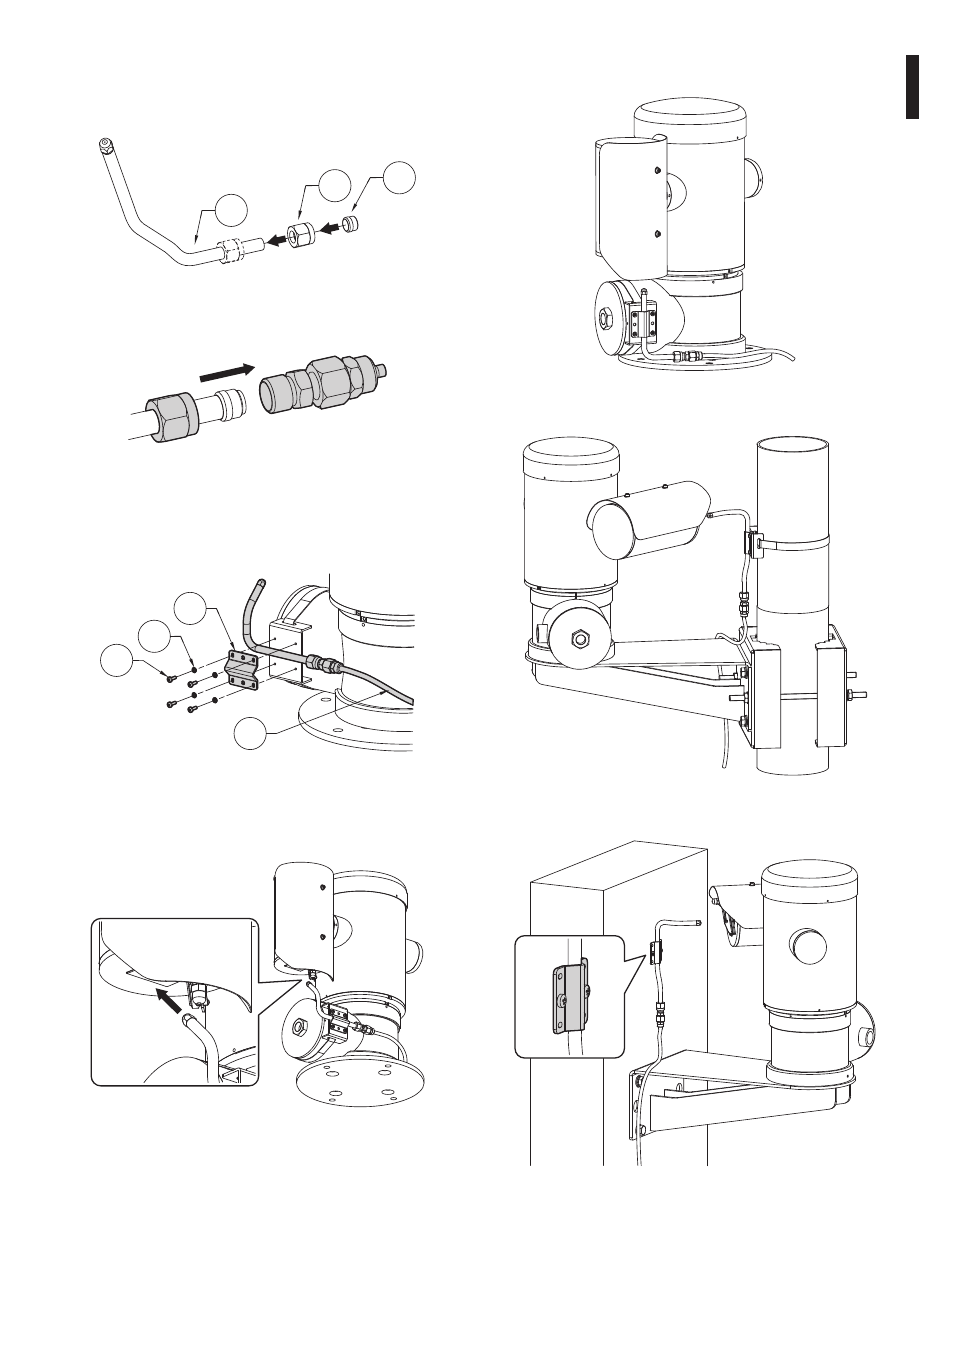
Shorten the washer pipe (01) as needed. Unscrew the
nut (02) and slide it along the pipe. Insert the end of
the pipe into the ogive (03).
03
01
02
Fig. 20
Lock the nut to the coupling.
Fig. 21
Attach the pipe to the washer support using the
bracket (01), the screws (02) and the washers (03)
supplied. Connect the supply pipe (04).
02
03
01
04
Fig. 22
To calibrate the jet direct the nozzle towards the glass
of the housing.
Fig. 23
To start the washer, refer to the pan & tilt manual.
6.1.4.1 Installation examples
Fig. 24
Fig. 25
Fig. 26 Pipe attached to the wall with a plate.
See also other documents in the category Videotec Video:
- MAXIMUS MHX (46 pages)
- MAXIMUS MPX (454 pages)
- EXH (114 pages)
- EXPT (114 pages)
- EXDTRX (124 pages)
- NXPTZ (76 pages)
- NTC (68 pages)
- NXM36 (44 pages)
- NXM (36 pages)
- NTM (36 pages)
- NXL (16 pages)
- NTL (20 pages)
- NXW (44 pages)
- NTW (44 pages)
- NXPTH (42 pages)
- ONXNAB (2 pages)
- NXFIGRU (2 pages)
- VIPNX (24 pages)
- WAS (36 pages)
- DBH18 - MEDUSA (60 pages)
- DBH18 Brackets (28 pages)
- DSBH120 (4 pages)
- PTH300 (60 pages)
- PTH355P (50 pages)
- PTH900 (60 pages)
- CBZ (52 pages)
- DTRX3 (108 pages)
- DTCOAX (4 pages)
- DTMRX2 (96 pages)
- DTRXDC (68 pages)
- DTWRX (20 pages)
- DCRE485 (44 pages)
- GEKO IRH (44 pages)
- GEKO IRN (52 pages)
- IRHPS (20 pages)
- TWM2 (52 pages)
- TWRC1 (20 pages)