Guy-anchor kit installation – WeatherHawk Inversion - Wireless User Manual
Page 19
WeatherHawk
®
16
815 W. 1800 N. Logan, Utah 84321-1784, Email: [email protected]
Copyright © 2004, 2010
Toll free in USA: 866-670-5982, International: 435-750-1802, FAX: 435-750-1749
Printed November 2010
2.
Mount the lightning rod clamp onto the top of Mast Section 5 using the U-bolt and nuts (see Figure 27).
3.
Insert the lightning rod into the clamp and tighten the screws (see Figure 27).
2.2.4. Guy-Anchor Kit Installation
A choice of duckbill anchor kits is offered for the CM375. The Duckbill Standard Anchor Kit (pn. 19282) is for
standard soils, and the Duckbill Heavy Duty Anchor Kit (pn. 25699) is for aggressive soils. Aggressive soils have:
•
Resistivity of less than 3000 ohm-cm
•
pH of less than 5
•
Chloride of greater than 1000 ppm
•
Sulfate of greater than 500 ppm
•
Poor aeration
Both anchor kits have one drive rod. The Standard Duckbill Anchor Kit has three duckbill anchors with a cable
attached to each of them. At the end of the cable is a loop for connecting the guy wires. The Heavy-Duty Duckbill
Anchor Kit has a threaded rod attached to each of the three duckbill anchors instead of the cable. At the end of the
threaded rod is a metal ring for connecting the guy wires.
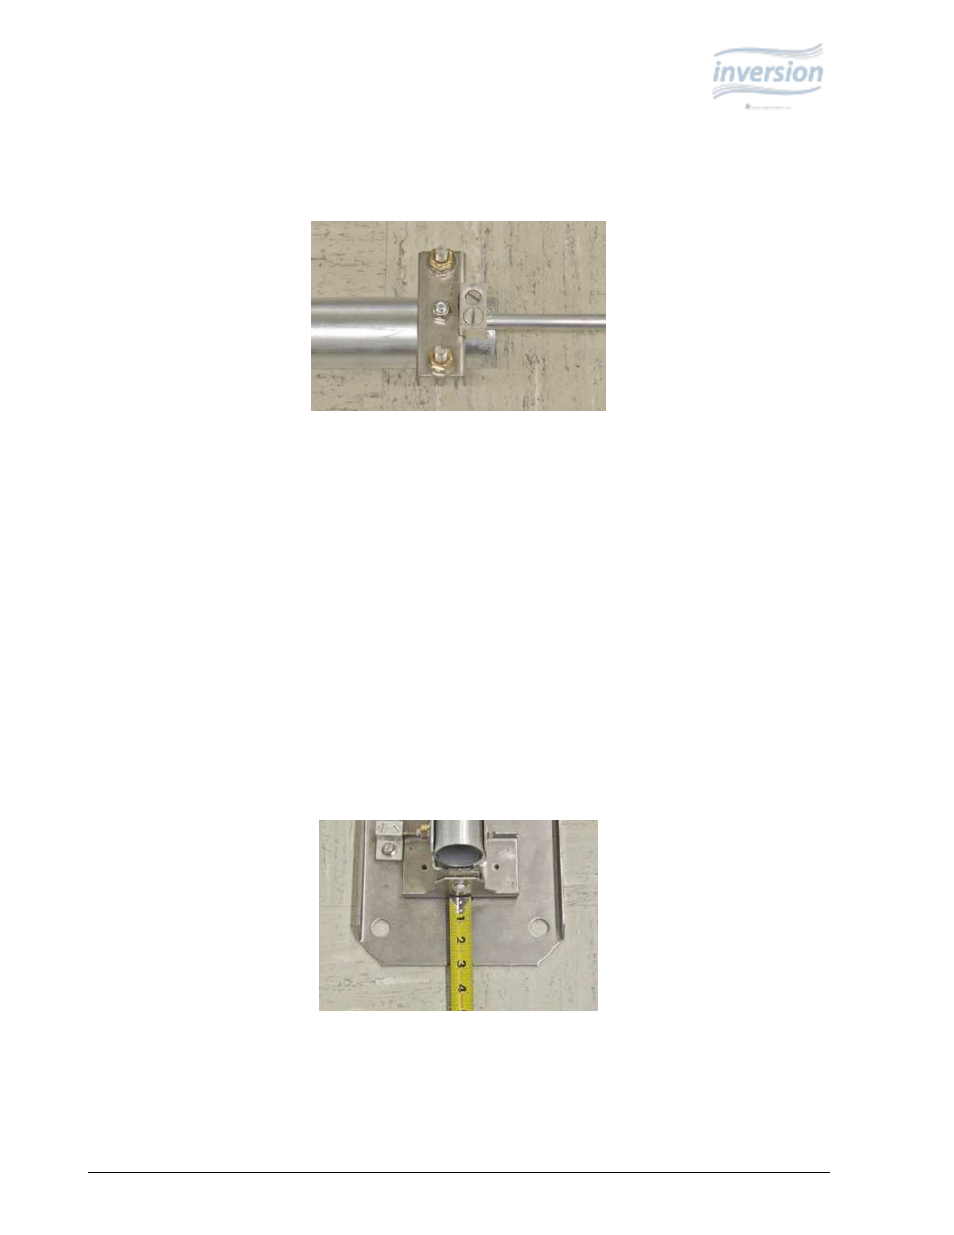
1.
For the SOUTH anchor, place the tape measure in the base slot centering the tape in the notch on the edge of the
base. Locate a point 20 feet from the mast base (see Figure 28).
Figure27: Installed Lightning Rod
Figure 28: Tape Measure in Slot for South Anchor