Stepped sensor installation tool, Pvc pipe welded to soil moisture sensor collar – DAVIS Soil Moisture/Temperature Station for Vantage Pro User Manual
Page 13
Installing Soil Moisture Sensors
Page 13
• Lack of a snug fit is the biggest problem in obtaining good soil moisture
sensor readings.
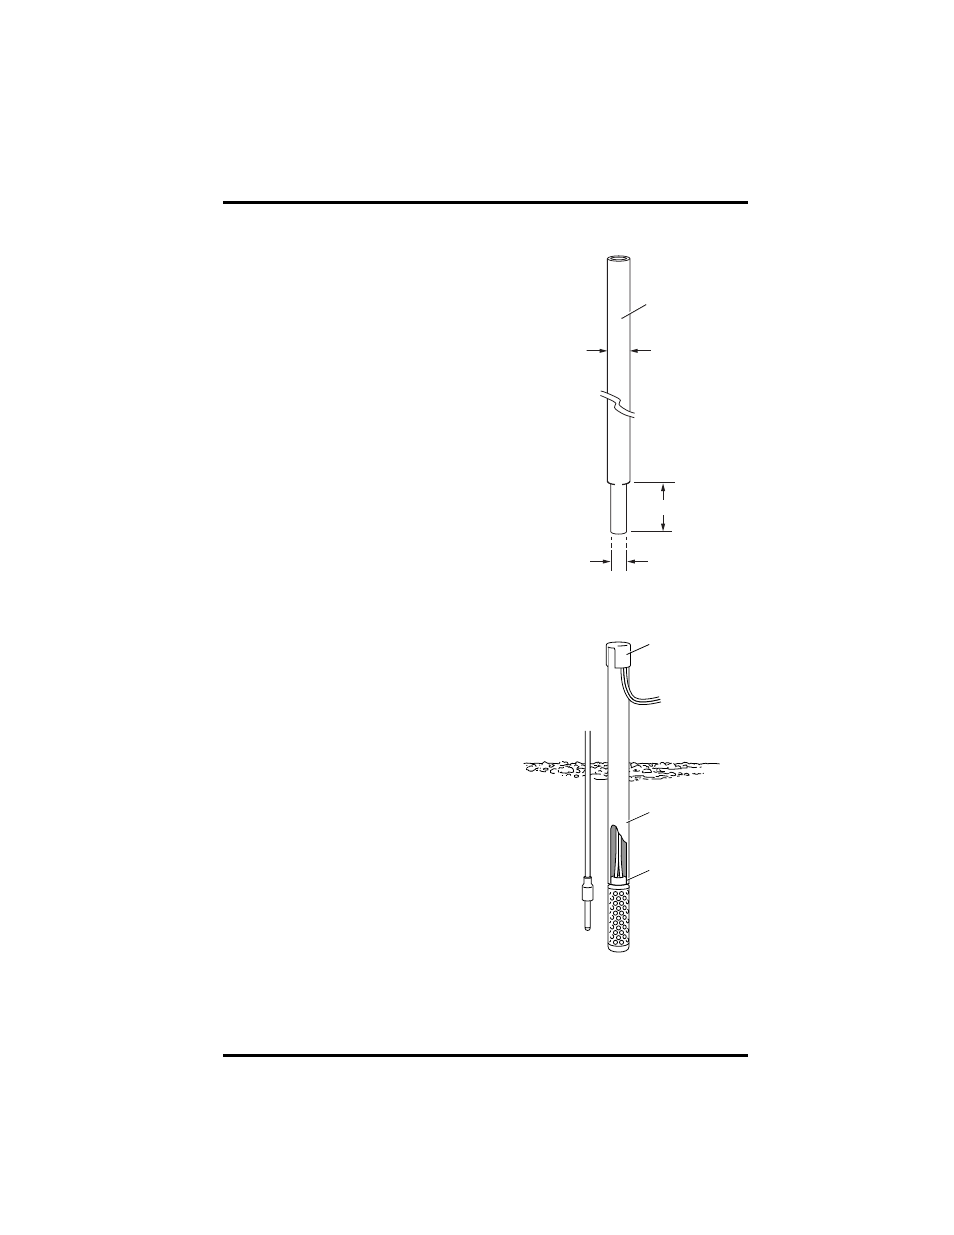
• The ideal method of making the access hole
is to have a stepped tool. This makes an
oversize hole for the upper portion and an
exact sized hole at the bottom where the sen-
sor is located.
4. After installing the soil moisture sensor, the hole
needs to be carefully backfilled and tamped
down to prevent air pockets which could allow
water to channel down to the sensor.
• Fill the hole with water and push the sensor
down into the hole so it bottoms out.
A length of 1/2” Class 315 PVC tubing fits
snugly over the sensor collar and can be
used to push the sensor. A good snug fit in
the soil is important.
• Carefully backfill the access hole with soil to
eliminate any air pockets.
5. You can solvent weld the 1/2” Class 315 PVC
tubing to the sensor collar for easier installation
and removal.
• Use a PVC/ABS cement (IPS
Weld-on #794 or equivalent).
6. After you have installed the soil
moisture sensors, the sensors will
need one or two irrigation cycles to
“break-in” and acclimate to the soil
conditions and provide better accu-
racy.
2-1/2" (64 mm)
7/8" (22.5 mm)
Cold rolled steel,
round rod
1-1/4" (32 mm)
approximate
diameter
Overall length
variable
Stepped Sensor
Installation Tool
Sensor
Wires
Tape
1/2" PVC Pipe
Pipe welded to
sensor collar with
PVC/ABS cement
Soil Moisture
Sensor
PVC Pipe Welded to Soil Moisture
Sensor Collar