Testing the sensor, Accessing the sim, Unplug the sensor cable from the sim – DAVIS Sensor - UV for GroWeather or EnviroMonitor User Manual
Page 12
Page 12
UV Sensor
V
ANTAGE
P
RO
V
ERSION
: I
NSTALLATION
ON
THE
M
OUNTING
S
HELF
Follow these instructions to mount the UV sensor on the shelf. The shelf has
two large holes, to hold a UV sensor and a solar radiation sensor. It doesn’t
matter which hole you use first.
Testing the Sensor
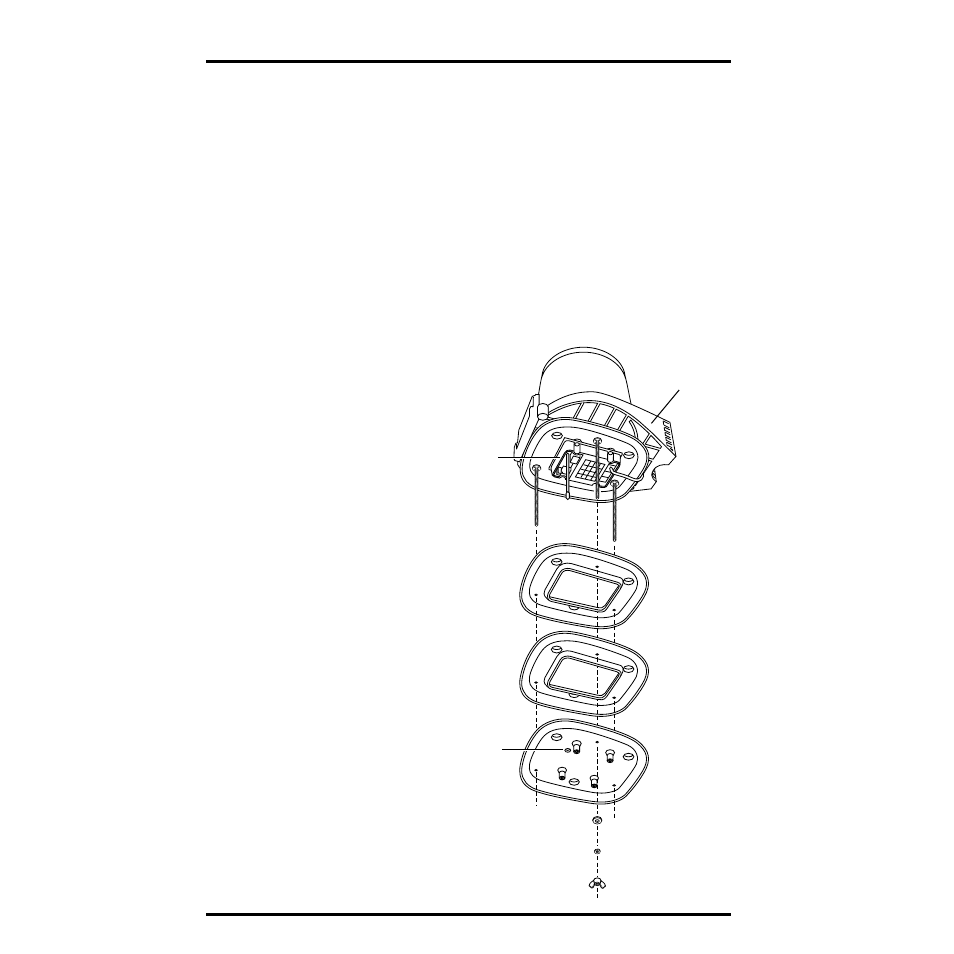
On Vantage Pro’s Integrated Sensor Suite (ISS), the sensor interface module, or
SIM, is inside the radiation shield. (The SIM is where the sensors connect with
the rest of the weather station). You need to remove the radiation shield plates
to access the SIM and test the UV sensor. Take your console with you.
On the rain collector side of your ISS, underneath the white mounting base is
the radiation shield. It consists of several white plastic plates.
Accessing the SIM
1. Remove the wing nuts, lock
washers and flat washers.
2. Remove the first three plates
of the radiation shield.
You should now be able to
see the SIM.
3. Plug the UV sensor cable into
the receptacle labeled “UV”
on the SIM.
Hold the sensor body with
white diffuser pointed
upward. Do NOT touch
the diffuser. If you do,
clean it after mounting.
(See “Maintaining the Sen-
sor” on page 15.)
4. On your console, press the
“UV” key to see the reading.
Shade the sensor with
your hand — the value
should drop.
5. Unplug the sensor cable from
the SIM.
Do not put the shield plates
back on yet.
You’ll have to
plug the sensor cable into the
SIM again, once you have
mounted the sensor.
Open Plate
Open Plate
Closed Plate
#8 Wing Nut
#8 Lock Washer
#8 Flat Washer
Antenna
deployment
hole (used on
Wireless only)
Sensor
Interface
Module
(SIM)
Mounting Base